Self-repair is difficult,laborious and costly process. In order for all the stages to pass relatively quickly, without overlaps and problems, it is necessary to foresee all the difficulties in advance and have several methods of getting rid of them in stock. One of the most difficult stages is because they occupy the lion's share of the entire surface area and to a large extent form the impression of the interior.  Repair of walls is always carried out intechnological order: assessment of the condition, surface cleaning, repair work, finishing. Any repair must obey certain rules and be carried out in accordance with the plan. This will help to correctly and rationally distribute time, so that between the main stages there are no long downtimes. The decoration of the walls in the new building differs from similar works in the apartment, in which previously they made repairs. The work plan is not always final, but it is important to keep the order. So, the repair of walls consists of the following stages:
- state assessment;
- cleaning the surface;
- "Wet" works: plaster and putty;
- final finishing.
In some cases, the intermediate stages can be replaced by partial alignment, the so-called repair of putty.
Surface evaluation
 On old wallpaper, paint or plaster glue andyou can not paint, so the old coating is removed. Before proceeding to the main stages, it is necessary to objectively assess the condition of the coating. If there are no cracks on the surface of the plaster, the curvature is acceptable, you can skip the dismantling stage. In other cases, the old coating is best removed. When assessing the condition of walls, and it is necessary to carry out it after removing wallpaper, it is necessary to pay attention to the following subtleties:
If there is significant curvature, it is not worthto succumb to the temptation to hide flaws with the help of plasterboard. This technique will significantly reduce the area of the room. It is better to remove the coating and make a qualitative repair of the walls. Back to contents</a>
Surface cleaning or dismantling
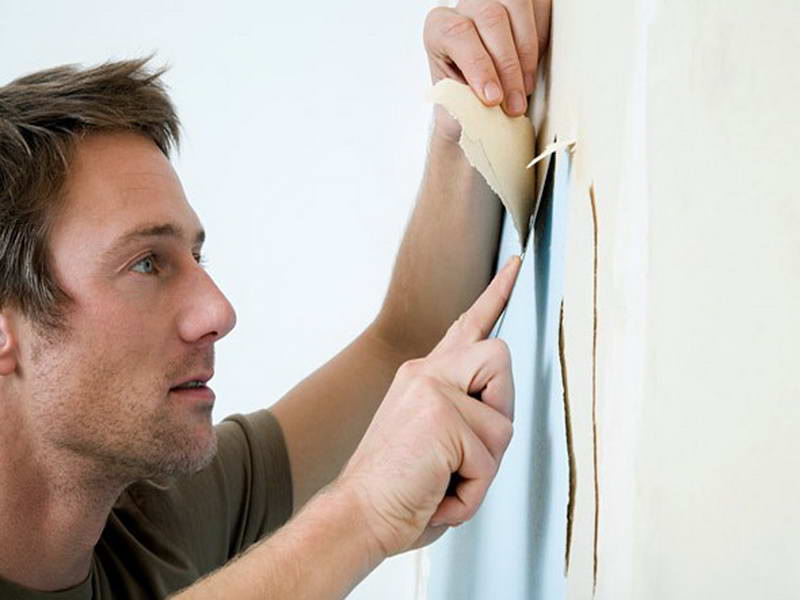
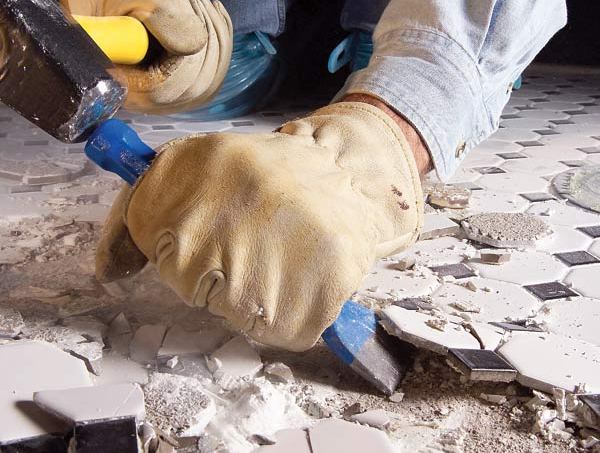 Dismantling of tiles or plaster is donehammer and chisel. Once the condition of the walls is evaluated, it is possible to start dismantling the old covering. This stage includes the removal of old wallpaper, but after carrying out these works, it is necessary to re-evaluate the surfaces. When dismantling it is necessary to use personal protective equipment: glasses and a respirator. To remove the wallpaper is better to use a trowel, gently pull the edge of the canvas and remove it. If the wallpaper does not depart well, they can be moistened with water and allowed to swell for a few minutes. The same method helps to remove multi-layer wallpaper. It is better to wash the old whitewash with water. To do this, carefully moisten the surface, for example, using a spray gun, allow the water to absorb a little and clean the chalk layer with a spatula. After rough cleaning, you can finish the areas with a damp sponge. If the whitewash layer is significant, it is better to remove it as wallpaper by using a trowel. The plaster is removed usually with a chisel and a hammer. Starting work is easiest from the areas where the material is kept poorly, gradually moving to the corners.
 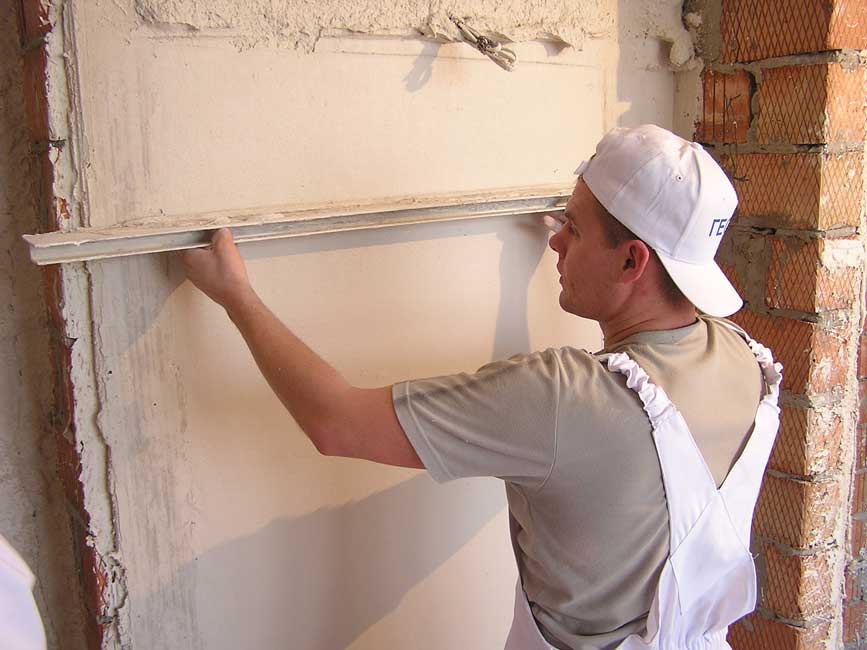 Plastered walls smooth and smooth allcavities. In some cases, you have to face the need to remove oil paints from the walls. To clean the surface of the walls with your own hands it is better to use a perforator with a special nozzle. After careful removal of old finishing materials, you can proceed to "wet" work. The best methods of finishing the walls are plastering and putty. Correct and consistent use of materials allows you to get smooth and reliable walls, ready for design. Back to contents</a>
Plastering works
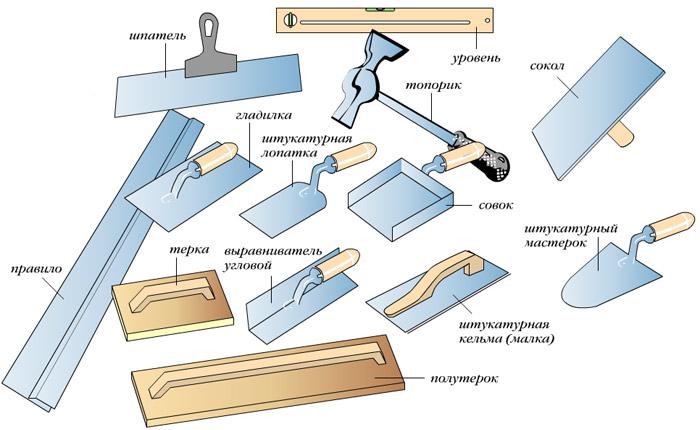 A set of tools for plastering walls. Plastering is the initial stage of the work. With its help, the walls are leveled, all depressions are smoothed. This type of work is ideal for leveling walls, peeled to brickwork. If there are many irregularities on the surface of the wall, for example, joints of bricks, it is necessary to purchase metal guides, so-called "perforations". They are attached to the wall with a plaster mixture, carefully checking the verticality with the help of a building level. Then 3-4 strands are stretched between the guides at a distance of 1-1.5 m from each other. Each thread, it's a beacon, should touch 3 guides. On these landmarks also it is necessary to plaster, only in this case the wall will turn out equal. After installing the beacons, treat the wall with a primer and allow it to dry. For plastering work you will need:
- plaster mixture;
- mixing tank;
- Master OK;
- a scoop for throwing a mixture;
- grater;
- rule (you can replace the flat board length of 1.5 m).
When using cement mortar, it must be thrown with a ladle. If a plaster mixture is applied, only a spatula can be used. 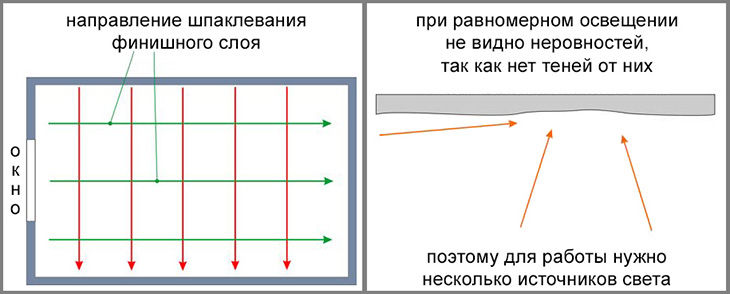 Scheme of shpatlevaniya. Cement mix is usually thrown on the wall and then leveled with an equalizer. If a non-professional works, you can apply the composition to the equalizers and then transfer it to the wall. Aligning the walls with their own hands is done in the direction from the bottom up, to the wet surface, taking into account all irregularities. After applying the layer of the mixture, the excess is removed from the rule and the application is corrected. In the case of the formation of bubbles and layers, part of the cement mixture must be removed and repeated work, otherwise the repair of the wall will not be permanent. When working with lighthouses, it is important to apply the stucco in stages. After the main layer of the material is slightly hardened, it is necessary to apply a thin additional layer and use a float to make the surface of the wall smooth. Back to contents</a>
Wall shading
If the plastering works were carried out correctly,a rather insignificant layer of putty. With its help, all irregularities will be smoothed, and repair by one's own hands will come to an end, only finishing works will remain. For work you will need:
- capacity;
- building mixer;
- a set of putty knives;
- set of grinding mesh.
Mix the putty in a clean container untilfull uniformity, consistency of thick sour cream. Before starting work, walls must be primed. After that, a small spatula collects a portion of putty and is applied to the rib of a large one. And with his help is transferred to the wall, to hold the tool at an angle. It is better to apply several thin layers of the mixture, with the first applied vertically, the second - horizontally. After this, the wall must be dried. If everything is done correctly and only light scratches are visible on the surface, the walls are repaired with quality. These defects can easily be removed using grinding mesh. Finishing the walls with their own hands is almost complete. Next, you can begin to paste wallpaper or paint - pleasant stages of decoration. It is possible to make a qualitative repair of the walls independently, the main thing is to study all the subtleties and have patience, and then everything will turn out all right.


