The putty is a special mixture,with the help of which the surface of the walls is leveled during repairs. As a result, the walls are completely prepared for the final finishing - painting or wallpapering. It is necessary to understand in more detail how to apply putty to the wall in order to obtain a smooth and even surface.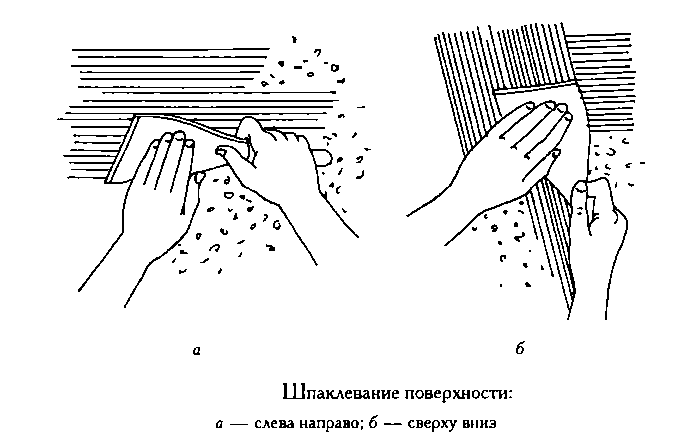 Wall puttying schemes.
Carrying out preparatory works before the puttying of walls
In order to perform high-quality wall puttying, it is necessary to carry out careful preparation beforehand. It consists of the following:
- carrying out of priming works;
- the selection of the necessary tools and materials;
- correct spreading putty.
 Scheme of applying putty to the wall.Any preparation for the main work should begin with clearing the surface of dirt, dust, stains, old material: paint, wallpaper, plaster, etc. After that, it should be primed using a special primer solution, for example, Ceresit CT17, a brush or roller. Walls prepared in this way will not only avoid peeling of the putty and the appearance of unevenness on the surface, but will also improve the adhesion of the building materials used. To carry out preparatory and main work, you need to take care of the selection of materials and tools, such as:
- primer;
- putty;
- roller or brush;
- set of spatulas: angular, wide and narrow;
- containers for solutions;
- mixer for mixing the mixture;
- Graters for grinding;
- ladder;
- Personal protective equipment: respirator, gloves, work clothes.
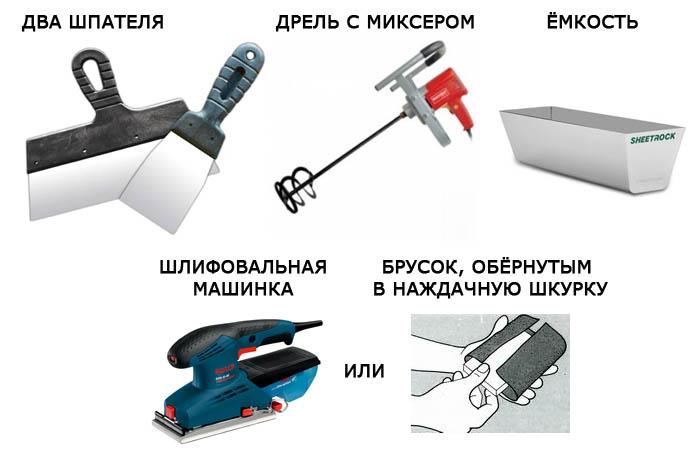 Tools for filling concrete walls.The next important step in preparing for puttying walls is to consider diluting the putty mixture itself. The proportions for diluting the dry mixture with water are always indicated on the packaging. But to get a high-quality putty mass for work, some subtleties should be observed when diluting it. First, take the required amount of dry mixture and water, a container and a construction mixer. The dry prepared putty is poured into the container completely, which is filled with half the required volume of water. Using a construction mixer, the resulting mass is mixed until a homogeneous composition. After this, gradually, in small portions, the remaining water is added, each time mixing well with the main mass. The mixture is left alone for 10-15 minutes, after which it is mixed well again. It is important to note that the putty mixture is prepared immediately before the main work and in the required volume. It cannot be stored for a long time, because it hardens quickly. The putty should be applied in a room with air humidity of no more than 60-65% and at a positive temperature. Return to Contents</a>
Technology of applying putty on the wall
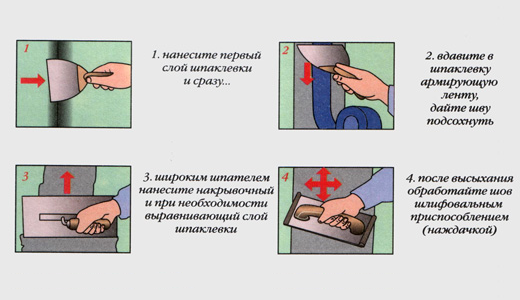 Scheme of filling seams.Regardless of whether the walls will be painted or pasted over in the future, it is necessary to obtain a perfectly flat and smooth surface using putty. For this, the main work can be divided into 2 stages:
- starting;
- finishing.
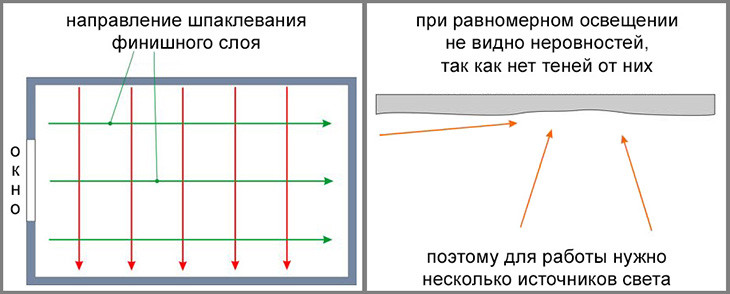
During the first stage of work with putty mixturethe walls are leveled, the most noticeable defects disappear. Depending on the condition of the walls, several such layers can be applied to their surface. The technique for performing the work is simple. A small amount of the prepared putty mixture is taken with a narrow spatula and applied to a wide spatula. The putty is applied to the wall with a wide spatula: first from left to right, spreading the mixture over the surface, and then in the opposite direction, removing the excess. The work should be started from the top of the wall, standing on a stepladder, gradually moving down. The putty should be applied carefully, slowly, without leaving gaps. After applying the first layer of putty, it is necessary to allow time for it to dry. It is important that each layer is thin, which will prevent peeling of the material in the future. After it dries, you can do a little cleaning of the surface with a special grater. It should be noted that each putty layer dries in about 2 hours.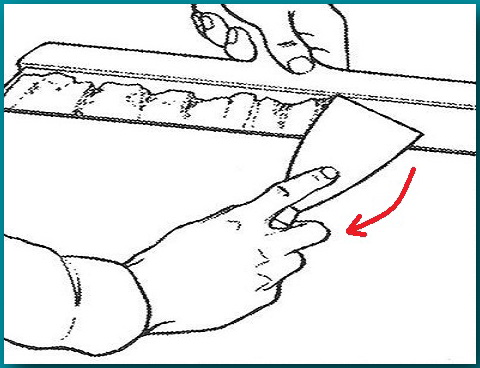 Scheme of work with a spatula.Now you can apply the finishing layer of putty to the wall. The technique for doing the work is the same. As a finishing putty, you can use a composition of a finer fraction. After drying, the wall surface is sanded with a float. The result is a smooth, perfectly flat surface, ready for further repairs. Particular attention is required to leveling the internal and external corners of the walls. When puttingtying internal corners, you can use a special mesh tape made of fiberglass. The work is done like this. First, the corner is coated with a putty mixture using an angle spatula. Then the tape is pressed evenly into the corner onto the putty, and another layer of putty is applied on top. Further actions are performed according to the general rule. When leveling the external corners of the walls, all possible irregularities are removed with a grinder. Then the surface is sanded. To obtain perfectly flat external corners, you can use special devices - perforated corners that are placed on the wet putty and covered with the next layer. Thus, knowing the correct order of puttying works, having all the necessary materials and tools, you can independently level the walls of any room and bring them to an ideal condition.</ ul>


