To date, more and more people preferchoose paint as a decorative finish on the ceiling surface. This is completely justified, since the paint will hold more reliably than other coatings. In addition, for wet rooms, this is an ideal option when it is possible to avoid damage to the material in the event of a fungus.  Ceiling painting technology. It is very important to be able to properly prepare the ceiling for painting with your own hands. If you want to do serious repairs, then you must follow all the rules. Only then the work will progress not so hard, and the result will please you. In case of non-compliance with the basic subtleties, even high-quality painting will not hold well.
Tools and materials for work
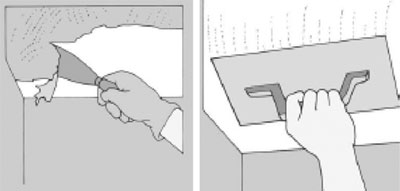
 Ceiling preparation for painting:a - cleaning from the solution with a scraper, b - smoothing with flakes, c - smoothing with a hinged float. Before proceeding to consider the main work that will need to be done, you need to figure out what materials and tools are required for this. So, before you start, you need to acquire:
- two spatulas - wide and narrow;
- a primer;
- starting and finishing shpaklevku;
- semifunctional;
- a wide brush;
- a soft rag;
- Cement mortar;
- sandpaper;
- respirator;
- drill or mixer;
- a hammer.
But the main material is putty. Therefore, it is necessary to approach her choice with special attention. To choose a really good filler, you should know the main features of it. So, the starting putty should be very thick - a little thicker than sour cream. A finish, on the contrary, should be rare. This is due to the fact that the first can be used to seal defects, and the second should be applied in a thin layer. It is also important to pay attention to the labeling. A good putty should have a protective hologram that will protect you from buying a counterfeit. As a rule, this is always taken care of by famous manufacturers. Also, the composition must meet all quality standards. Back to contents</a>
Surface preparation
 Removal of textured paint. First, you need to dismantle the old cover. The technology will depend entirely on how the ceiling was previously trimmed. If it was a wallpaper or a tile, you should just take them off. If it's paint, then you need to remove it with a special rinse, even if it has not started to peel off by itself. The most difficult thing will be whitewashing. As a rule, it is very difficult to shoot. The most sparing method is blurring the whitewash with ordinary warm water, where a little iodine is added. But in any case, this process requires the protection of walls and ceiling, otherwise you will then have to wash these surfaces. Then remove the old plaster and putty. First the ceiling is taped with a hammer. In those places where there will be a sonorous sound, it is necessary to dismantle the old covering, not regretting it. And remove the remaining cavities from dust. Now it is necessary to carefully seal all defects. Pay special attention to cracks. Before they cover, you need to expand them. This is done by conventional expansion with a screwdriver or spatula. After that, cover them with a solution. Such a method will not allow further cracking to continue to expand. On top of the solution, it is advisable to apply a thin layer of putty. When the basic defects are corrected, and the mortar and putty clamp, a surface must be primed. It is best to use a primer that contains an antiseptic. So you will be able to protect the surface from the appearance of the fungus. Primer is better to apply in several layers, so that it is well absorbed into the surface. Back to contents</a>
Application of starting putty
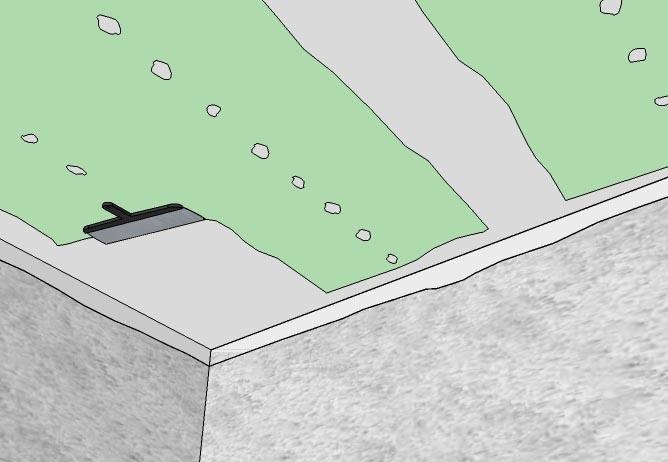
In a day, you can proceed to the main stage of the preparation of the ceiling - treatment with the starting putty.  Scheme of putty on the ceiling. As a rule, sealing cracks and pits with a solution does not allow to achieve a perfectly flat surface. And too small defects there is no sense to cover with a solution. For this reason also it is necessary to use shpaklevku. Strangely enough, for better adhesion of putty to the ceiling, experts recommend using a thin nylon mesh, which has visible identical holes. This will also prevent the appearance of new cracks on the surface in the future. Start shpaklevko before work should be well stirred. To do this, it is advisable to use a drill or mixer - so the mixture will get the right consistency. First you need to take a narrow spatula and cover all small defects and pores on the ceiling carefully. Pay attention to the rust emerging from the armature - it also needs to be smeared so that corrosion in the future does not show through the paint. When this is done, take a half-ruble and rub it with power all over the ceiling. So will remove the small notches. Now you should wait about 2-3 days until the putty completely dries. And only after grasping you can proceed to the main treatment. Now take a wide spatula and apply a layer of putty that will hide as much as possible any irregularities and visible defects. A good starting putty can be applied even in a thick layer. Just before this, apply a grid that will securely fix this layer. Align immediately, without waiting for drying. Otherwise, then it will be quite difficult for you to level everything out. After drying, inspect the surface. If the composition has settled fairly smoothly, then an additional layer of starting putty can not be applied. But if the ceiling requires alignment yet, then the second main layer should be applied. But it must be done much thinner. Do not neglect it if you see that the surface is uneven, because after painting it will be even more noticeable. After about two days, the surface should dry completely. Then you can make a grinding. To do this, first use a thin spatula, which removes small lumps, and then emulsify the ceiling with sandpaper. But do not forget to protect the respiratory system, because in the process of work there will be a lot of dust. Back to contents</a>
Finish putty and grout
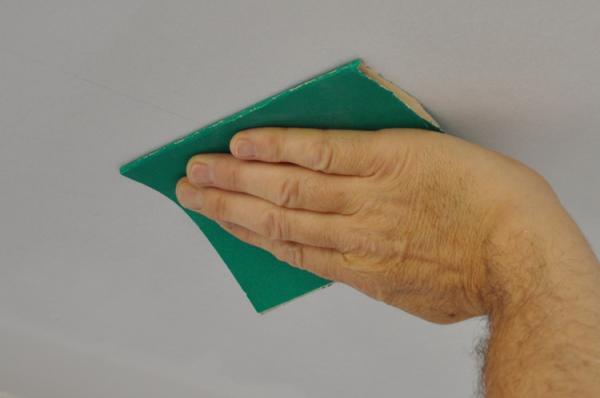
 Finishing putty on the ceiling. The next step is applying the finishing putty. Here everything will be much easier, since you no longer have to make a careful alignment. As a rule, the finishing putty is applied very thin layer. And to achieve it, it will be necessary to press the spatula with force. For this purpose, a spatula is ideally suited, the working part of which is made at an angle. So on the ceiling will not form strips. Finishing putty involves quick work. If you apply it very slowly, you just will not be able to smooth everything out well. As a result, then it will be necessary to spend a lot of effort in order to remove irregularities and strips from the edges of the spatula. So, the treatment of the ceiling with the putty is over. Usually the surface dries out after 10 hours. But it makes sense to wait longer, so as not to spoil anything by another. After drying, it is necessary to remove all irregularities again with sandpaper. Then you need to take a half-and, slightly moisturizing it with warm water, make a grout. Another day must be applied a coat of primer. It is necessary for the paint to adhere well to the surface of the ceiling. Yes, and the extra protection from mold formation here also does not hurt. After soaking the primers, you can safely proceed with the painting. The order of work in the process of preparing the ceiling for coloring is considered. It should be noted that during the execution of such works it makes sense to protect the walls with polyethylene or paint tape, as it is done to blur the whitewash so that they are not contaminated with putty. </ ul>


