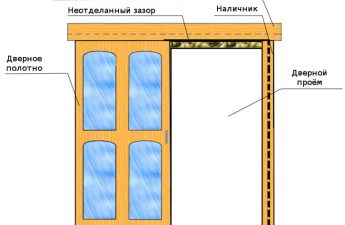
can be performed in an arbitrary wall openingthickness. At the same time, boxes for interior doors are offered with only a few standard depth ratings, which almost never exceed 100 mm. On the remaining part of the opening, you can make a slope, but this is long and difficult for a novice craftsman. A much more technological and aesthetic solution would be to install an extension. Door frame with extensions.
Tools and materials
Before starting work, you need to stock up on everything you need. List of tools:
- roulette;
- level;
- pencil;
- hacksaw;
- drill;
- chisel;
- a hammer;
- stool;
- gon;
- Glue gun;
- electric jigsaw or circular saw.
List of materials: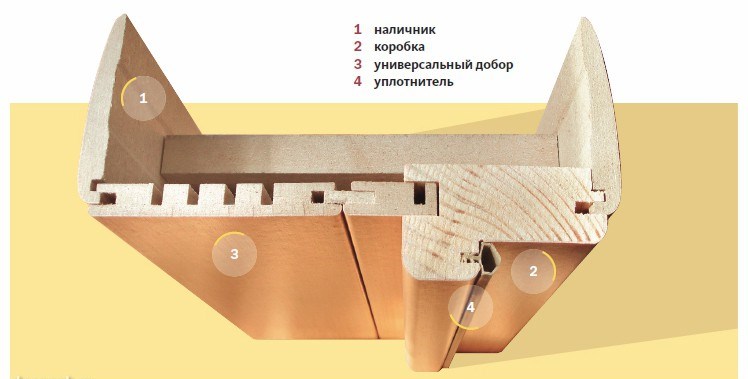 Extensions for interior doors.
- box set;
- hidden fasteners for boxes or straight pendants;
- canvas;
- additional strips;
- platbands;
- canopies;
- Scotch tape;
- self-tapping screws.
Before purchasing interior doors, it is worthcarefully measure all the parameters of the opening and the adjacent wall. For normal operation of interior doors, they must be installed strictly vertically flush with one side of the wall. The wall itself is often tilted to one side or the other. As a result, the casing does not fit the wall at the top or bottom. The problem is solved by installing telescopic casings. The same applies to additional elements. When using a frame with a groove for the extension, it will be easier to correct deviations in the geometry of the wall. You should not buy a frame without a groove even when installing interior doors in a wall opening with good geometry. The joint of the extension with the frame through the groove allows you to adjust the elements to any width of the opening. Special hidden fasteners for installing the frame will not be available in any store, but these elements allow you to firmly fix the side strips with a certain gap and adjust them to the level. In fact, most installers do fine without them, using traditional fixing methods. Return to contents</a>
Assembling the box
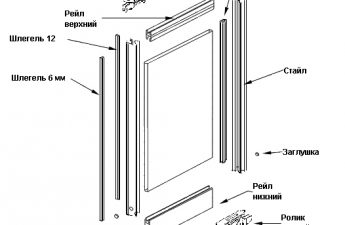
If you purchased a unit with a universal box,Before installation, it must be adjusted to the size of the canvas and assembled. The frame is laid out on the floor. The canvas is placed between the side strips on the rebate. The upper strip is applied to its place. Gaps of 2.5 mm to the side strips and 5 mm to the upper one are installed along the perimeter of the canvas. Marks are made on the upper rebate in alignment with the side ones.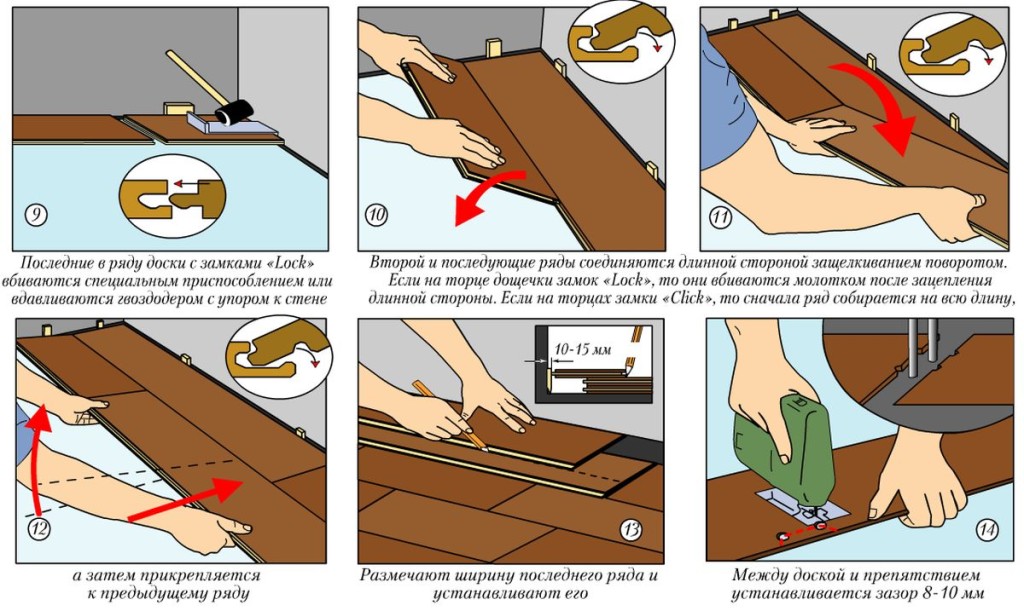 Installing an extension on the entrance door.From the bottom end of the door leaf on the side planks, 10-15 mm are set aside. For kitchen doors and doors of rooms with boilers and gas water heaters, this size is increased to 40-50 mm for normal air flow through the gap between the door leaf and the floor. The locations of the hinges are marked 20 cm from the ends of the door leaf. All 3 planks are shortened according to the marks made. It is better to use a miter box to make a perpendicular cut. Otherwise, you need to mark the lines with a square and try to hold the hacksaw vertically. The upper rebate is cut with a hacksaw along the marks and is trimmed with a chisel in the areas where the upper and side planks adjoin. For standard awnings, excess material is removed from the door leaf and one of the side planks with a chisel. After that, they are fixed with self-tapping screws in the prepared seats. When using "butterfly awnings", there is no need to select the material. They are simply screwed on. To prevent the material from cracking, pre-drill the holes for the screws. It is better to drill the holes and screw the side strips to the top one with the canvas inserted in place and the gaps set. To connect the parts, screw a pair of 75 mm long wood screws into the ends of the side elements through the top one. Cuts must be made in the top crossbar to align the extensions. It is better to cut the extensions to the length of the frame elements before installing it; the width is determined later. Return to contents</a>
Box mounting
 Door construction.Installation begins with fastening the strip with awnings. It must be leveled in two planes and in line with the wall. With a tilted wall and installation with telescopic trims, the frame is installed at the deepest point. You can even recess it a little more so that the taper is not noticeable. The remaining elements of the frame are exposed with the canvas hung. If there is a correct rebate and gaps, then the strips are in place. To fix the frame, you can choose between hidden fasteners, direct hangers, screws screwed through the material or dowels. The latter are hidden behind a removable rebate. If the rebate and frame are made of a single piece, for hidden installation they are placed behind the awnings and the latch strike plate. This option for arranging hardware is suitable if the opening material is not prone to cracking or if there are embedded parts in the right places. In the installation position, the frame is wedged, the gap around the perimeter is moistened and filled with polyurethane foam. The extrusion of the planks into the opening can be prevented by closing the door. To prevent the door leaf from being pinched by the frame, tile crosses, cardboard, matches, etc. are placed in the space between them. Return to contents</a>
Fastening of the fence and platbands
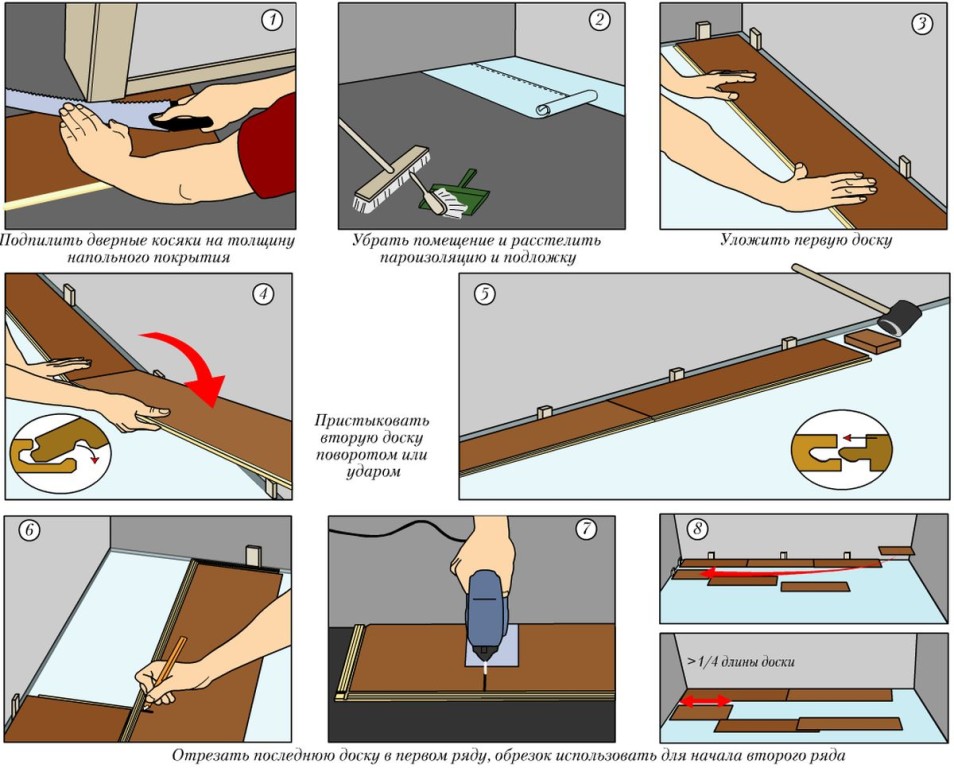 Types of extensions for interior doors.The extensions are inserted into the mounting grooves. On each of them, two extreme rough marks are marked in the plane of alignment with the wall. To accurately locate the desired point, any guide is applied to the wall. The extensions are removed from the grooves. To obtain clean marks, the distance from the outer end to the rough mark must be set aside from the inner end. A line is drawn along the new clean marks, along which the excess is cut off. The resulting parts are installed in place. Wedges are placed between them and the ends of the opening, which eliminates the gap at the junction with the frame. In this position, the extensions are intercepted with masking tape to the adjacent wall. It is necessary to try to position the extensions exactly perpendicular to the wall. A square can be used for this. Mounting foam is used for final fixation. It should not fill the groove completely. The foam is applied pointwise with a step of 10-15 cm. This will allow it to work as glue. Expanding, the foam will fill the free space and not warp the thin planks. The upper casing is cut exactly according to the distance between the side ones. The side ones are shortened to the height mark of the outer end of the upper casing. The joining and correct fit of the side casings is achieved by removing the tenon above the side planks. Fixation is done with glue. To simplify future repairs, the casing should be glued not along the groove, but along the wall. This will allow you to preserve it when updating the wall finish. Do not be afraid to install interior doors with your own hands. Precisely following the instructions and understanding several subtle points will allow you to do the job efficiently. The technology for installing doors with an extension is much simpler than installing a slope and is within everyone's power.</ ul>
