Staining of the wall surface is the mostA popular event held during the repair process. Usually this activity is carried out without any problems, if it was preceded by preliminary preparation. As you know, such work takes a considerable amount of time. It is necessary to prepare a set of tools, to choose the necessary enamel, to gather information about the forthcoming work, finding out the possible problems and difficulties.  Before painting it is necessary to repair all cracks anduneven walls. Increased attention is paid to the quality of paint. This determines the timing of the repair activities and the subsequent attachment on its basis. Preliminary preparation of walls for painting will help to carry out work in an organized, purposeful manner, in a short time and with minimal losses.
How does this work begin?
Any work is easy, if it is clearplanned and thought out. The same must be said about the painting. Preparing for this important event, it is necessary to assess the condition of the walls. For this check, you can use the following method: the old coating is glued with adhesive tape, then it comes off with a sharp movement. Adhesive paint indicates that the old coating is clearly worn out and needs replacement. Surface preparation in this case is reduced to wetting the substrate and then removing the old layer. For this you can use a spatula. Here it is necessary to exert force. As a result of such work, you can get a perfect coating. The presence on the surface of the wall 2-3 layers of paint does not require mandatory cleaning. 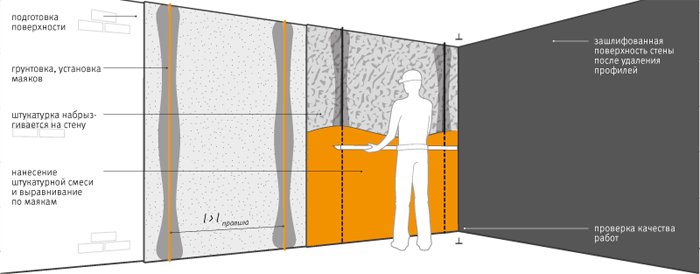 The scheme for aligning the wall with the lighthouses.starts with cleaning the base from all kinds of stains, traces of dirt and dust. The partitions can be washed with any detergent. As soon as the surface is dry, putty should be applied to the existing irregularities. In order to check the strength of the walls, you need to stock up on any sharp object and clean the surface a little. Easy removal of the old layer indicates the need to remove it and treat the area with putty or alabaster. The strength of the plastered layer can be checked by tapping on the wall. The presence of a dull sound indicates that the plaster does not bond well enough to the base. It is necessary to mobilize your strength to remove the old layer. Use a good quality gypsum filler to level the grooves. As soon as the objects of interest are dry, it is necessary to carry out grinding work. For this, sandpaper of medium thickness is taken. Use a damp cloth or brush to remove dust from the walls. The corner zones located on the border between the walls and the ceiling deserve close attention. They require priming the surface. This preparation is not performed by all people, since this procedure takes a lot of time and, accordingly, money. However, such savings are questionable. After priming the surface noticeably reduces the degree of absorption of the enamel, strengthens the structure, makes the base smooth and guarantees good adhesion of the enamel to the wall. The volume is reduced, the price of repair work is reduced.
 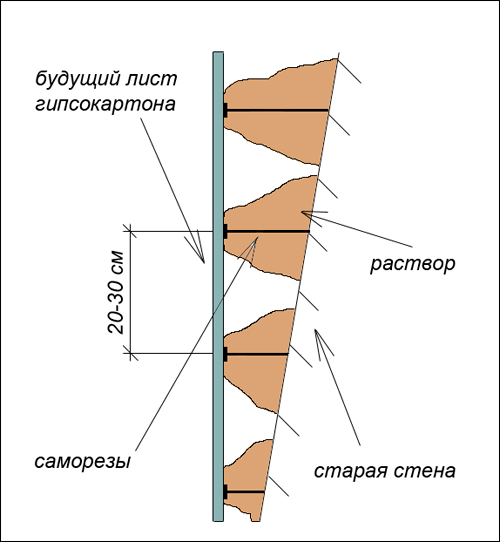 Scheme of wall alignment without a frame. Often in the process of exploitation on the walls there are all kinds of spots and divorces. Before painting, they need to be removed. The most attention should be paid to such residues as soot, oil, nicotine. They are able to reduce the degree of adhesion of the emulsion to the surface and change the color of the paint, down to its discoloration. To eliminate greasy stains, you can apply a reliable and reliable tool - soap. It is not recommended to replace this product with all sorts of balms for washing dishes. They contain lanolin. Once the stains are removed and dried, they can be painted over with paint. Possible manifestations of the fungus on the walls should be immediately eliminated. Back to contents</a>
Practical recommendations for leveling
The old water-based paint is removed wetsponge. Enamel coating can be removed with a spatula or drill with a special nozzle. When priming the surface, it is worth using material with a deep penetration, which will ensure good adhesion of the coating to the base of the wall. To do this, take a roller or brush. After that you need to wait until the surface dries completely. Aligning the walls is done with putty. The brick plastered wall is processed directly on the finished base. On the reinforced concrete frame skeleton mesh. Previously, a layer of putty is applied to it, then a mesh is applied, on the surface of which another layer of this material is laid. The most convenient size of the spatula will be 35-45 cm. Most often, putty is a dry powder, packaged in bags and having a mass of 30 kg. To bring it to full readiness, it is important to follow the attached scheme of mixture dilution. As a rule, fillers based on gypsum are used. For it to be completely ready, it needs to be dried. 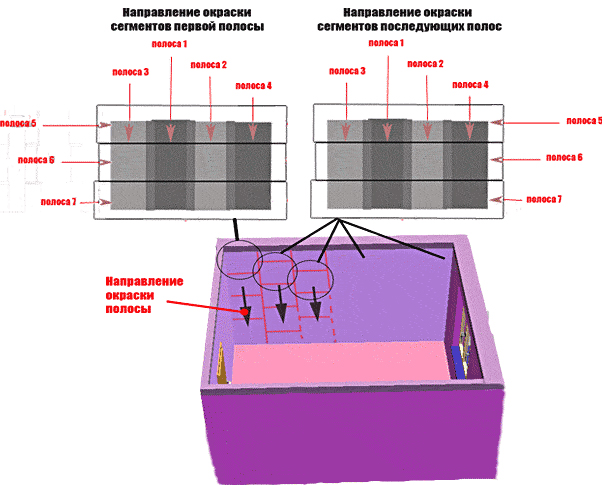 Scheme of painting the walls. An obligatory condition when working with putty is its complete drying before applying the subsequent layer. Otherwise, air bubbles may appear on the surface. Then the qualitative treatment of the base will not work. The further stage of work is connected with drawing of a layer of finishing putty. For this, a base is applied to the base on a construction plaster, which ensures a quick and reliable grip on the surface. Satenypse is smeared with a thin layer of 1-2 mm. After that, it dries out thoroughly, and then it is covered with a primer and dried again. Each of the stages of preparation of walls for painting should be controlled. Plaster putty should be done with sandpaper, because the priming of the surface excludes the presence of streaks. The surface is painted after all the necessary preparatory work has already been carried out. Back to contents</a>
Accessories for coloring
Preparing for the painting of walls, it is necessary to prepareimportant tools. These include brushes, trays, rollers. Brushes choose, focusing on the type of paint. They can be of different sizes. On sale there are options with flexible handles, the base of which can be changed to the desired size. Such adaptations noticeably simplify the coloring of the walls. Sales rollers can be found both in the kit and separately. Their main design is the handle and the rotating part, designed for a different width of the surface. Such adaptations help in painting large and small areas. Trays for immersing the roller come in different sizes. On their base there is a special part with notches, intended for rolling the roller. In this way, you can easily remove excess paint from the roller. It is not necessary to use a ladder to improve the color of the ceiling. To do this, you can take a telescopic bar. It can be purchased separately. Wearing a roller on it, you can easily reach the ceiling. The outer corners of the walls can be treated with a roller having a lid in the side part. This device will protect the adjacent partition from accidental hitting the paint. Given all of the above recommendations, you can thoroughly prepare the surface for painting and ensure a perfectly smooth and smooth base.


