Over time, wood floor owners noticethat they start to creak. In most cases, this is due to the fact that the boards could dry out or any nail has already become unusable. Going through the entire floor is a rather difficult task when it can be dealt with much easier. But before, you should still establish the exact cause of the occurrence.  Over time, the boards are cracked, which can cause a scratch.
The causes of the creaking
In most cases, you can eliminate the creaking of sexwithout autopsy, the main thing is to know what the problem is. But here I would like to note at once that if in time not to intervene in the situation, then in the future it will lead to serious repair. The tree, as a natural material, grows old over time, but this does not mean that you do not need to follow it. The creaking of the floor indicates its failure in the design. The reasons can be the following: 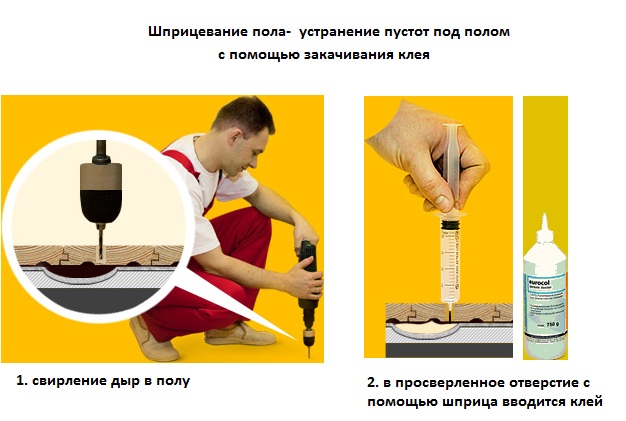 Repair the floor with glue and syringe.
Why is it so important to know the cause of the creaking? Because it directly depends on which method to choose to eliminate the scratch without disassembling the sexes. Even the sound of the creaking floor can be different. But only a professional can determine this. If the floor did not fit on its own, then, most likely, this drawback is caused by the weakening of the fasteners between the boards and lags. This results in friction against each other. If the problem is lags, then there are two ways to solve the problem: to equalize or completely replace. But here it is necessary to carry out the opening of the sexes. But if there are no problems with lags, the following options are used to eliminate the squeak. Back to contents</a>
Elimination of squeaks with the help of mounting foam: features
 To eliminate the creak, the mounting foam is pouredinside the wooden floor. This method is suitable in cases where the underground space does not exceed 9 cm. The slots between the floorboards are filled with the necessary amount of foam, which must fill the existing voids. Since this material expands and solidifies, it simply serves as a fixer for loosened boards. And with the help of foam, there is additional stiffness at the floor. But once it is worth mentioning that this method is far from cheap, because the foam itself is very expensive. In addition, this method of eliminating the creaking has a short-term effect. All due to the fact that during the load on the surface, the foam itself will be pressed and sagged, and this entails a weakening of the stiffness. Therefore, after the shrinkage of the interlayers, the squeaking will resume. The same will be observed if the mounting foam is replaced with talc or graphite powder. Elimination of creaking with wedges. These elements are pummeled between the floor boards. For this procedure you need a hammer (mallet) and a milking machine.
 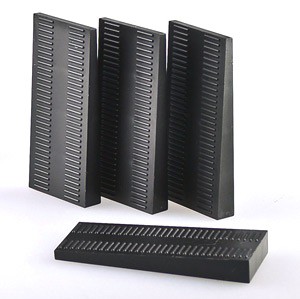 Elimination of the creaking with pegs. In between the wooden elements, wedges and spacers are driven in. Such details can be made by hand. To do this, you need wooden slats with a length of 0.1-0.15 m. Each wedge is inserted at a distance of 0.15-0.2 m from each other. They are driven in until the tip is level with the floor surface. And that during operation wedges do not jump out, before they are mounted, it is necessary to lubricate these elements with joinery glue or PVA. But it also happens that the size of the slots is too small for the wedges, so use an alternative method. It consists in the fact that a solution is prepared from sawdust and PVA glue, which is then applied to the slit with a spatula. Back to contents</a>
Elimination of the defect by a constriction of self-tapping screws
 To eliminate the creak, you can lay it on the floorplywood. This method is applicable if the problem is not only related to the boards, but also to the lags themselves. And here there is a difficulty with the definition of problem logs, especially in those cases when the surface of the floors was opened with varnish. To solve this issue, you need to remove the plinth, after which this place is marked by a long thin metal rod. For this procedure, these elements are stuck in the floor at the central point of the lag or in the lag itself, if there is a concrete base. Then they are connected by a marking cord. Selection of the length of the screws goes according to the total thickness of the logs and floorboards (thickness of the log + thickness of the board). They should be shorter by 2-3 cm. After they have been bought, self-cutters, in the number of two or three pieces, are screwed into each board. They should be positioned as close to the center of the lag as possible, and their hats should not protrude above the surface of the lag. If old shaken nails are observed, then they should be removed, while the rest, densely sitting in their places, do not touch. This method should be strengthened not only defective elements, but all the rest too.
 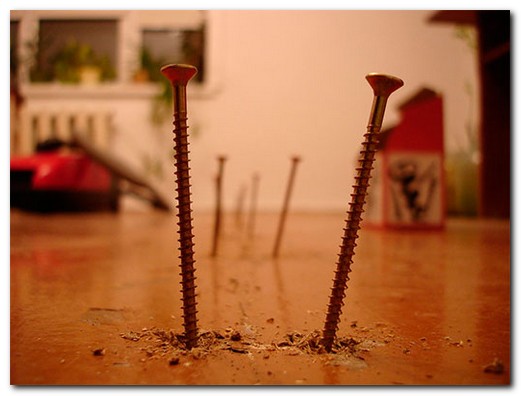 Screws must be screwed into the center of the lag. In general, this method is quite effective, besides it is budgetary. But again, if we compare this method of self-tapping with nails, then it should be noted that in the second case, after a lapse of time, the places where the nail is hammered will be weakened by the loss of elasticity, since the wood is split. But the screws do not destroy the tree so much, because they are simply screwed. In this case, you need to stock up the following tools:
- with a drill;
- screwdriver;
- nailing;
- metal rods - 2 pieces;
- cord or line;
- ruler.
Back to contents</a>
Elimination of scripting with plywood or sheets of particle board
This method will help in case of detectionA wide step between lags or with thin boards. In this case, flooring will be created, which requires a flat surface without fail. Choosing plywood, it follows that the thickness of the sheet was not less than 1.2 cm, so that during the operation of the floor, it does not bend. From tools it is necessary to have a saw-hacksaw, a drill and a screwdriver, although a screwdriver can be used instead. The sheets of material are spread on top of the boards, and to fix them, use self-tapping screws. The distance between the fasteners is from 15 to 20 cm. The stacking itself should be made at an angle relative to the laid boards. This option is one of the most reliable and durable. First of all, the entire process begins with the detection of a problematic area, which must be unloaded, that is, remove all furniture there. Further, it is delineated by chalk, creating a square shape, the sides of which are equal to 15-20 cm. After this, with the help of the Bulgar this plot is sawed out. It is also necessary to measure the distance from the bottom of the floor and the bottom of the chipboard, after which four bars are produced, each 12-16 cm long, and the thickness should be equal to the above index. These elements will serve as a support, so they are driven into the corners of the sheet. After that, the previously extracted area is put in place, fixing it with the help of screws on the places of the wooden bars. Then the floor covering is laid. Such a repair intervention will allow long exploitation of the floor without fear of re-creaking. In the end, I would like to note that if the floor creaks in several places, then an individual approach may be required for each specific site. It is not necessary that all the creaks are caused by the same reasons. Therefore, it is necessary to find out in each case separately. Of course, in most cases, there is enough elementary intervention in the form of a deeper drowning of the nail, but sometimes this is not enough. All of the above methods allow you to abandon the complete disassembly of the floor covering, while they do not carry much.


