In any room, the ceiling occupies the most prominentposition. This is the first thing that catches your eye, and its appearance creates a first impression of the whole house. To improve the impression can plaster the ceiling with your own hands.  Plaster ceiling allows to eliminate defectssurface and update it. When building on the ceiling ceiling surface, there are various defects and irregularities. In a residential building on the ceiling over time, spots, cracks, etc. appear. Plastering the ceiling with your own hands allows you to remove surface defects and update it.
Selection of plaster material
The plaster is a thick mixture,which is designed for finishing various surfaces. The process of plastering ceilings involves plastering the ceiling with a ceiling to create a smooth, smooth surface. In general, this process can be divided into plaster (primary removal of unevenness) and putty (fine leveling of the surface). The main requirements for the materials used: good adhesion with different materials used in construction; the possibility of forming a smooth surface in simple ways; solidity; resistance to external influences. 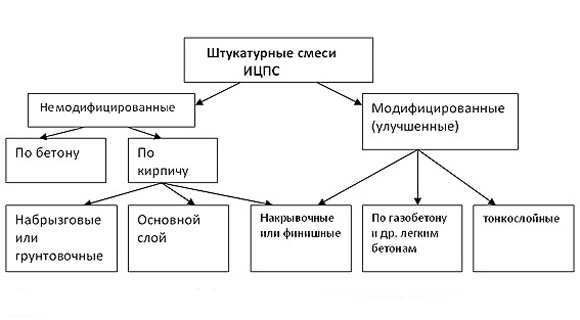 Plaster building mixtures.Plasters can be divided into two large groups - mixtures based on cement and based on gypsum. To increase the functional properties and manufacturability, various substances are added to the mixture. Cement slurry is a mixture of cement and sand in a ratio of 1: (3-4). To increase the elasticity, a cement-lime mortar is used, when milk of lime (0.7-1 part of slaked lime diluted in water to a liquid state) is added to the mixture of cement with sand. A purely gypsum solution is usually not used for plaster. Lime-gypsum solution is widespread. It is a mixture of gypsum and lime mortar in a ratio of 1: (3-4). In turn, the lime mortar is prepared in the form of a mixture of slaked lime with sand in a ratio of 1: (4-6). Self-prepared solutions allow, but cannot provide the desired reliability. Currently, dry construction mixtures are being sold, which significantly increase the reliability and quality of the material. The composition of such a mixture includes mineral and polymer additives that increase their elasticity and strength. They can be based on cement and gypsum.
 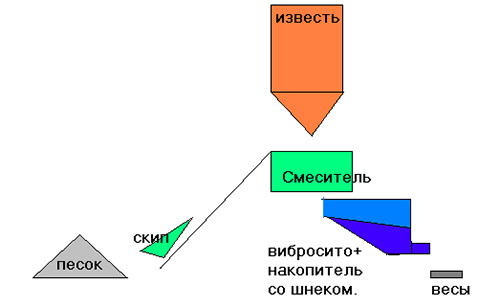 Scheme for the production of calcareous dry plastermixture. For the plastering of ceilings, dry construction mixtures using gypsum base are most often used. However, in rooms with high humidity and other effects of various factors, cement-based mixtures should be used for internal work. For decorative plaster, colored building mixtures are produced. In addition, the mixtures differ in the granularity of the additives, which should be taken into account when choosing the composition for the plaster (the granularity can exceed 2.5 mm) and the putty (grain size not more than 0.3 mm). In general, dry building mixtures are divided according to their intended purpose into the following types:
- plaster alignment;
- protective covering;
- putty;
- primer;
- adhesive layer;
- color decoration.
Back to contents</a>
Step-by-step instruction: preparation of the ceiling
Plaster surface with your own hands begins withsurface preparation of the ceiling. Preparation consists in cleaning the surface, removing obvious defects and old ceiling covering (during repair). First of all, you need to take measures to protect yourself - when cleaning the ceiling there will be a lot of dust. Use glasses and a respirator. 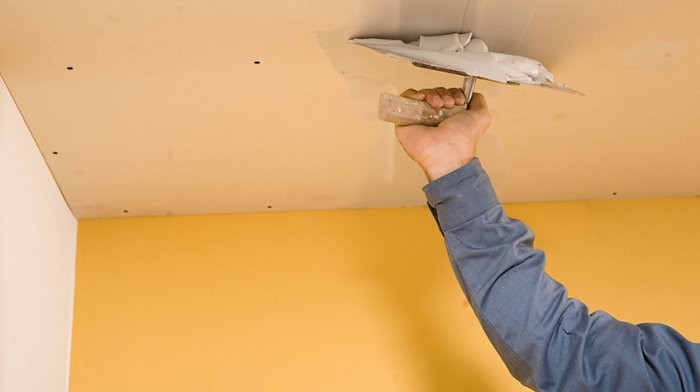 Before plastering, it is necessary to cleanThe surface of the ceiling and remove the old ceiling cover. Old coatings are removed with an acute hard spatula. First, the paint and the old plaster are removed as much as possible. If the spatula can not completely remove the old coating, then use an emery cloth, a grinder or a rough emery cloth. It is necessary to check the quality of sealing joints between the slabs. If the plaster staggers or crumbles, it should be removed. Plaster, which does not lend itself to touching with a spatula, remains in place. Difficulties can cause paint applied directly to the concrete. If it does not lend itself to a spatula, then special solutions will have to be used. So, you can apply iodine aqueous solution (25 ml per 10 liters of water). The solution is applied to the rest of the paint, soaks it. After that, the paint is removed with a spatula. Sometimes there are cases when, after blotting, mold or fungi appear on the ceiling, to remove them, it is necessary to treat the affected area with a solution of copper sulfate (5 g per 1 liter of water). After all the work on the ceiling, its surface is dried and thoroughly cleaned of dust. Back to contents</a>
Plastering tools
Plastering of the ceiling is done using a specialized hand tool. To plaster the ceiling, you will need the following tool: 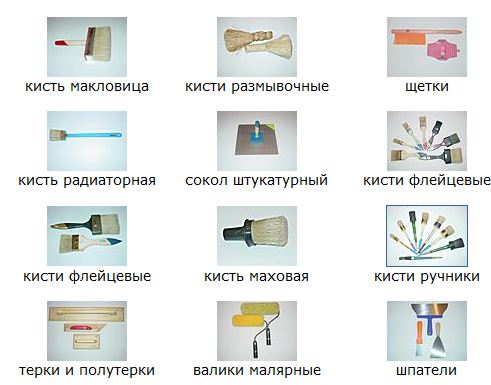 Tools for plaster ceilings.
- putty knife;
- grater;
- semifunctional;
- falcon;
- stucco trowel;
- plaster blade;
- the equalizer angular;
- rule;
- trowel (malk);
- scoop;
- an ironing board;
- level;
- hatchet;
- roller or paint brushes;
- sandpaper;
- sandpaper.
For convenience, a set ofspatulas of different rigidity and width from 50 to 120 mm. In addition, it is advisable to have a comb spatula. To prepare the solution, you need a container for the mixture, a mixer or a drill with a mixer nozzle. Quality control should be conducted using a level. Back to contents</a>
Aligning the ceiling
Self-plastering of the surfacebegins with its alignment. The first step in leveling the ceiling is priming the surface to cover large defects and ensure good adhesion. Priming the ceiling is done in two layers. Priming mixture is applied to the entire surface of the ceiling by a roller, and in the corners by a brush. Before applying the plaster, the primer layer must be completely dry. 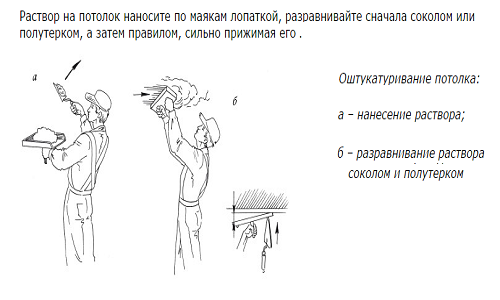 The process of plastering the ceiling. The mixture for plastering is prepared as follows. The water is poured into the container and the dry mix is poured in the proportion indicated in the instructions. Using a drill with a mixer nozzle, mix the mixture and then settle for 5-10 minutes. After this the final mixing of the solution is carried out with the drill until a uniform consistency of thick cream is obtained. The plaster is applied to the surface of the ceiling with a spatula and trowel. Begin plastering the ceiling from the corner of the wall with a window. The solution is applied to the surface and immediately spread out with a spatula. The ceiling is plastered evenly over the entire surface of the ceiling. The thickness of the coating is about 5-10 mm. Completed work overlay putty over dried plaster. The putty mixture is prepared similarly to the plaster mixture. It is applied by a thin layer of 3-5 mm and carefully leveled with a spatula. After drying, it is sanded with an emery cloth. Back to contents</a>
Plaster for beacons
When processing an uneven ceilingThe plaster must have a layer of increased thickness. In this case, the method of plastering the lighthouses is used. The essence of the method lies in the fact that plastic beacons of different heights are attached throughout the surface of the ceiling, which, at their apex, form the same level. Beacons are attached to gypsum or cement patches every 30 cm. After the patches dry, fixing the beacons, they produce a plaster overlay with alignment along their tops. The thickness of this layer reaches 5 cm in the places of greatest dents on the ceiling. Control over the correctness of the installation of beacons is carried out using a level 2 m long. After performing the work, the beacons are deleted. Back to contents</a>
Plasterboard ceiling from plasterboard
is to apply putty. Initially, a grid is attached to the joints of the drywall sheets (serpent). The sections of the joint and the place where the drywall is fastened with screws are carefully shpatlyuyutsya. Then the entire surface of the drywall is applied a primer with a thin layer. After it dries, a layer of 2-3 mm thick filler is laid on the drywall. The surface is rubbed and sanded using an emery cloth. Plastering the ceiling with your own hands is not an easy process, but it requires careful and thorough finishing. When using plaster, use standard quality mixes, then a good appearance of the surface will be provided.


