Contrary to the established opinion that the ceiling should bepaint with one color and choose at the same time white paint, there are many ways to refresh the interior through decorative techniques. Now artists and decorators often turn to the idea of painting ceilings through stencils.  Stencils allow you to perform artisticpainting when you need a perfect repetition of one pattern. Stencils can be a geometric ornament, a pattern of plants and flowers, and sometimes a full-fledged drawing. In the choice of colors and the richness of colors for working with ceilings, no one is limited. As a result, everyone can choose the way of decorating the ceiling to their liking, without driving themselves into a style frame. will help to reveal creative and design abilities, if you wish, your children can also participate in the design. It is known that services for decorative design of the ceiling are expensive, and the result of the work will directly depend on the high skill of the master. If your primary goal is to save time, extra money and confidence in a high-quality result, use the drawing through a stencil.
Sequence of work with stencils
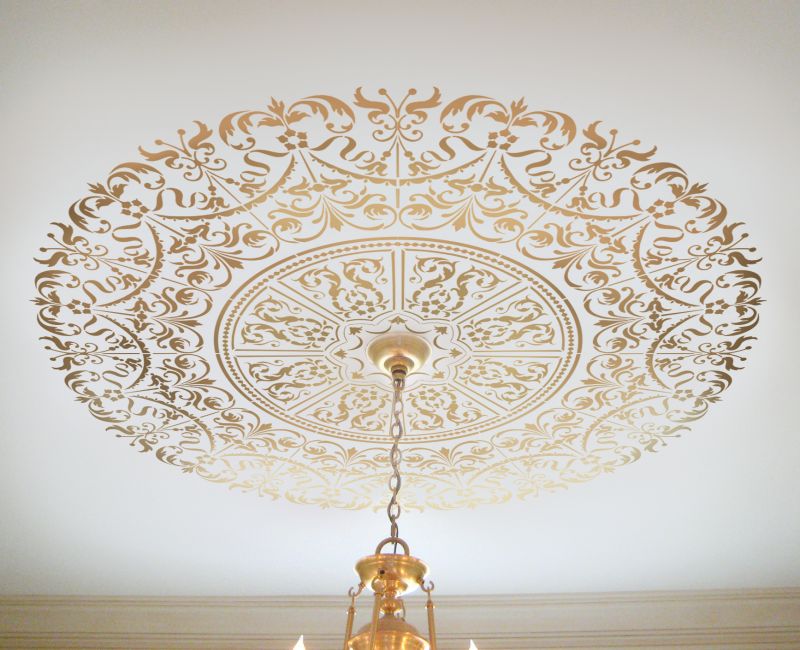 For painting the ceiling, a symmetrical pattern around the chandelier is most often used. Artistic involves actions consisting of such stages as:
- Drawing up a diagram of the layout of the picture and choosing a color palette;
- stencil manufacture;
- cleaning the ceiling from dirt and old paint;
- painting the stencil on the ceiling;
- applying a protective layer on the finished drawing.
What is the layout? The pattern of the ceiling is best depicted at first on paper or in a graphic editor to determine the symmetry around which the pattern will be built, in which direction the ornament will develop, so that the picture looks good when entering the room. Most often in the design resort to the symmetry of the pattern regarding the suspended chandelier and the lines of the diagonals of the ceiling. When creating a stencil, you need to decide on their types. By the nature of the application of the paint, the stencils are divided into two types:
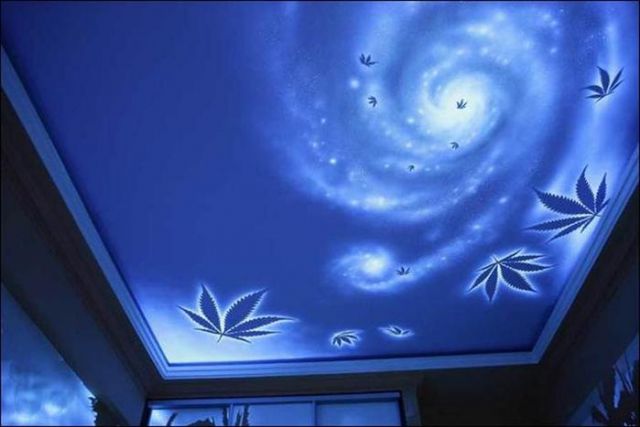 Very impressive looks ceiling paintingfluorescent paints on a direct stencil. For a blank under the stencil, a sheet of thick paper (paper) or thin cardboard is suitable. A more durable and durable will be a workpiece made of thin plastic or vinyl. We mark the cardboard sheets with a pencil or marker under the future pattern and carefully cut the holes with a stationery knife. To the template does not become flimsy from the slots, you need to leave thin jumpers in them so that it does not burst. Places that are closed with bridges, we will additionally paint over with a brush. Another should be moistened with linseed oil and dry paper stencils to make them harder. In creating drawings from several colors, each part of its color will need its own template. If you want to accurately transfer the original drawing to another scale, you need to divide the stencil into cells. Then take a fresh sheet under a new stencil and divide it just like the original workpiece by the same number of squares. The figure from the original template by the arrangement of figures and lines in the cells of the original is exactly the same in the new workpiece. In this way, without a special tweak, you can get a new version of the existing pattern on a larger or smaller scale. Back to contents</a>
Features of application
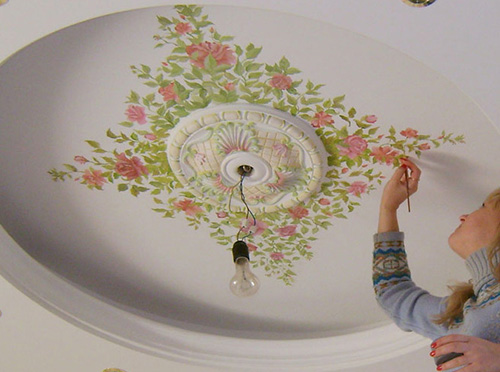 With the help of a stencil, you can also performa multi-color artistic ceiling painting. There are no tricks in applying paint through the stencil. Beforehand, we paint the ceiling in the basic base color and wait until the paint absorbs. After applying our template in the right place and glued to the ceiling on the painting tape. Apply lightly soaking movements with a brush or foam sponge and apply the paint gently through the stencil. In any case, you can not type too much paint on the brush so that no stains appear. Also it is impossible to drive a brush along the slots of the sheet, otherwise the paint will fade under the sheet and ruin the conceived drawing. After the stencil is finished, remove excess paint from the workpiece with a cloth, trying not to touch the drawing itself. In the work on creating a pattern from several colors before applying another pattern of a different color, you will have to wait until the paint has completely dried out on the previous one. So here it is necessary to show patience and leave haste. There are other ways of applying decorative pattern. Work on creating ornaments and drawings, similar to those obtained through stencils, can also be done with rubber stamps and rollers with a relief pattern. Their use will significantly save time on cutting and fastening sheets with a pattern to the ceiling. Back to contents</a>
Manufacturing and specificity of work rubber stamp
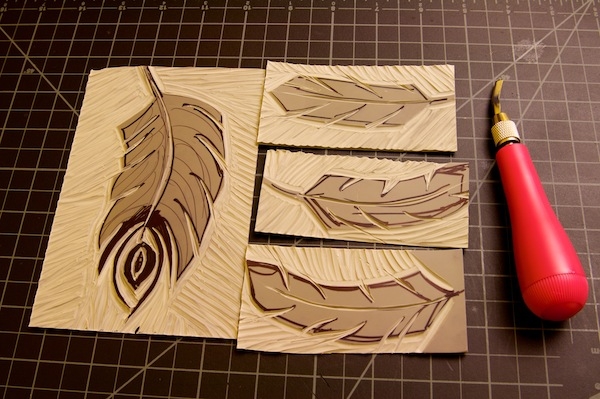 Stamp for painting is cut out on a thin layerrubber, which is subsequently glued to a convenient base. A rubber stamp can easily create a picture of repeating fragments. On sale there are decorative stamps made of flexible rubber or molding plastic. They weigh a little, they fit comfortably and are easy to clean. Such stamps, however surprising, also do not necessarily have to be bought. You can make them yourself. The main thing is to act in order.
Now we have a ready-made stamp. It is easily moistened with a relief side in the tray with paint and squeezes against the tray tray so that it does not drip. To get a print with our drawing, evenly press it into the desired place on the ceiling and carefully take it back. The impression will be more pronounced and more uniform than the selected wooden bar under the base. Still it is necessary to make so that the stamp does not fidget on a ceiling, differently drawing risks to turn to the bladder. In order not to test fate, you must practice on a piece of plywood, painted in the color of the ceiling. Several test stamps will make it clear if there are flaws in the assembled instrument, and will help to adapt to work with it. In addition, it will be clearly seen how the background and pattern colors are combined, if necessary, the color of the latter can be adjusted. Back to contents</a>
How to apply a pattern with a patterned roller?
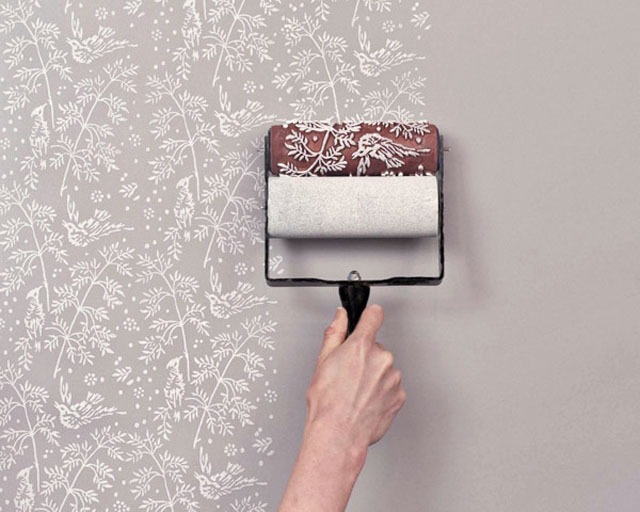 A special patterned roller allows fastto apply a fine drawing on the big areas. Such rollers are often found on sale. With them, it is equally convenient and quick to work both on walls and on the ceiling. Specialist in painting for painting with a relief roller is optional. It is enough to get a machine, on which two rolls are attached: a roller with a relief pattern is clinging to the front, and from behind is a foam rubber. Placed in this way, they must lie close to each other, but at the same time freely rotate. In doing so, you should follow the procedure for creating a picture:
It is necessary to watch, that at movement the patterned shaft easily rolled and did not seize, it is necessary to check up in advance, how easy both shafts go, having driven them on a firm and equal surface. Back to contents</a>
Selection of style and design elements
Each of the rooms in the house has its own purpose andcauses certain images, associations. Therefore, it will be expedient to choose the design, its style and elements in accordance with generally accepted ideas about the interior of the hallway, living room, bathroom, etc. The kitchen organically looks the subject of the harvest, compact bouquets of wildflowers and ears. Elements of the decor should not look sweeping and colorful, everything should look restrained and compact. In the living room, preference is given to compositions with images of nature, such as woods, animals, birds and lush inflorescences - everything will be appropriate with the correct selection of color and arrangement. To decorate a child's interior delivers a special pleasure to parents and children. The child here will be a personal consultant. And what he likes more: cartoon characters, superheroes, cars or spaceships, depends on him. Comfort in the bedroom is well complemented by unobtrusive monophonic images of constellations, angels, flowers and birds. Choose a calm and not too bright colors. If the bed has a wide wooden back in the bedroom, a wooden crown of a similar color should be painted behind it. From the side it will seem that the bed lies on the branches of the tree. In the design of the bathroom is better to use the sea theme. This is a fish figure with dolphins, and an image of underwater vegetation, shells and corals. In the bathtub will look spectacularly large-scale paintings of the seething sea and ships, dissecting waves. The effect will increase if the pattern extends to the entire ceiling. </ ul>


