One of the most important steps in a major overhaulis plastering surfaces indoors or outdoors. This is not the easiest stage, but it is quite possible to do it yourself without hiring specialists. Especially if the work area is not that big. First, you need to understand why this process is needed and what the technology of plastering walls is, and only then start working. Plastering allows you to level the walls for further finishing. The first point is simple, here are just some of the possibilities of plastering:
- leveling of irregularities;
- protection against moisture and fungus;
- additional strength;
- thermal insulation;
- soil for further wall finishing;
- preservation of the room space.
For example, plasterboard sheathing does not provide thisthe same effect, and often takes up a lot of space, which sometimes simply needs to be saved. The technique of plastering requires special attention and accuracy. It consists in the fact that it is necessary to follow certain rules and recommendations, as well as consistently go through a number of stages: prepare materials for plastering, the room itself, make markings and, finally, apply the solution for finishing the walls.
Surface preparation
 Priming the walls is necessary to improve adhesion.plaster with the wall. Of course, it is very important what materials will be used and how exactly to work with them. But first of all, you need to figure out the walls to which the mixture will be applied. Pay attention to the material - brick, concrete or wood - this will determine how the work will go. They will have to be prepared according to the standard. There should be no traces of previous repair work on them. For any type of wall decoration, this is almost a rule. And plaster, including, will not lie tightly on the surface where there are pieces of wallpaper, paint, dirt from dust, grease and anything else. Therefore, everything should be thoroughly cleaned, scraped off, etc. Particular attention should be paid to such areas that crumble and crumble. This also needs to be cleaned until the wall begins in a normal solid state (even if a depression forms in this place). There is nothing terrible in this, everything will be repaired in the next stages. The same applies to cracks and holes - they are even widened in order to be sealed up well and firmly during repairs in the future. Large and hard dirt is removed with a hammer and chisel or a metal scraper, and dust is brushed off with a soft brush. If huge holes do occur, nails should be hammered into them, and for a better effect, they should also be filled with mesh.
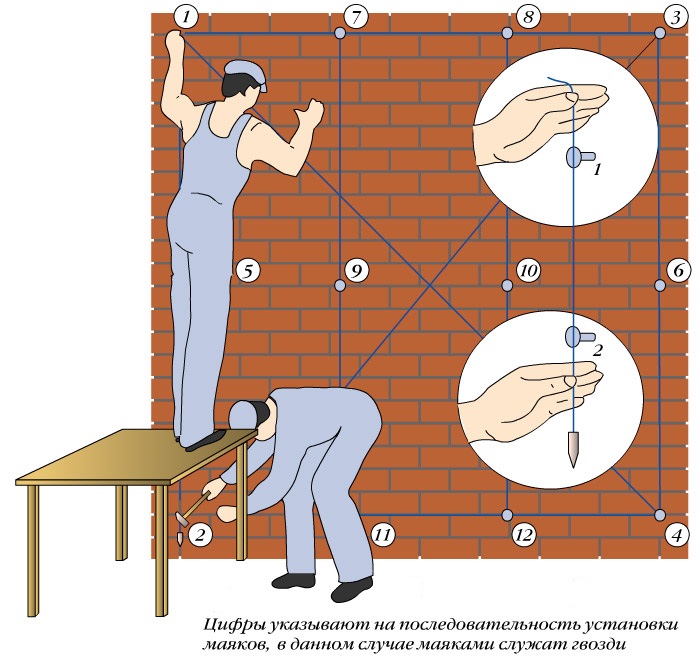
 The process of installing the markings beforeplastering. You can take your time shaking off the dust. First, you need to make notches over the entire surface. This process will help the solution adhere well to the wall. A special reinforcing mesh is nailed to the wooden surfaces. The same can be done on other materials. The next step is to apply the primer. Usually, this is a non-viscous liquid that can be applied with a roller, large brush or sprayer. The primer should be purchased based on the material the walls are made of and what kind of plaster will be used. As a rule, different companies produce several materials for plastering walls at the same time and sell them practically in pairs. Or they write on the package with the solution which primer is suitable for it. Next, you need to make markings so that the walls after the repair are really even. The easiest way is to fix a fishing line or thread at the top of the ceiling and lower it down, making sure that the direction is strictly perpendicular to the floor. This is done along the entire perimeter so that there is something to measure against. Return to contents</a>
The main stage of wall decoration
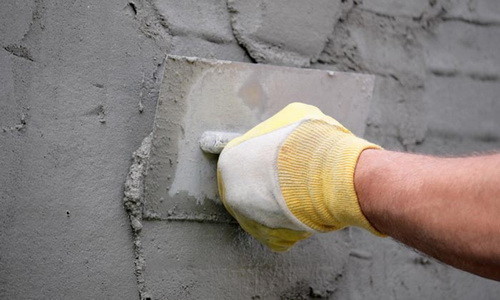
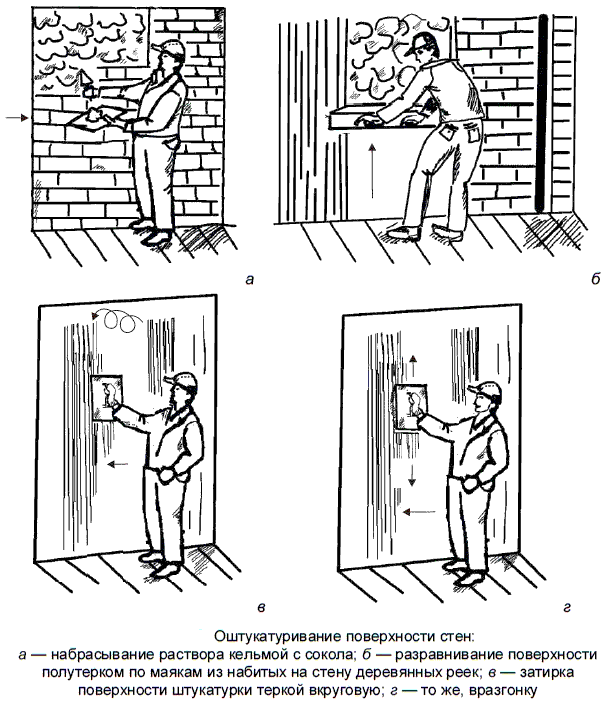
Finally, the last and most important thing isto do for finishing the walls - the plastering itself. It is done in several stages. The first of them is spraying. A solution of such a consistency as liquid sour cream is prepared and sprayed on the wall in a layer of 5 mm. When using a mesh, the layer thickness increases to 9-10 mm. The next stage is applying the primer. It should be like a thick dough, and you can level the plane with it until the result is completely satisfactory. However, it is better not to exceed 10 mm at this stage. Technology of applying plaster to a wall.The last layer of wall finishing is the top coat. It is also done with a liquid plaster solution, with wave-like movements of a float, and not by spraying. Here everything needs to be leveled very carefully, since this is the plane on which wallpaper will be pasted, paint or other materials will be applied. The finishing technology assumes that the worker has special skills. But even a person who has never done this before will not have a hard time learning. The main thing is diligence and attentiveness. For example, in order to make the correct spray of the first layer, you can remember the game of table tennis. The hand movements are very similar. The mixture is collected on a hawk, and then picked up with the edge of the trowel and thrown onto the wall as if a person were hitting a ping-pong ball. And so on until the very end. Although specialists have machines with sprayers that help to do this in a mechanized way. There is no need to level anything after this. Leave it as is and wait for it to dry. The second can be done with the same hawk, but wide spatulas and a rule will also come in handy. The mixture is transferred to the wall surface with a trowel or the hawk itself, pressing it to the wall slightly at an angle, but almost in a vertical position, and then leveled with a rule. Return to contents</a>
Tools and materials needed for wall decoration
The first thing you need to do is choose the right one -This is the plaster itself. Cement-lime or cement-sand is suitable for concrete, brick, and ceramics. It is also used in bathrooms, since there is high humidity there. But in dry rooms, you can use gypsum. There is also decorative plaster, but it is not used to level walls. You will also need a primer for finishing the walls, which is selected in accordance with the main solution. It is important to choose in advance what and with what to apply the materials. Tools that will be needed for the work:
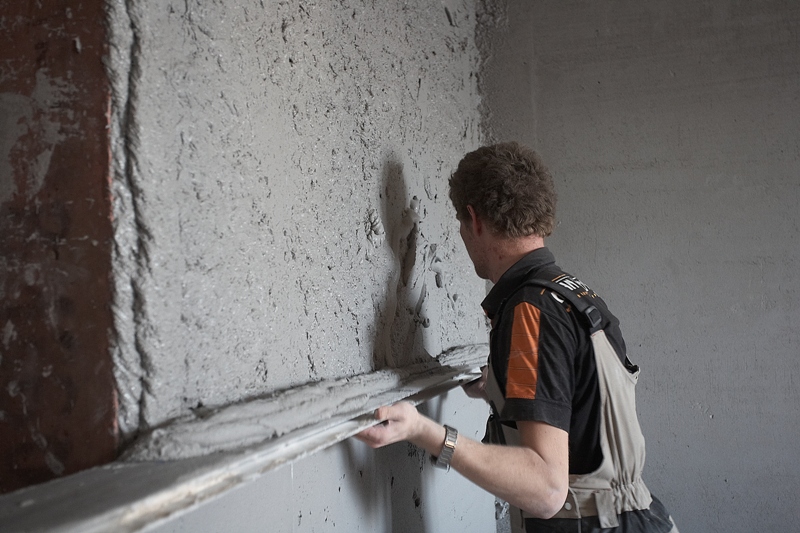
 Using a rule, the plaster is leveledthe entire width between the beacons. Spatulas of different sizes. Large ones are needed for applying plaster to a large area, which speeds up the work. Small ones are convenient for doing this in corners, near door and window openings and in hard-to-reach places.
Return to Contents</a>
Rules to be followed
The technology of plastering walls requires precision,order and neatness in everything - this applies to cleanliness in the workplace, and a clear sequence of stages, and the correct application of the plaster itself. So, first of all, you need to remove everything unnecessary from the room. If you can’t take out furniture and other objects, then they must be placed in the center of the room as close to each other as possible and covered with film. Materials and tools are arranged so that nothing is underfoot and does not interfere with free movement. This rule concerns the convenience and safety of workers. Next, in the room where the walls are being finished, it is advisable to constantly maintain the same temperature. This will allow you to do everything quickly and clearly. At the same time, the temperature should fluctuate between + 5º C and + 30º C. Humidity - no more than 60%. Otherwise, there will be problems with the application and drying of the mixtures. The process of plastering the walls begins from the ceiling, and then work is done on the walls. First of all, cracks and depressions are filled and allowed to dry. Be sure to wait until each layer is completely dry after applying it, and only then continue applying the next one. And do not forget what the manufacturers themselves advise. The packages of plaster and wall finishing mixtures usually contain all the information that you need to read and use in your work. provide for a smooth, but at the same time rough surface, since it will be easier to adhere to paint or wallpaper. Therefore, you need to level it several times, rubbing the entire area of the walls well. You cannot allow the appearance of bumps, bubbles, cracks, peeling and other troubles. They will spoil all further repairs. Therefore, you should wait until it dries, and then immediately fix all the problems and continue the repair. So, there is nothing particularly difficult in this kind of work. You just need to pay close attention to the rules of plastering and carefully select materials and tools. And then the main thing is to get the hang of it and apply the plaster as it should be, and in the end, carefully level everything. Almost anyone can do it. The repair technology does not necessarily require the intervention of specialists, so you can do everything cheaply and cheerfully.


