It has become fashionable to create designs latelyrooms using decorations on the ceiling. This is especially true if we are talking about a child's room or a teenager's room. In order to make the ceiling beautiful, you do not have to be an artist. Some plots can be brought to life on your own. Clouds on the ceiling create harmony and comfort ininterior. For example, it is quite easy to make a cloud on the ceiling with your own hands, which will be a wonderful decoration for a child's room. Such a drawing will bring a calm and peaceful atmosphere to the house, and the child will fall asleep better looking at it. But, in addition to the drawing, you can create mobile and relief clouds. They are easy to make, and the result will be amazing. To have an idea of what such clouds will look like, you need to consider the methods of their manufacture.
How to draw a cloud?
To make a cloud on the ceiling, you will need the following materials and tools:
- water colors of blue and white colors;
- a spray gun or brush;
- shallow tray for paint;
- porous sponge (not foam rubber).
It is advisable to decorate the ceiling with such a pattern.only when the overall style direction matches the given element. For example, if you draw clouds on the ceiling in a room with a sports theme, they will not look harmonious, but they will successfully fit into a room with plant patterns.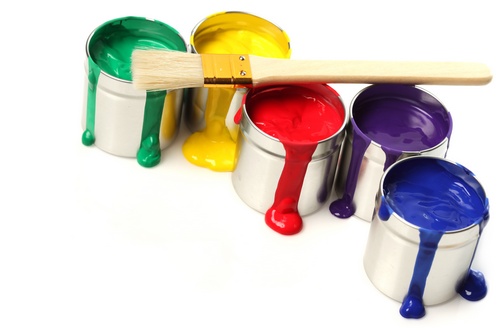 To draw clouds you will needbrush, blue and white paint, paint container. Before you start working, you need to cover the interior items with polyethylene or take them out of the room. Then you need to prepare the surface of the ceiling. It should be completely free of stains, dust and dirt. After that, the entire ceiling is covered with blue paint using a sprayer or brush. When working, you need to ensure that the paint is applied evenly. When the first layer dries, the paint needs to be applied one more time. After 24 hours, you can begin the process of creating a cloud on the ceiling. The drawing can consist of one large cloud or many small ones. It is more difficult to draw one large cloud, here, most likely, artistic skills will be required. The drawing is applied using white paint and an elastic porous sponge. It is advisable to use a natural sea sponge. A small amount of paint must be poured into a shallow tray, then the sponge rolled into a poke is dipped into the dye and quickly touches the ceiling. The strokes should be applied carefully and lightly to give the clouds their inherent airiness.
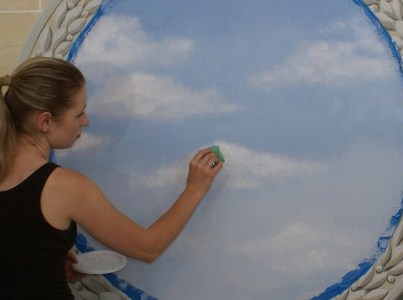 The clouds are drawn using a porous sponge andwhite paint. Before work, you can draw the outlines of the clouds with chalk and apply paint accordingly. In order for the clouds on the ceiling to look more natural, experts recommend applying more paint to the center and less to the edges, slightly shading the outlines. It is desirable that the objects on the ceiling have different sizes and shapes: this way the drawing will have a more natural look. If you need to make clouds in perspective, you should add a little pink or purple color to the white paint. This technique can also be used to create a night or morning sky illuminated by the rising sun. The main thing here is not to overdo it. Although the process involves the implementation of creative ideas, the sky on the ceiling should look as natural as possible. After painting, the room must be well ventilated to get rid of the unpleasant odor. In addition, an open window will speed up the drying time of the dye. Return to the table of contents</a>
Clouds glued or suspended from the ceiling
Clouds can be not only painted, but also glued. In order to create relief clouds on the ceiling, you will need the following materials and tools:
- cotton wool;
- starch paste;
- dishes for paste;
- scissors.
 Clouds of cotton wool create a relief ceiling,which looks very beautiful. First, you need to prepare the paste. This is done as follows: 2 tablespoons of potato starch are dissolved in a glass of cool water. Then the water should be slowly heated, stirring constantly. The liquid should be brought to a boil, but it cannot be boiled, otherwise the adhesive will lose its properties. It is advisable to use the paste in a warm state. Then you need to make clouds. How to make clouds on the ceiling from cotton wool? Very simple: the cotton wool must be divided into lumps of different sizes and stretched to give the desired shape. After this, the cotton wool is dipped in warm paste. The adhesive should be distributed over the entire surface of the future cloud. The lumps soaked in glue should be combined into one large object of the desired shape. In this way, you can make one cloud or several. Then the cotton wool should be dried for at least a day. In order for the part to dry well, it should be turned over every 2-3 hours. When the paste dries, the cloud should be slightly kneaded to give it fluffiness. The finished parts are glued to the ceiling or attached to it using white threads or transparent thin fishing line. To make the decor look natural, it is better to use different lengths of threads. If you need to make the parts urgently, you can use a simpler method - spray the surface of the cotton wool with hairspray. When the varnish hardens, the cotton wool is slightly kneaded and attached to the ceiling. Return to the table of contents</a>
Making mobile clouds from air balls
Balloons and papier-mâché can be used as a base for clouds hovering under the ceiling. For work you will need:
- several air balls;
- thin white paper;
- cotton wool;
- glue PVA or paste.
First of all, you need to inflate the balloons.It is better if they are inflated with helium. Then several balloons are folded into the shape of a large cloud and glued together. After that, you should prepare paper and glue for papier-mâché. This can be done as follows:
After the paper dries, you getone large cloud that rises up to the ceiling on its own and can move to any desired location. To give the cloud a more natural look, it is covered with cotton wool. If the cloud is filled not with helium, but with ordinary air, it is suspended from the ceiling on a thread. Clouds on the ceiling are a great idea for decorating a child's room. Such decor will not only look original, but will also create a sense of a fairy tale in the room, which all small children love so much. It will bring joy to both you and your guests.


