During repair of any complexity at homemasters can appear questions about how to deal with cracks on the ceiling and walls. On the quality of their sealing depends at times the result of many days of work on the design of the apartment.  Cracks in the ceiling can be caused by differentreasons: due to movement of floors, poor-quality finish or due to irregularities in the installation technology. The nature of cracks in the ceiling can be different and depends most often on the material from which the ceiling is made, on the quality of the plaster and on the observance of technology, on reasons independent of the builders, etc. In any case, you will have to process and eliminate these defects. It is quite possible to do this with your own hands.
Methods for repairing cracks in the ceiling
There are several ways to solve the problem yourself: 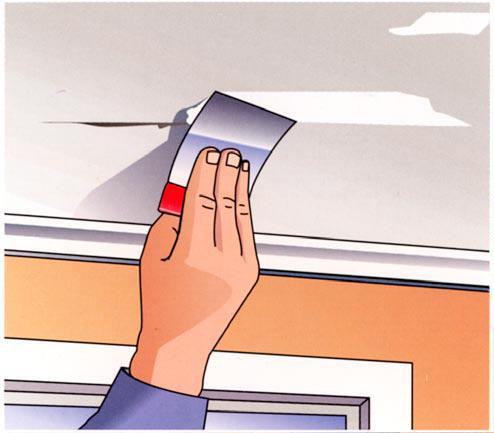 Small cracks on the ceiling can be sealed with a putty.
Back to contents</a> How to prepare for work? 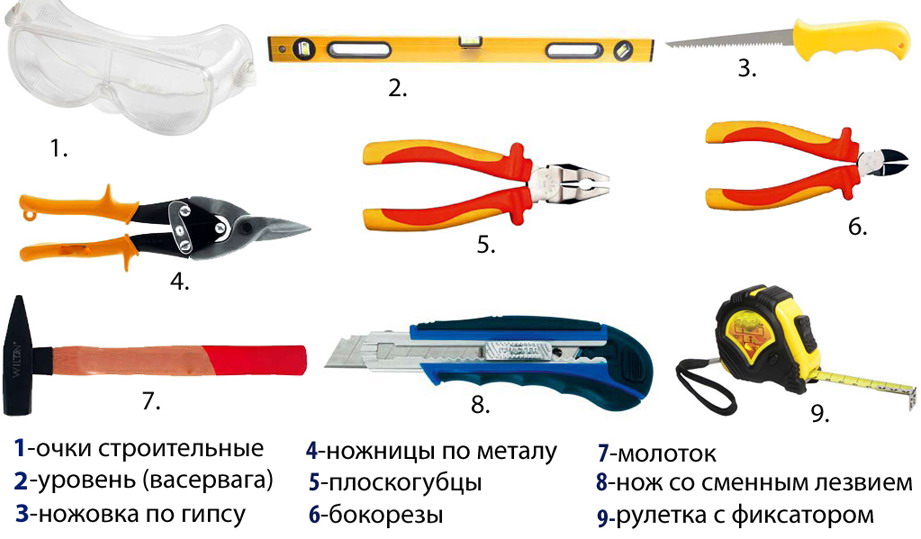 Tools for installation and repair of drywall. Before the beginning of the work on the elimination of defects it is necessary to carefully evaluate their dimensions: assess the condition of the plaster, determine the true width and depth of the crack. After the evaluation activities, choose the method acceptable for repair and engage in the acquisition and preparation of such materials and tools as:
- gypsum mixture dry for puttying (Ceresite or others);
- reinforcing mesh;
- sealant, foam or other fillers;
- PVA glue;
- priming mixture of deep penetration;
- spatulas;
- solution tank;
- spray with water.
The exfoliated part of the plaster must be removedcompletely up to layers that have retained their strength. Deep crack caused by the displacement of slabs, clean off plaster, putty, decorative coating, etc. Defect between GKL to release from the sickle or reinforcing tape, if it is, clean and with a sharp knife remove the bevel from the edges of adjacent plates GKL. The surfaces to be repaired should be thoroughly cleaned with dust using a spray gun with water. Such a measure is necessary because modern mixtures for puttying are made on the basis of gypsum and have low adhesion to the dry surface. Neglect of such a trifle as dust removal and wetting of the surface, will lead to the formation of a new crack on the ceiling after repairs have just been eliminated. Back to contents</a>
Technology for repairing defects in the ceiling
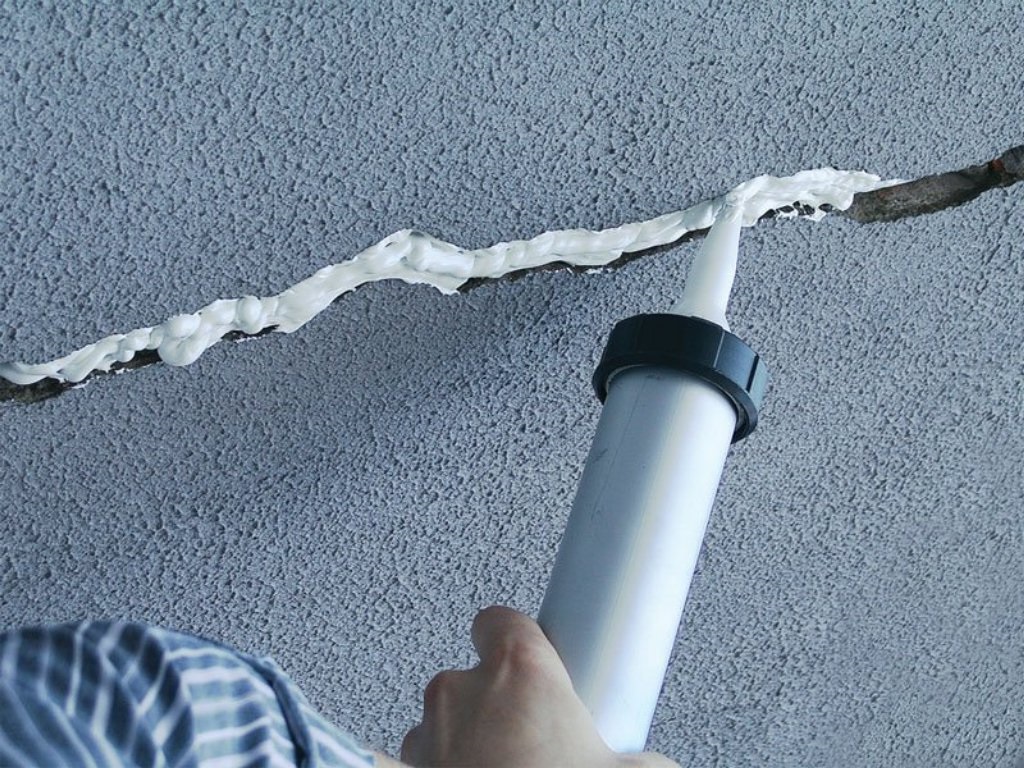 Deep cracks filled with mounting foam,sealant or rags, moistened with PVA glue. Small cracks should be filled with a spatula carefully filled with a mixture for puttying with the help of the manufacturer's instructions, rubbing it with effort to ensure filling of the cavity inside. Standing on the surface of the ceiling mixture is removed with the same spatula and as closely as possible level the area around the repair site. After drying for 24 hours, the fouled crack and adjacent areas are sanded with sandpaper, achieving smoothness and removing possible irregularities. After this, the ceiling can be painted or otherwise finished. Deep cracks that arise due to the shrinkage of the building in new buildings, repair will have to be done differently:
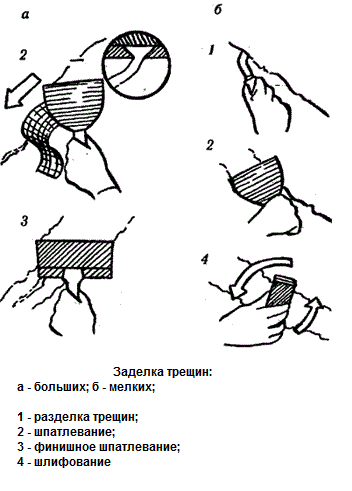 Scheme for sealing cracks. If cracks appeared as a result of detachment of plaster or paint, then the primed composition should be applied to the cleared and moistened area, and then a layer of putty mixture, filling the groove level with the remaining coating. Do it comfortably with a wide spatula or rule, conducting them immediately over the entire surface of the repaired area. With a considerable depth of the groove, it is best to fill it in a few steps, slightly drying the previous layer, the surface of which is not leveled. After the work is completed, the putty should dry within 24 hours.
 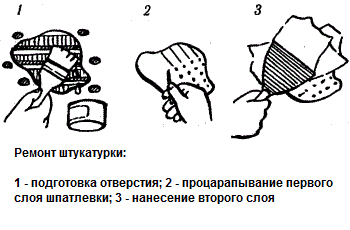 Repair of peeling plaster. Then the final mixture should be wiped with small cracks, if any, applying and leveling a thin layer of putty. After drying it should be sanded and painted. Cracks between sheets GKL with the removed facet to fill with a mix for шпаклевки, to level a surface. On the seam apply reinforcing mesh or serpian and apply a layer of finishing mix. Wait for it to dry for 12-24 hours. Apply primer in 1-2 coats. Putty with a thin layer of finishing mixture. Align it, dry it and sand it to a smooth state. If it is impossible to repair the crack on the ceiling in a qualitative way, they will have to stick to the ceiling a decorative tile made of polystyrene foam. To calculate the number of tiles, draw a ceiling plan on the scale and apply a grid of lines with a pitch that is equal to the size of the tile on the same scale. You can replace the tiles with wallpaper or stained glass, but in these cases, remember that the crack caused by the displacement of the slabs or walls will increase and cause the wallpaper to peel off, break them, break some of the tiles and other troubles. In new buildings, the process of shrinkage of the building can last several years and only after its completion will it be possible to qualitatively eliminate the defects caused by it and make the final repair of the cracks. </ ul>


