There is nothing better than work done by yourselfwith your hands. This statement can probably be called indisputable, because in what you make yourself, you put your love and unique quality. In the end, it should be noted that in such a product you will be able to realize all your desires regarding it. Now is the time of technology, so you probably have a computer. If you are interested in showing creativity and making a high-quality computer desk from wood with your own hands, then welcome, we will tell you how to do it!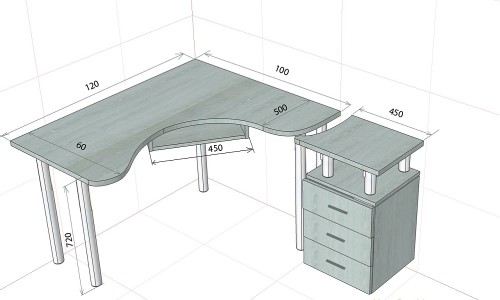 Drawing of a corner computer desk with dimensions.So, let's get down to achieving our goal, to creating a computer desk that will help organize all the components of a personal computer, and will also make your workspace a truly stylish and modern place. But first, we need to decide on a list of tools and materials that will be useful to us in our work:
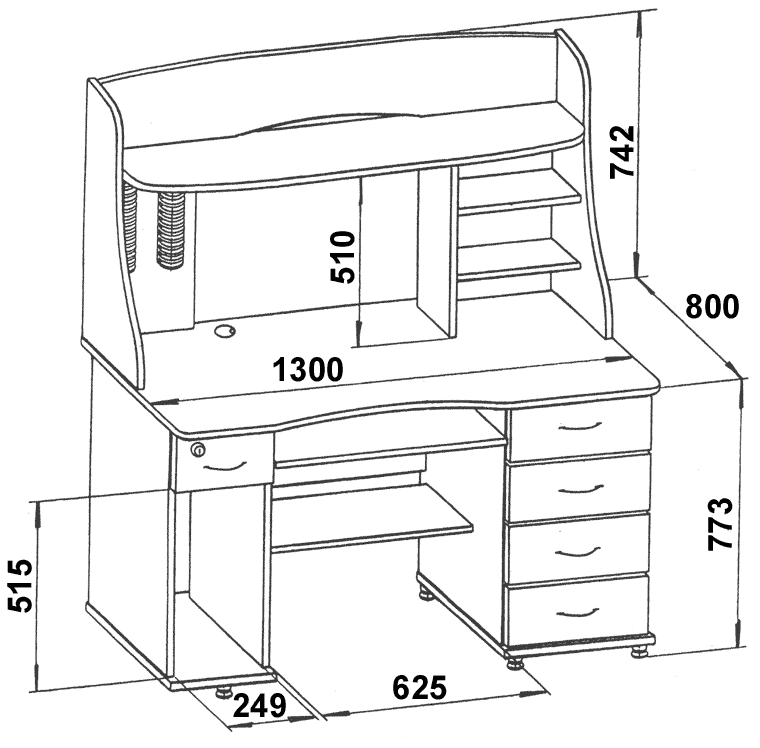 Drawing of a straight computer desk with upper shelves.
- a furniture board (wood) measuring 18x400x2000 mm in quantity of 3 pieces;
- boards of furniture 18x600x2000 mm in quantity of 2,5 pcs .;
- wooden furniture boards, dimensions 18x200x2000 mm - 2 pcs.;
- plywood, the dimensions of which will be 1526x1525x6.5 mm;
- glossy varnish - 2 l;
- a cutting board measuring 12 × 125 mm, in an amount of 6 meters;
- roller guides, length 500 mm - 3 sets (for working with drawers);
- roller guides, length 400 mm - 1 set (for working with a sliding panel);
- self-tapping screws 5 × 60 mm in size of 60 pieces;
- handles for furniture in quantity of 3 pieces.
Let's get to work (instructions)
 Assembly diagram of a computer desk drawer.In order to start work on creating a wooden table with your own hands, you need to decide in what order each stage of the work should be performed. First of all, you need to make all the parts, of which, in fact, our table will consist. Therefore, the work plan is as follows: we make parts for the table, compare their sizes relative to each other and try to connect dry, in order to make sure that the final version of the table suits us and the parts do not require modifications. After completing our check, we must sand and varnish all the components of the table and then assemble it again, this time finally. But everything in order. Let's start creating parts so that our computer desk is ready for use soon. Return to the table of contents</a>How to make parts for a computer desk?
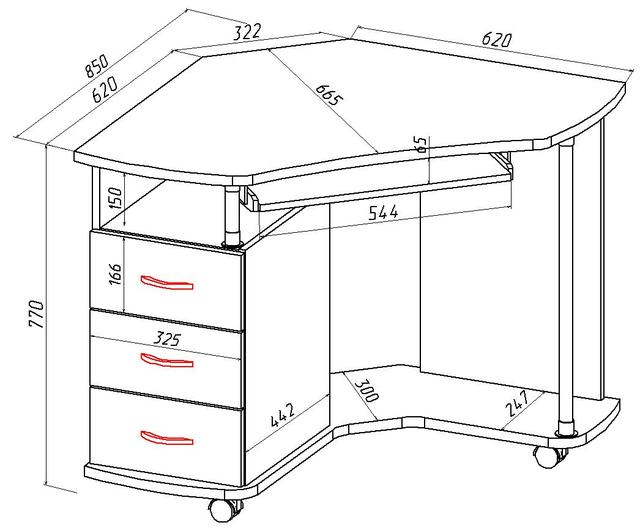 Drawing of a mobile computer desk.We take our pre-prepared furniture boards measuring 18 by 600 mm and begin the manufacturing process. At this stage of creation, you need to cut out the wall that will be in the center, a vertical shape, the bottom and the top of your desk cabinet, and the tabletop of the desired shape. Here you can be original. The design of the table is such that the upper front corners of the side and central walls must be cut 2 by 2 cm. For an original look, the corners must be rounded using sandpaper. To be able to move the computer desk as close to the wall as possible, the back corners are cut to the size of the baseboard. In order for your table design to be high-quality and rigid, you need to attach a panel to it. For this, you will need a wooden board measuring 18 by 200 mm. As soon as you have made all the described parts of the table, you need to connect them with self-tapping screws. To prevent the material from cracking, you need to drill special holes of the appropriate size for them.
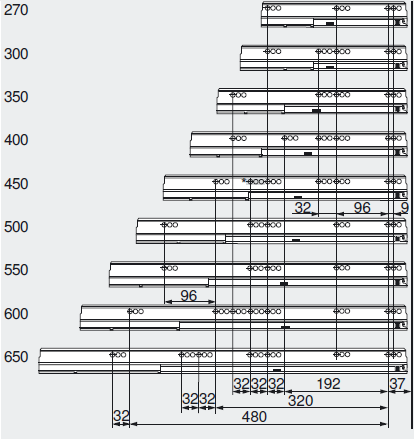 Dimensions of drawer guides.Now you need to make a special niche in which you can place the system unit on the table. It consists of a shelf at the bottom, on which you will put the system unit, and a side niche rounded at the front and cut to fit the baseboard. In order to improve the appearance of your table, after installing the bottom shelf, close the resulting opening with any material, for example, a baseboard. You can fix it with dowels. You need to choose them because if you fix it with screws, they will be visible, and this will spoil the overall design of the table. The peculiarity of such a table is that we do not use glue, since this is not a very reliable method of fixing. A wooden board measuring 400 by 2000 mm must be sawn lengthwise, this is the beginning of making the top shelf. The work must be done carefully, since this strip is thin and fragile, and serves to create the back panel.
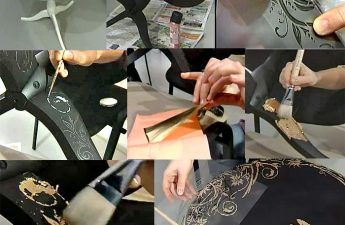
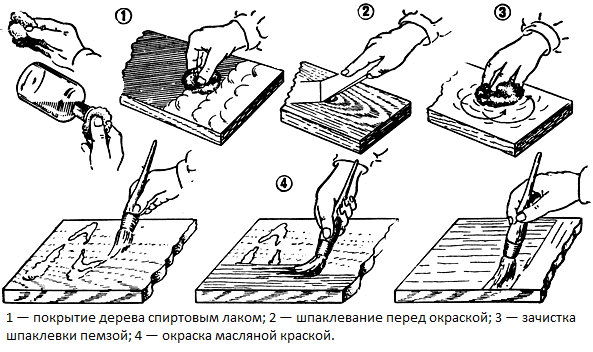 Stages of varnishing and painting woodcomputer desk. To make the middle partition of our wooden desk, a board with the specified dimensions of 200 × 2000 mm is suitable. Next, drill holes in the tabletop and secure the partition with screws. It is necessary to use a square throughout the work to ensure the evenness of the computer desk. Having installed the central wall, we attach the crossbar, put the upper shelf on the partition in the middle and fix it with screws. The left side of the table is made in the same way, taking into account the availability of the types of shelves that you wish to see. There you can make something like a niche for the system unit, only for placing a subwoofer on it. Return to the table of contents</a>Drawers and keyboard panel FourThe cut boards must be fastened with screws and the bottom made of plywood. The depth must be determined based on the length of the roller guides and your personal preferences regarding the size of the table. During installation, observe symmetry. One important rule: the roller guides should not be fastened at the same level as the edges of the cabinet, which are the front ones. Do not forget that the front panels will be fastened later. The keyboard shelf is made based on the width of the roller guides. When you have assembled the final version of the table, separate all the parts and varnish them. It is advisable to do this in two layers. This will be a worthy protection for your wooden table from scratches. After the varnish has dried, you can finally assemble your creation completely. After the assembly is complete, the final process remains: fastening the handles to the front panels of the drawers for opening them.
