It is often necessary to do various things at the dachado-it-yourself constructions. This can apply to absolutely any products. Many people have various materials left at their dachas after construction work. An example would be clapboard. It is used to decorate a wide variety of buildings. For example, you can make a door from clapboard with your own hands. This is what we will talk about next. Doors made from clapboard are made very simply, but look very stylish.
Initial stage of work
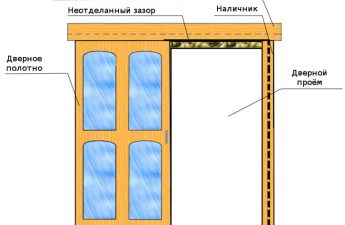
Before heading to the store formaterials, it is necessary to make the necessary measurements of the doorway. Most often, a standard door has a geometric height of -2 meters, and a width of -up to 90 cm. For measurements, you will have to get a tape measure. The size of the door directly depends on the geometry of the opening. You can also, for example, make a window through which it will be possible to look into the room from the outside. The frame does not always fail. It can be used as a base.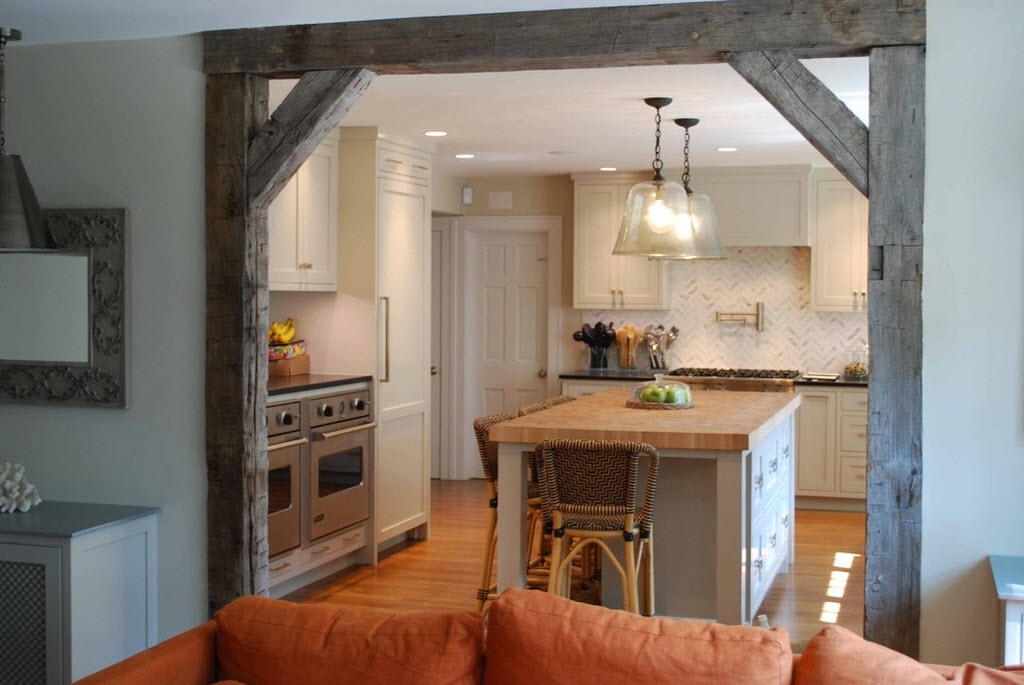 Measurements for a door made of clapboard.However, this can only be done if it is really well preserved. In some situations, you will need to make the frame yourself. If it does not look very respectable, then it will have to be made of bars. Its geometric dimensions are 100 * 100 cm. A standard tool for this work will be quite sufficient. You can use ordinary nails and a hammer. After the frame is installed, you need to take all the necessary measurements from it, which will allow you to make a door that is clear in terms of geometry. Now you need to decide on the main material from which the door itself will be made. Boards are best suited for these purposes. Many people use plywood for these purposes, but this significantly increases the cost of the entire structure as a whole. It is better to get by with ordinary boards, the thickness of which will be at least 30 mm. In this case, the lining itself will be used for the central part. This will give the door a high-quality aesthetic appearance. This design option meets all modern requirements. It is better to buy material in construction stores, but you can just walk to the market. Return to contents</a>
Operating Instructions
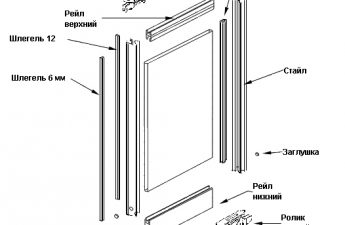
So now the box is ready to go, and this ismeans that you can start. If the door has a geometry of 180*80, then the sequence will be as given below. By the way, all the tools and materials must be put in one place so that they can be reached without any problems if necessary. It is not necessary to make a workbench. For these purposes, you can use an ordinary bench. Types of door paneling profiles.First, you need to cut two boards 180 cm long. After all, this is the size of the door. You can use a regular hand saw or an electric jigsaw for the job. Next, you will need to use a door with a cutter. It is installed in the device. Using a drill, make grooves on the end side. Their depth should be 50 mm, and the width - 10 mm. They will form the side of the door from the clapboard. Next, you need to take a saw or an electric jigsaw in your hands again. Using the tool, cut three boards 70 cm long. Then, you should step back about 5 cm from the edges of the cut boards, and then grind these places to a depth of 10 mm. Moreover, this is done not only from the top or bottom. Now you need to insert one of the boards into the vertical components of the structure. The result is a structure that resembles the letter P. Now you can proceed directly to cutting the clapboard. Any available tool is also used for this. It is best to use a jigsaw, as this will give you smoother edges on the material. The lining should be 70 cm long. The thickness of the board is approximately 4 cm, based on this you should calculate the total amount of material that will be needed for upholstery of 180 cm height. The thickness of the lining can be very different. When calculating, you should start from the final height of the doorway. It is better to buy material with a small reserve, so that you do not have to run around the stores later.
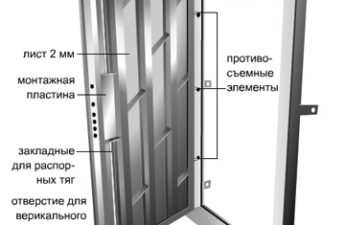
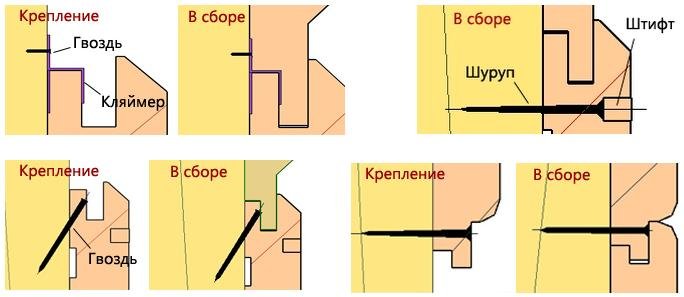 Schemes for fastening the lining to the door.The resulting planks should be inserted into the vertical grooves of the boards that were prepared earlier. The material can be fastened with the most common nails. It is better to use nails that are not too long, as they can affect the aesthetics of the door. This is how all the rows of lining are laid out. By the way, the material can be fastened not only with ordinary nails, but also with self-tapping screws. For these purposes, you will have to get a screwdriver. The most common standard self-tapping screws are quite suitable. The last row is closed with a board, which should also be prepared in advance. The result should be a fairly strong structure that will allow the door to be used for many years in almost any conditions. At the same time, the middle part of the door still remains weak. It needs to be made rigid. For this, the last board is used, which is 70 cm long. It is nailed in the middle part of the door. The result is a fairly high-quality coupler, which significantly increases the rigidity of the entire structure as a whole. Now all that remains is to install the door in its rightful place. To do this, first attach the hinges to it. You can use absolutely any design. At this point, you should definitely attach the handle. Its design is selected depending on the tastes of the person. Otherwise, hanging the door involves a standard set of actions. Everything is extremely simple and clear. You just need to take the door and hang it on the hinges that were installed on the frame. Of course, the lining is not the only material that can be used as an additional one for the door. In this situation, a plywood panel will do just fine. However, it is worth noting that the aesthetics of the door in this case will be lame. It is also worth noting the high cost of plywood. Today, it is easier to buy high-quality lining, rather than the cheapest plywood. Return to the table of contents</a>
Conclusion and summing up
So now every reader knows for sure thathow to make a door from a lining with your own hands. As you can see, the process itself does not present any supernatural difficulties. The most important thing is to get all the necessary tools and materials, and then get to work. The instructions presented above will definitely help every beginner, and not only a beginner. It will also be quite useful for experienced carpentry masters. You can also give some useful tips that will definitely come in handy in the work. It is necessary to use a jigsaw for processing the lining itself, if possible. Fortunately, today no one should have any problems finding such a tool. It can be purchased at any specialized store, and if necessary, simply borrow from friends or acquaintances. It is best to use self-tapping screws to fasten the material. A screwdriver is extremely easy to find today. Perhaps, the person who started the work already has one in his arsenal.