Any chair eventually begins to deteriorate,upholstery breaks, and if there is a cross with wheels, then, perhaps, they need to be replaced. Repairing the chair with your own hands is not so complicated, it can be considered using the example of a small wheelchair, which requires a necking, replacing the packing.  The device layout of the chair.
How to repair an old chair?
Before repairing the chair with your own hands, you must immediately prepare all the materials and tools that will be required to carry out such work. The list is as follows:
- Cloth for covering the chair (it can be velor, suede, natural or artificial leather and other types of furniture upholstery);
- a piece of natural or artificial leather for the armrests and for the cross;
- foam rubber for replacing the packing (for the seat you can take foam polyethylene). The thickness of the packing is usually 20-40 mm;
- for the lining you can use sintepon;
- threads and needles;
- scissors;
- buttons that can be covered with a cloth;
- Furniture stapler;
- drill;
- Spare wheel spigot, if replacement is required.
Before you repair your seathands, it is necessary to disassemble it. Furniture is usually made on the basis of metal frames bolted together, so there should be no difficulties. It is only necessary to remember how and in which places individual elements of the structure were fixed. It is necessary to remove the backrest and disassemble it, remove the seat, remove the cross with the wheels. Back to contents</a>
Seat Folding
 Picture 1. In order for the chair to be transformed, it is enough to re-tighten his seat and back. At a seat it is necessary to replace not only a fabric, but also a stuffing. The choice of material in this case depends on the model of the chair. If a soft seat is required, then you can take foam rubber, but in some cases a piece of foam polyethylene of the required thickness is also suitable (you need to be guided by the thickness of the old packing). The material is carefully cut out and then glued to the base. It is best to cut the padding so that it goes a little past the edges, on the back side, the material is fastened with a furniture stapler. The next step is to create a piece of fabric for the upholstery. It is made in the form of a cover, all seams should be made with a turn if the fabric is thick enough, and its edges do not require additional processing. This option is great for leather, suede, some woolen thick fabrics. For the rest, the usual cover is sewn, which then turns out and stretches on the seat. The fabric should be straightened, sew the left part. If a cushion is used for a chair, then it can be provided with a rather original but convenient fixing system. On the seat, when sewing a cover, a velcro tape is sewn. The second part of the Velcro fastens on the cushion cover. Back to contents</a>
Works with back
To be comfortable with the back, it should beto disassemble. Small armchairs are often made today on a metal frame, from which the back is removed in the same way as the seat. The back can be integral or of 2 parts. Repair in the second case is simpler. Sewing is not necessary, only the replacement of the packing will be performed, a tightening with a new cloth with the addition of buttons. As a result, your favorite chair will literally change before your eyes. An example of restoration work is shown in Fig. 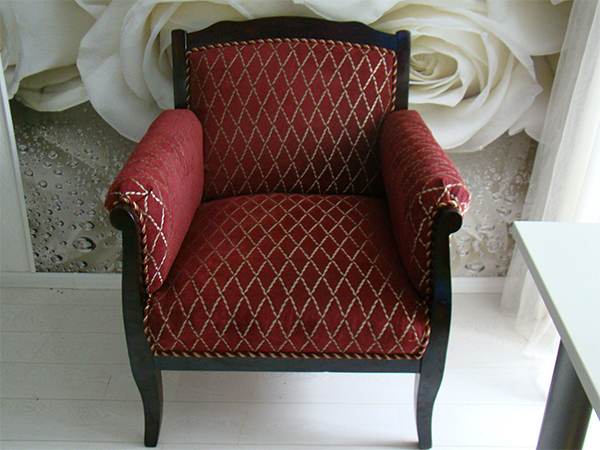 Figure 2.It is advisable to select the fabric for the upholstery in the same tones as for other furniture in the house. What is the best way to start restoration work? First you need to prepare a wooden base for the backrest for the constriction. With a ruler and a simple pencil on the back, markings are made in the form of rhombuses. The intersection points will be where the buttons are attached. Holes are drilled at these points. Next, you need to glue a piece of foam rubber on the back. If necessary, a double layer of foam rubber is made in the lower part of the backrest. In the foam, you need to carefully make holes for future buttons. After the main part of the work is completed, you need to start upholstery of both parts of the back (front and rear). The fabric is pre-cut, trims are retained as they will be used to tighten the buttons. It is used to stretch the fabric, but you can fix the fabric with a furniture stapler. During the stretch, you should look so that there are no folds left. On the front, the canvas will be additionally stretched with decorative buttons. You can take various fabrics to cover the chair, but they must be durable. In addition, the fabric should be easy to clean, natural or artificial leather, velor is good for work. The color is best taken the same as the rest of the chairs and sofas in the room, so that the upholstery matches them or is done in the same tone. Another example of a restored chair can be seen in fig. 2. Back to the table of contents</a>
Cross repair
If the cross at the armchair broke or acquiredquite unsightly appearance, it can be replaced. This will be much cheaper than replacing individual items that you need to buy somewhere. To minimize costs, you can purchase a cross from plastic (these are usually used for office chairs). But since her appearance for a home chair does not quite fit, plastic can be covered with natural or beautiful artificial leather. It is not so difficult to do this, it is enough to cut a piece of leather so that it tightly covers the pieces of the crosspiece to the wheels and the vertical part. They need to be stitched with a special waxed thread, the color can be selected for skin coloring or contrast. Similarly, you can trim the armrests so that the armchair looks beautiful and harmonious. The skin itself needs to be strengthened with decorative carnations. If there is experience, then the skin surface can be decorated with special paint. After all the individual elements for the chair are ready, you can start assembling. For the back from the fabric, buttons are made, they are fastened with a stapler or strong kapron thread from the back. Then the back of the chair is strengthened. The cross is screwed into place. At this, the repair of the chair with his own hands is over. If the upholstery on the favorite chair or the arm rests have become ugly and badly scratched, it is not necessary to throw it away or cover it with a sheath. With their own hands, furniture can easily be repaired, completely changing the appearance or simply replacing the upholstery. This work is not complicated, it is necessary only to clearly define what is required to be done and prepare materials.


