Plastering is one of the oldest and mostreliable ways to level the walls. In addition, the plaster makes the surfaces more durable. Although the plastered surfaces serve for a very long time, they also need repair, since cracks appear on them over time. In addition, the plaster state is affected by a number of factors - from the level of humidity in the room to the degree of impact on the surface of mechanical loads (the plaster coating quickly breaks down in the window and doorways). In addition, frequent repair of plaster is inevitable where a poor-quality mortar was applied or the walls for work were not thoroughly prepared. The following tips will help you avoid mistakes when repairing interior walls. Following the recommendations, you can forget about the frequent repair of the partitions in the apartment. In addition, they will become a reliable basis for any finishing material.  From time to time, walls finished with plaster should be repaired, as they can become unusable due to dampness in the room or a poor-quality solution.
How to prepare the walls for repair?
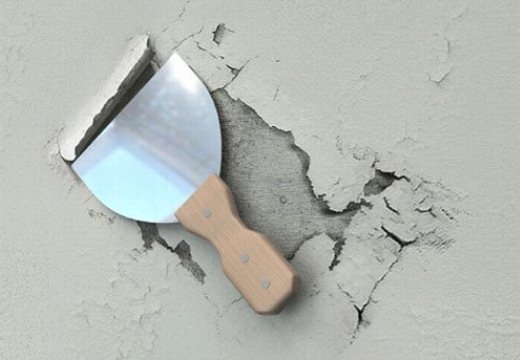 Before repair, you need to remove the old layercracked and swollen plaster. A radical way of repairing walls inside a building might seem to be a complete replacement of the plaster, but it is unlikely that such an operation would look reasonable, if in general the walls look good. New plastering may be necessary before laying the tile on a surface that was previously, for example, painted. But more on that later. In the meantime, if you plan only to slightly update the partitions before pasting wallpaper or new painting, it is enough to determine the most problem areas of the surface. Cracks, for example, are visible to the naked eye, and "suspicious" areas can be checked by tapping on them with a wooden or plastic kijanka. A deaf sound at once will give out, where the plaster has lagged behind the surface. In these places, the old solution is removed with a spatula. At the same time, it is necessary to check what caused the detachment. Perhaps under the stucco that remained behind the wall was not properly prepared surface: there were traces of paint, fatty traces or whitewash. All this will have to be removed, otherwise the new layer will suffer the same fate as the previous one. The cleaning of the wall should be carried out until the contamination is completely removed. Back to contents</a> How to cope with a fungus? Another factor that detaches the plaster layer from the wall may be a fungus. Its appearance is most possible in rooms with high humidity and leaks. The primary task in this case is to eliminate the causes of the appearance of the fungus: warming the walls, eliminating leakage, improving air circulation in the room.
 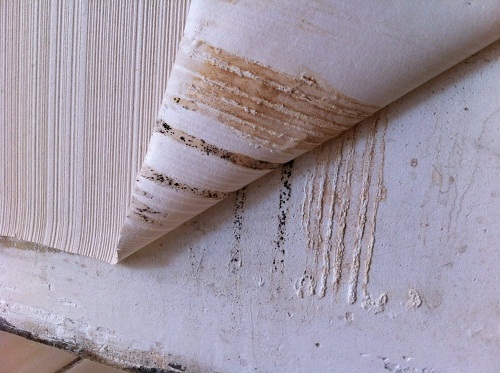 If there was a fungus on the wall, then a new layerplasters should not be applied until the wall is dried and treated with an antiseptic. With regard to the removal of deteriorating plaster, it must be removed not only on the site with obvious signs of the appearance of the fungus, but also to go beyond it for several cm, removing around the affected area and a "healthy" solution. It is worth adding that before removing old plaster, the treated area needs to be moistened. This is done not only to ensure that there is less dust, because together with her freely scattered and fungal spores. Also it is necessary as deeply as possible to clean the base under the area infected with the fungus. If the wall is brick, then the masonry seams are cleaned 2-3 cm deep. All the fragments that are not strong enough are removed from the concrete partition. Further plaster repair can be continued only after thorough drying of the wall. And when the surface dries, it must be impregnated with fungicidal compounds that will destroy the remaining spores in the wall and will prevent the appearance of the fungus in the future. Once again, it should be recalled that antifungal treatment is effective only after eliminating the causes leading to its appearance. Back to contents</a> Crack processing Crack processing forsubsequent plaster repair looks much easier. All clefts are wetted with water, after which the flaking fragments are removed by the spatula at the edges. With the help of tools along the crack an original groove is made with a narrowing inward. After cleaning, the cavities are treated with priming compositions that improve the adhesive properties of the walls being repaired. Primer is applied to all surfaces on which plaster will be applied. Back to contents</a> What is necessary at the preparatory stage?
  Tools for plastering walls. The work on cleaning the internal walls from defective plaster is best done with the following tools:
- spatulas of different widths;
- trowel;
- steel brush;
- a building hair dryer;
- perforator.
The latter can come in handy if necessarygo deep into the concrete partition to remove traces of the fungus, and the hair dryer is used to remove old paint from the wall (although this work must be carried out in a ventilated room) and drying out the raw surfaces. To impregnate the areas to be repaired apply:
- plain water;
- antifungal solutions;
- primer.
They are applied to the surfaces to be repaired with a brush or spray gun. Back to contents</a>
How to repair plaster?
 Large sections of the wall require reinforcement. Extensive areas with damaged plaster and the largest cracks require additional reinforcement. In the cracks the reinforcing tape is laid, and the area under the plastering is pasted with reinforcing mesh. Are reinforced and areas adjacent to the door and window boxes. It should be added that in the deep and wide areas where repairs will be carried out, the plastering of the walls is superimposed in several layers. The first of these is done by spraying with a liquid solution. After it has dried, another 1 layer of plaster is applied to the wall, which must dry before applying the next one. Sometimes for repair of a problem site it is necessary its plastering in 3-4 layers. The last one can be aligned with the rule, if its length allows you to lean on the edges of the partitioned surface, or a half-lock. It may be necessary to install beacons if the area to be repaired is too large (see below for how to do this).
 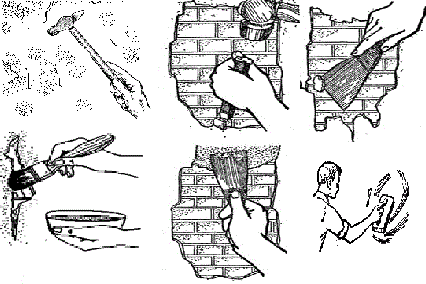 Stages of plaster repair. All defects on the walls are sealed with a solution with the same composition, which was used for their plastering earlier. It must be said that it is not necessary to prepare a solution with the maximum content of the binding component (cement). This will not only improve the strength characteristics of the plaster, but will lead to the appearance of new cracks in it. For better plasticity, add glue (for example, PVA) to the solution. The solution for the finishing layer is made with a slightly smaller content of the binder component, compared with the previous ones. If the partitions will be faced with panels made of plasterboard or MDF, then the plaster can be repaired, but the surfaces need stucco before gluing to the interior walls of wallpaper, before which the slightly hardened finish plaster of the walls is treated with a block of expanded polystyrene. With its help, small irregularities are rubbed, and the surface becomes more uniform. Back to contents</a>
How to repair the walls in damp areas?
Often the walls of many bathrooms, kitchens andthe toilets are covered in paint. Many homeowners have a desire to make repairs in these premises and lay out their partitions with tiles. Plastering of walls can not be carried out on the paint, so it must be removed. We have already described how the colorful coating is removed. After this, the internal plaster is performed, correcting defects of the surface and leveling it before laying the finishing material. 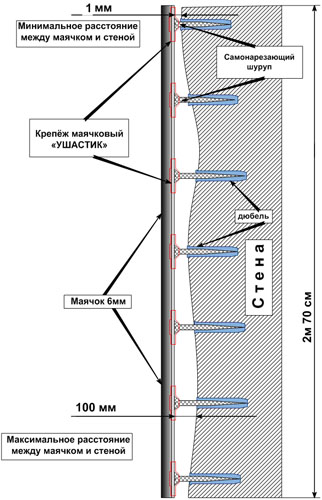 Scheme of installation of plaster beacons. Do not forget that the bathrooms and the kitchen are rooms with a high level of humidity, so the probability of the appearance of a fungus in them is quite high. To avoid problems in the further operation of these rooms, treat the walls with fungicidal means. Qualitative leveling of walls is possible only with the use of a beacon profile. This stage of repairing internal walls can be considered the most time consuming, as it requires the most responsible approach to work. To install beacons you will need:
- plastic dowels 4 x 60 mm;
- self-tapping screws;
- beacon profile with fasteners;
- plumb or level;
- hammer drill;
- drill-screwdriver;
- synthetic yarn.
Near the upper and lower corners of one of the wallsholes for dowels are drilled. Two vertical profiles are attached to the wall. The correctness of their installation is determined by the plumb or level. Between the extreme beacons stretch threads, creating a plane for the future plaster. The other profiles are attached with orientation to these threads. The distance between the beacons should be somewhat less than the length of the rule. The same operation is repeated on the other partitions. Mayachki to the walls can be fastened and with the help of gypsum. The first layer of plaster consists of a liquid solution that is sprayed onto the surface, the next layers are stretched over it with a trowel, a smoothing pad or a spatula. The finishing layer is aligned with the rule, based on the beacons. Surplus solutions in the corners are removed by an angular leveler. After some time after leveling, the plastered wall is rubbed with a grater. Back to contents</a> How to extract beacons? Beacons after plastering the walls are best removed. This operation can only be neglected if the tile is laid on the wall, as it will hide the red bands that will appear through the plaster after the oxidation of the metal profile. The beacons are extracted quite simply. Do not pull them out immediately after plastering, together with them will peel off significant fragments of plaster. The removal of profiles is best done after 24 hours after work. For this, pliers are best suited. It is advisable that you know where the beacons are exactly, so it is good to make appropriate notes before installing them. Using a scraper, the edge of the beacon hidden under the plaster is bare. It is gripped by pliers and pulled away from the wall. Grasp the tool with another section of the profile and pull it out. Do the same in the same way. Do not be afraid that grooves are formed in the surface, because they just need to be filled with a mortar and leveled with a spatula. Before filling the solution, the slits are treated with a primer. After sealing, the groove is grated with a float. Confidence that the walls in the bathroom or in the kitchen will not be affected by the fungus, will give you an application in the repair of plaster, created especially for walls in damp rooms. To such compositions, for example, is a mixture of "Rotband". In any case, you can pick up the most suitable composition in the store, since all manufacturers indicate on the packages with mixtures the scope of their products, its components and the technology of preparation. Now the walls of the room are ready for further work. They can be pasted with tiles or covered with decorative plaster, you can paint again. The main thing is that the qualitative repair of the plaster performed by you will make it possible not to worry about the condition of the internal walls for many years. </ ul>


