In everyday life, a small table completelymeets the needs of a family of 3-4 people. Such a table is successfully used both as a kitchen and as a dining room. The situation changes dramatically when guests appear. Many people have a desire to make a sliding table with their own hands. 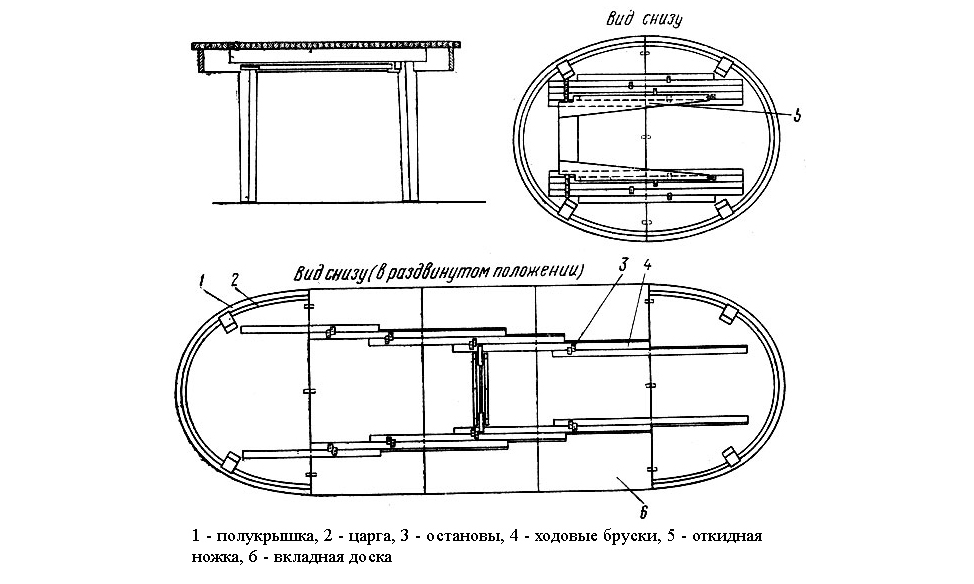 The scheme of the device of a sliding table. Any table is not a very simple design, which must withstand heavy loads and frequent movements around the apartment. Despite certain difficulties, anyone can make a sliding table with his own hands, who are familiar with carpentry. The design of sliding and folding tables set. It is only necessary to really assess which of them can be done by yourself.
Step-by-step instruction: the basics of construction
Any table consists of a table top, legs andfasteners. Sliding (folding) structures additionally contain removable or movable table top inserts and a sliding mechanism. According to the shape of the tabletop, they can be round (in the expanded state - oval) or square (rectangular). 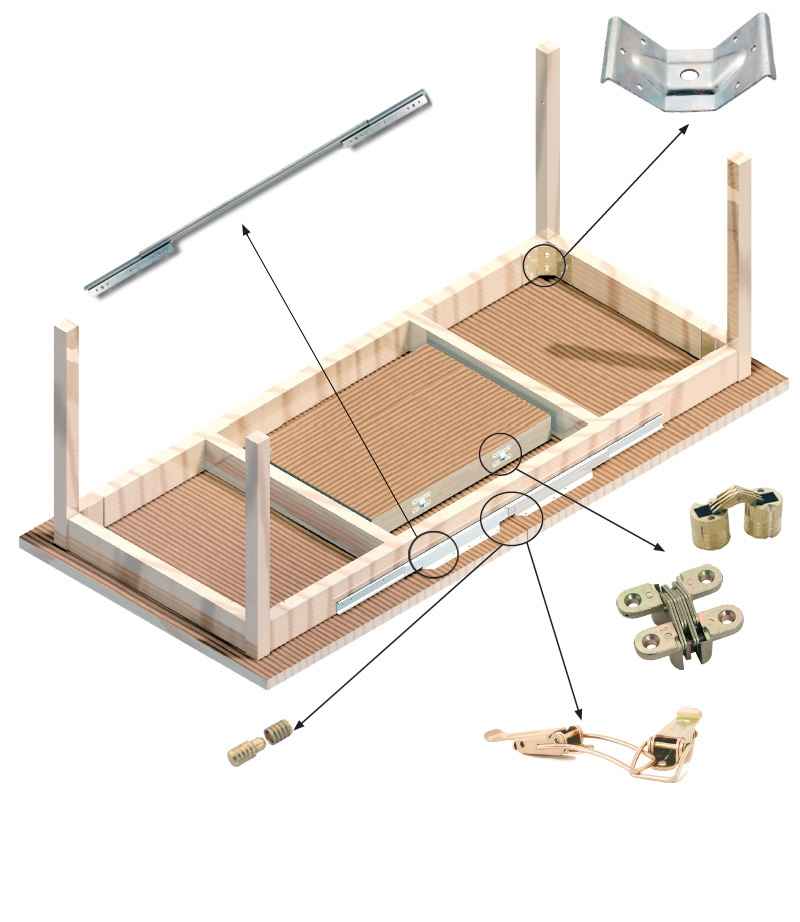 Scheme of mounting sliding table guides. The main requirements that are imposed on the design are the strength of the table top and the reliability of fastening the legs, which should allow to withstand loads (including shock) and be stable when used during cooking or at dinner. In addition, the surface should be comfortable and practical. The dimensions of the table are determined mainly by the dimensions of the room and the number of guests who can sit down at the same time. The height of the dining table is usually 73 cm. Dimensions in the extended state can be calculated on the basis that the optimal distance per person at the table is 60-70 cm. Back to the table of contents</a>
Selection of basic materials
If it is decided to make a table with your own hands,It is necessary to determine the material for the main elements. Aesthetic impression of the design of the table basically provides a table top. In addition, it can get moisture, fat and other active substances used during cooking; may be affected by fever from hot dishes; significant mechanical stresses may be applied. Wooden countertops are quite reliable, environmentally friendly, practical and aesthetic, but at the same time expensive and difficult to manufacture. The greatest use as countertops was found in wood of pine, oak and walnut. When using wood, it should be well dried and treated with waterproof compounds. If a natural tree is used for the surface, then it must be periodically polished, and also varnished or waxed. 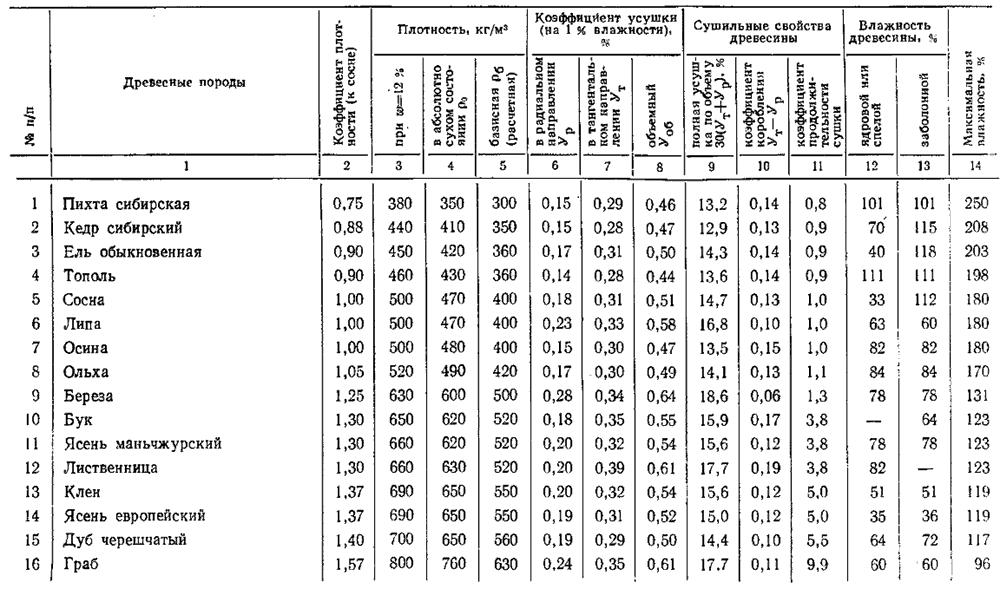 Characteristics of materials for the manufacture of table. A simple, cheap, but sufficiently reliable worktop is obtained from a laminated chipboard with a thickness of at least 20 mm. The ends of the plates are rounded and covered with a protective material, for example, silicone or PVC film. Such plates can be covered with plastic. A major drawback of such a material is swelling when moisture enters the thickness of the material. According to other indicators, this material is quite capable of competing with wood. The legs of the table can be made independently, and you can buy ready-made ones. The most common option is the legs of a wooden bar. The minimum dimensions of the bar are 40x40 mm. For large tables, you should use a larger beam. So, for a table length (in the extended state) of about 2 m, a bar with a section of 85x85 mm is recommended. The legs can be square, round or carved depending on the desire and capability of the manufacturer. In addition to wooden legs are used metal. For example, you can purchase ready-made metal legs in the form of a pipe with a diameter of 70-90 mm. It is possible to make steel or aluminum legs from a pipe and a different profile independently. Back to contents</a>
Sliding table construction
One of the simplest designs of slidingThe table is based on the increase in size due to the sliding of the surface and the laying of additional elements. The main table top consists of two parts that are not fastened to the legs and have the possibility of longitudinal movement in opposite directions from each other.  Drawing of a kitchen table. The sliding structure consists of the following main parts: the base; The main countertop, consisting of two identical parts; guides for full rollout; additional panels. The base is made in the form of a frame that connects the legs with each other using jumpers (collet), and the upper panel, which resembles a worktop, but is fixed to the legs. Each of the parts of the main countertop consists of a surface directly and three sidewalls fixed on it. The mechanism of extension is recommended to be made from standard guides for a full pullout for drawers. It is necessary to purchase two sets of guides with a length of at least 30 cm. The additional elements of the countertop are similar to the main surface and have a length equal to the width of the countertop, and their width is determined by the length of the extension. The number of elements can be from 1 to 3 at the discretion of the manufacturer. The principle of the design is very simple: both parts of the main countertop are mixed in the guides, fixed on the basis of the table, until it stops. In this case, the table top slides over the surface of the substrate. In the resulting space between the two parts are installed additional elements, which together with the main parts create the appearance of a solid countertop. Back to contents</a>
Making the Basics
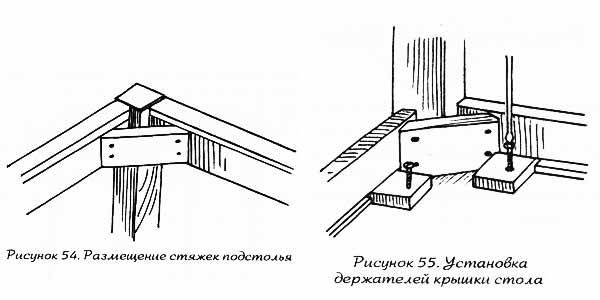 Scheme of installation of table top holders. The main function of the base of the table is the reliable connection of the table legs to each other and to provide support for the installation of the table top. The binding of wooden legs into a single frame is done with the help of wooden crosspieces - tsang. Collets are made of plywood or boards with a width of 10-12 cm and a thickness of 18-20 mm. The length of the collet is determined by the selected table size in the non-extended state. To secure the collets in the upper part of the legs on two adjacent sides, grooves with a size corresponding to the collet section are made to a depth of 20 mm. The grooves of the collets are fixed in the grooves. The joint is glued and fixed with screws. To strengthen the connection of legs in heavy tables, it is recommended to additionally install wooden headscarves in the connection points. On top of the frame is fixed a sheet of plywood 10-12 mm thick. The size of the sheet is determined by the frame dimensions. The sheet is fixed with screws. In its final form, the base is a table with a black top. The top plywood sheet is not an obligatory element, since the structure will work without it. Back to contents</a>
Making the main countertop
First cut and cut twoparts of table tops of selected sizes. If necessary, the surface is to be faced and the ends are sealed. On the inner end (which is combined with the end of the second part) of each of the countertop parts, two holes are drilled to fit the dowels of the removable elements. The hole diameter is 8-10 mm. 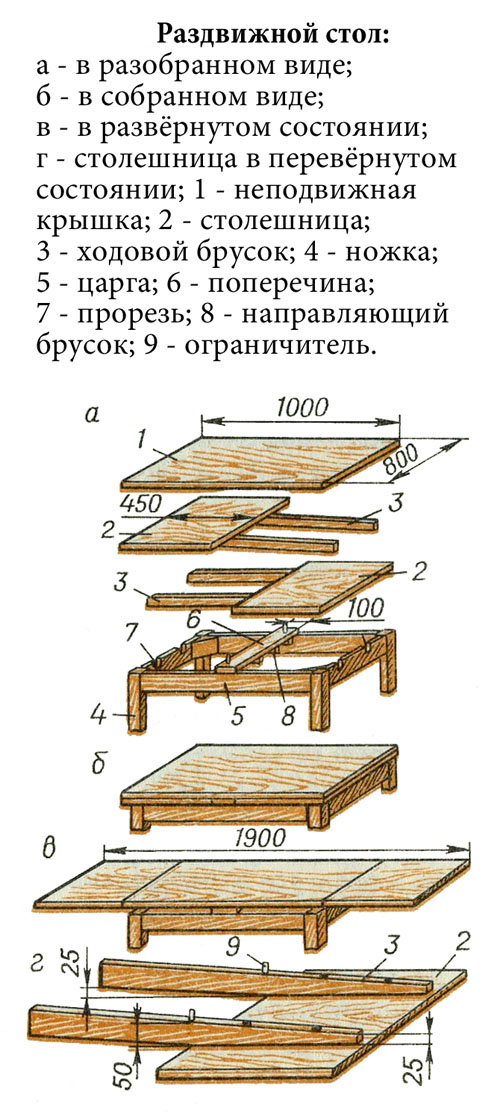 Scheme of assembly and disassembly of the sliding table. A U-shaped box made of sidewalls is made, consisting of a strip of chipboard or a board of 100-120 mm wide and 18-20 mm thick. The length of the sidewalls corresponds to the dimensions of the base of the table, measured along the legs. The corners of the box are strengthened by an aluminum corner on the inside. On the inside of the side parts of the body, the narrow (reverse) parts of the guides are fixed so that the box can move at a height of about 2 mm above the plywood sheet of the table base (or the collet surface in the absence of a sheet). On the top of the box, the table top is set so that the countertop countertops coincide with the free ends of the box. Using aluminum corners, the table top and the box are connected together. Back to contents</a>
Making additional items
In the center on the surface of the plywood base sheet(or the upper end of the collet), an aluminum corner with a vertical side of at least 40 mm is installed. The length of the corner is not less than 50 cm. The corner is fixed with wide (main) parts of the guides, two on each side. Both parts of the guides (on the table top and on the corner of the base) are docked and snapped. 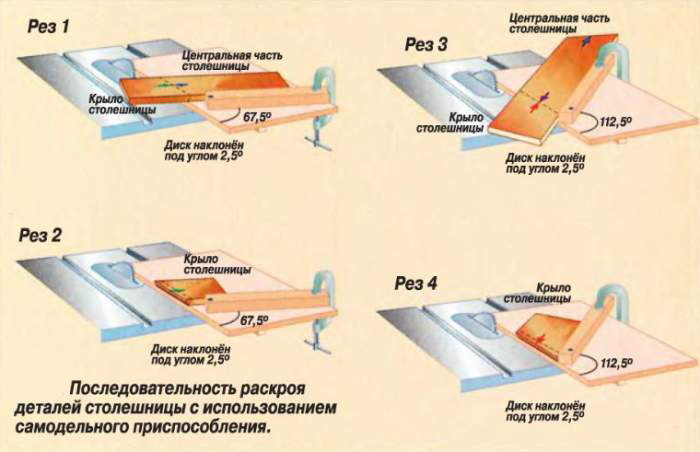 Scheme of cutting the countertop. The maximum part of the main table top is moved apart and the dimensions of the removable additional table top elements are specified. Cutting and sawing of additional elements is carried out, and also preparation of their surface by analogy to the basic table-top. On the inner ends of the removable elements holes are drilled and dowels 8-10 mm in diameter are installed. The dowels are fixed with glue. Removable elements are installed between the main parts of the table top and fixed with dowels. After complete assembly, the work of all elements is checked. Ши C д C Cшишиши Cшиши C д C C д C Cши C д C C Cши C C C C C + C д C C C C +ши C C д Cши C C C C д Cши C C + C д C C Cши Cши C C Back to contents</a>
Design table design
The design of the sliding table allows you to applyany form of countertop. Very modern will look round form. In the extended state, such a table has the shape of an oval. The entire manufacturing process is similar to making a rectangular version. The only difference is the cutting of the countertop. It is advisable to start cutting with drawing a semicircle of the correct size on the paper and then transferring the sketch to the fabrication material. Removable elements remain rectangular in shape. The design of the sliding table can be enriched by changing the number of legs. So, for not very large tables, you can provide only one massive foot with a platform or a cross from below. You can use two wide side legs. An obligatory element will remain the production of a rectangular frame of the table base for the installation of the table top. Back to contents</a>
Other table designs
A more simple design is foldingbook tables. For example, it is possible to produce a structure that in the assembled state has the form of a cabinet. Such a table has a basic fixed tabletop with a width of 40-50 cm. Sidewalls, which simultaneously serve as the main massive legs, are also of the same width. The height of the side walls is 730 mm. To the fixed table-top, a movable length of up to 700 mm is attached through the hinge. Such countertops are fixed on both sides of the fixed one. Additional legs are made in the form of frames and through the hinge are attached to the sidewalls. Thus, four legs are installed, which have the ability to retract inside. The sliding is carried out in the following order: the movable parts of the table top are lifted; by turning the hinge under them move the legs. As a result, the working length will be about 2 m. Back to the table of contents</a>
Required Tools
In order to make a sliding table with your own hands, the following tools and equipment will be needed: 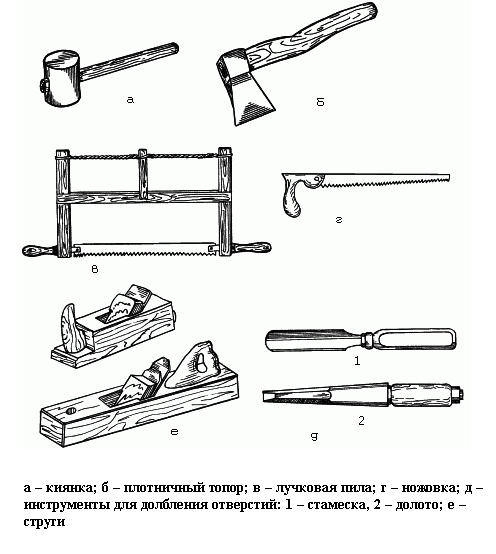 Tools for making a sliding table.
- drill;
- Screwdriver;
- Bulgarian;
- hacksaw;
- screwdriver;
- a hammer;
- chisel;
- plane;
- abrasive sandpaper;
- file;
- paint brush;
- Ruler;
- roulette;
- calipers;
- scissors;
- electric jigsaw;
- grinder.
The sliding table is very convenient and practicalelement of furniture. It will help to solve some problems related to the lack of space. Such a table can be made by yourself, if you put a little imagination and get acquainted with the basic principles of the process.


