In the interior design, the parts have a largemeaning, they create the cozy homely atmosphere in which it is so nice to spend time with the whole family. The frame on the wall, made by own hands from improvised materials, will not only decorate the dwelling, but will also bring in it a certain zest and individuality. Such products can compete with works of art.  To decorate the interior of the house, it is not necessary to buy expensive paintings, you can make a frame with your own hands, having a little patience and imagination.
How to make a frame from a ceiling skirting board?
It will take:
- ceiling plinth made of expanded polystyrene;
- universal polymer adhesive;
- acrylic putty on wood;
- sharp knife;
- protractor;
- acrylic paints;
- corrugated cardboard (box of household appliances).
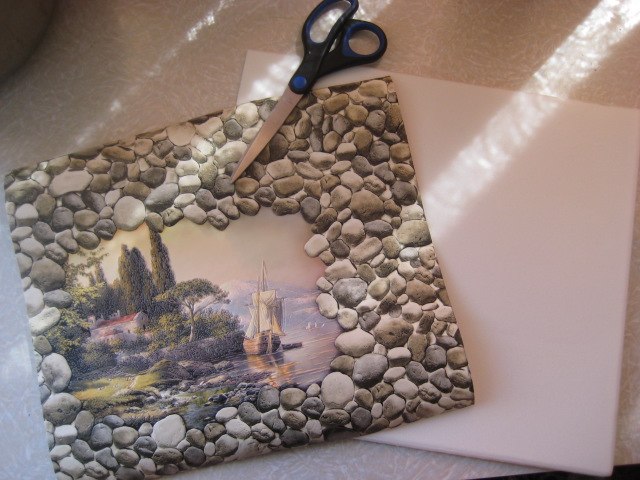 A suitable picture is cut from the wallpaper andis glued to the ceiling slab, which should be 1 cm longer than the picture from all sides. To make frames on a wall it is possible from a corrugated cardboard and a ceiling skirting board. First of all, you need to cut out a template for the future frame. From corrugated cardboard a rectangle is cut out, in the center a window for a photo or a picture is cut out. The dimensions of the product will depend on the parameters of the image that you want to draw in the frame. On this pattern, cut out the same rectangle, but the window is made more by 5-8 mm on each side, the details are glued together. This is the place for inserting the picture. If the frame is made under the glass or stretcher, then you have to cut another 1-2 cardboard rectangles with an enlarged window and paste them on the workpiece from the back side (all depends on the thickness of the inserted image). After the base is ready, proceed to decorating the frame with a ceiling skirting board. The ends of the baguette on each side are cut at an angle of 45 °. Using a protractor draw a corner and a cut line on paper, lay a bar on it, make a mark on it, then cut it with a sharp knife, in all, 4 parts will be needed. Glue the baguette onto the blank of cardboard from the front side. If you have crevices in the corners, then do not be upset, this error is easily corrected with putty and paint. The work is left until the glue dries completely.
 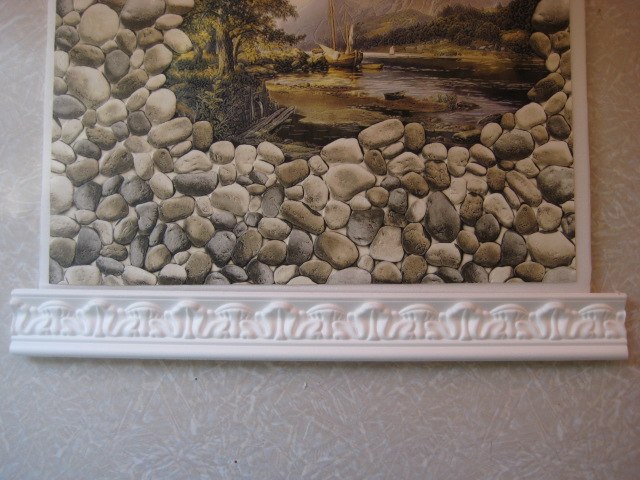 From the ceiling skirting four pieces are cut outFor the frame, along the length, it is slightly superior. Next, it is necessary to fill the baguette with the cardboard blank, as well as the corner seams and the reverse side of the frame. This will give the product additional strength and hide all the shortcomings. The outer side (end faces) of the frame will have to be putted several times with mandatory intermediate drying and sanding each layer with sandpaper. But you can go another way. For example, paste a piece of styrofoam between the cardboard and baguette (on the front side), then putty them. After the putty dries, proceed to painting. For this purpose, it is best to use acrylic paints or water-based emulsion. In order to paint the frame in a milky shade, you need to add a little ocher to the white paint. If you want to make a dark frame, then take the black paint and mix it with red and dark brown hues. After painting the product is varnished on a water basis. It remains only to make a fastening, for this take a dense twine, cut 10-14 cm. From a dense thin cardboard, cut out a rectangle 5x7 cm. Attach the rope to the reverse side of the frame, apply glue and glue the cardboard, press the load until it dries completely. The frame on the wall is ready! Back to contents</a>
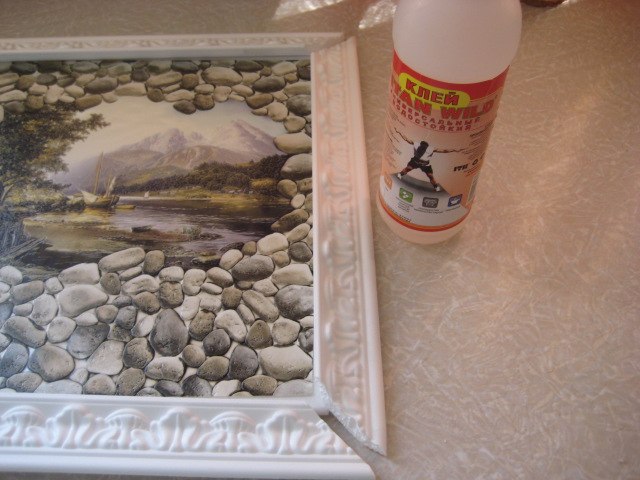
Frame on the wall from the newspaper
 Details from the ceiling skirting are cut obliquely and glued to each other. It will take:
- old newspapers or magazines;
- glue pencil;
- stationery knife;
- protractor;
- PVA glue;
- white acrylic paint;
- putty on wood;
- universal adhesive.
A frame on a wall made from newspapers is smalldiffers from the purchased baguette. As a result, the product turns out to be strong enough, and in appearance it is difficult to guess what the frame is made of. The first step is to stock up the material, for this purpose you can use both newspapers and fine journal paper. The newspaper is unfolded, laid on a flat surface, after which they begin to fold a dense tube. In order to get a thicker frame, you need to use several newspaper pages. When the tube is almost folded, a new newspaper is glued to it with a sticky pencil and continues to work. It is important to twist the newspaper with the same density, otherwise the details will be of different thicknesses and they will be difficult to connect. 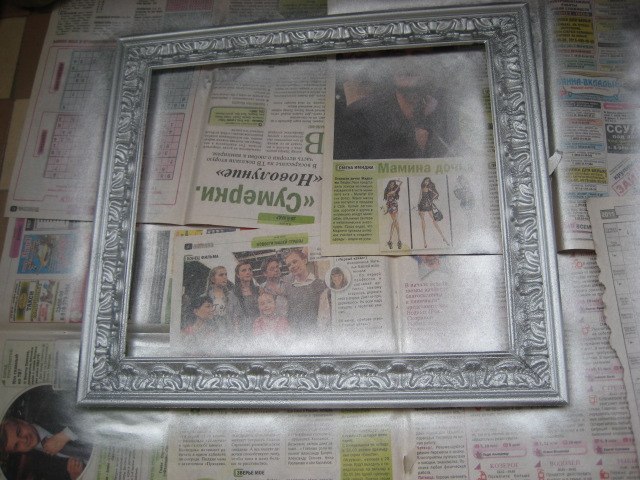 After the glue has dried, it is necessary to paint the framean aerosol paint of silver or gold color. The frame consists of 4 slats, for one side you need from 3 to 8 tubes, which glue together in a triangle (the more details, the wider the frame will be). To obtain a narrow baguette, take 2 tubes, glue them side-by-side. Then glue another 1 from above, thus a triangular cross section is obtained. It is necessary to make 4 blanks, leave them until the glue dries (for a day). Next, you need to cut each bar at an angle of 45º from 2 sides, for this purpose it is best to use a chair, but if there is no such device on the premises, you can do with a conventional protractor. Take a piece of paper in a box, draw a square, then connect its corners with diagonals, lay the bar on the marking, use a protractor and a pencil draw a line and cut off any excess. Now you need to glue the parts at an angle of 90º. First, connect the two strips, after they dry out, glue the remaining corners. For greater strength, you can glue a wooden spike (for example, a toothpick) to one side of the corner, and in another - to make a groove with an awl. Slots between the corners are sealed with a putty on wood. After the frame is assembled, it is necessary to do the reverse side of the place to insert the picture. To do this, glue 4 tubes, retreating from the window 5-8 mm. At the same time, a device is made for fixing the frame to the wall. Using an awl, pierce the 2 holes in the upper tube, which is designed to insert the pattern, thread the wire in them so that a loop is formed. Now it is necessary to prime the product, this will give the frame additional strength. For the soil take 1 part of the water, add 2 parts of PVA glue and the same amount of white acrylic paint (can be replaced with water emulsion), stir to a homogeneous consistency resembling liquid sour cream. The product is primed 2-4 times with intermediate drying. The glue will impregnate the frame and make it firm, and the white paint will override the typographic font. After that, the frame is painted with acrylic paint in any color you like and cover with water-based varnish. Insert the picture from the back of the frame, fix it with small studs or clerical tape. With such a framework, any wall will play with new colors. Back to contents</a>
How to make an oval frame for a photo?
It will take:
- dense cardboard;
- old newspaper (magazine);
- twisted cord;
- gold paint in can;
- acrylic paints;
- scissors.
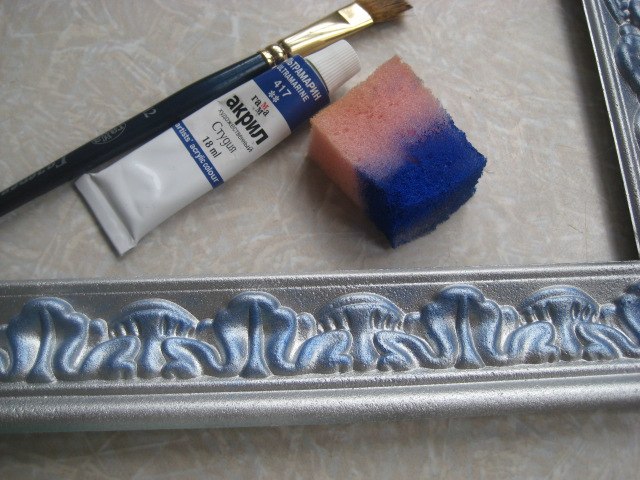 Convex frame parts can be tonedacrylic paint of a suitable color with a sponge. Make a frame on the wall for photos is easy enough. It is necessary to take a sheet of cardboard, draw an oval, map a window under the image in the center, then carefully cut it all. The workpiece for the frame is ready. Take the newspaper, remember it properly, then rip it to pieces and cover the frame. The edges are wrapped on the wrong side and glued. The more folds you get, the more interesting will be the texture of the frame after painting. Then take a piece of string and glue it along the window for the image, so you get a beautiful edging. The junction of the ends of the string and part of the frame must be sealed. To do this, cut the newspaper (diagonally) into thin strips of 2-3 cm, then roll them in a spiral and twist the roses, glue them on the frame. You can also use lace, buttons, coils of thread, twisted wire and beads. The main thing is that the composition looks good and does not weight the frame. Take the gold paint in the can and paint the product along with the decor, leave until completely dry. After that, mix black and brown acrylic paints, paint the edging of the window and the places where the wrinkled newspaper was pasted. After about 10 minutes, wipe off the paint with a damp cloth so that it remains only in the recesses of the folds. It remains only to make a pocket, in which the photo will be inserted. To do this, take a tight cardboard, cut out a rectangle. It should be glued on the back of the frame from 3 sides, the side part should remain free, through it and a photo will be inserted. Make a loop from the rope, when you glue the pocket, insert it between it and the main part of the frame. If the wall is smooth, then you can use a double-sided adhesive tape instead of the fastening. Designer frame on the wall is ready! Back to contents</a>
Decorating the frame in the style of "Terra"
It will take:
- blank from fiberboard;
- PVA glue;
- acrylic putty;
- dry grass and flowers of an interesting texture.
The frame on the wall in the Terra technique will become a realdecoration of the interior. To do this you will need a variety of dry spikelets and flowers that have a beautiful volumetric shape. Using a jig saw, cut out the workpiece from the fiberboard sheet under the frame, sand the edges with sandpaper. Then primetuyte surface glue PVA several times. Dilute the acrylic putty with PVA glue in a 2: 1 ratio, if necessary, add a little water. It should be a mass that resembles a dough for pancakes or thick sour cream. Apply this mixture on the frame, then type in the dried flowers, cover them with the same mass, leave for a few days until completely dry. After that, shade convex places diluted in brown, light lilac or gray paint. Secure the result with an aerosol varnish. Make a pocket for a photo can be exactly the same as described above. Such a frame will not only decorate the walls, but will also be the highlight of your interior. It is not necessary to follow these instructions exactly, show imagination, create, and you will succeed!


