Chandeliers and lamps, sconces, floor lamps, table lampslamps are used not only to illuminate the room, but also to decorate the interior, creating a certain mood in the room. Today on sale it is possible to find fixtures of a different appearance and style, but their cost is sometimes great. What solution can be found in this situation?  Elements of lighting (chandeliers, floor lamps,lamps), created by their own hands, will always have an exclusive design. Having shown a little imagination and using improvised products, you can make yourself a stylish lamp or sconce. The original lamp or chandelier will become a real highlight of any decor. They will emphasize the necessary details or give the room more coziness and comfort.
Sconce from cardboard and improvised materials
Sconce can be made from ordinary cardboard tubes, which remain from paper towels or when laying linoleum (on them the floor material is wound). In addition to cardboard tubes, you should prepare:  When creating a cardboard box, you will need red and black wires and a power supply.
- 2 m of red wire;
- 2 m of black wire;
- 2 m LED strip with adhesive backing (white color);
- power supply unit (1 A, 12 V);
- paint spray (brownish or wine-red color).
Starting to make chandeliers and fixtures is necessary withdrawing up a sketch. In this case, a future sketch is drawn on a large sheet of paper in full size. The luminaire will bend in space and plane, creating the impression of an unusual but attractive volume wave. Ready lamp should resemble a pipe. When the sketch is ready, it is necessary to start making the sconce. All pipes are cut according to the planned dimensions, for cutting it is best to use a stationery knife with replaceable blades. Accurate adjustment is carried out after all the pipes have been cut. It is necessary that the lines are smooth, changing into each other. Cuts in the tubes are made with a jig saw. It is necessary to control their depth so that they all turn out even. The width of the cuts should be 2 mm. 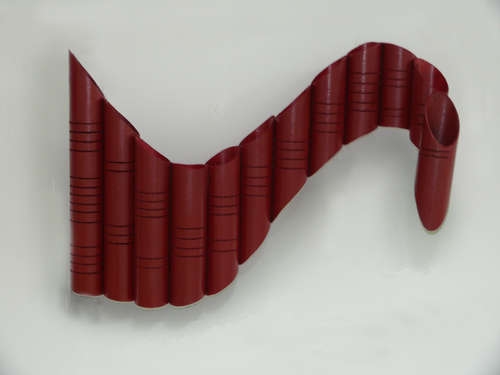 Pipes are connected together by means ofsuper-glue. Connect pipes with PVA glue or superglue, you can use a glue gun. The back of the structure will be fastened with wood strips, they will form the basis for fastening to the wall. In each tube, a hole is carefully drilled, through which wires for the tapes will be output. Pipes are painted in such a way that they are covered with paint not only from the outside, but also from the inside. That's why paint is used in cans. In this way, you can easily paint even the most difficult places. Then you need to leave the tube to dry, the time it takes is usually a little. When the paint dries, you can start laying the LED strip. Cut it must be so that it is enough for all the tubes, while it should not protrude outward. The connection is as follows: to the "+" it is necessary to attach the red wires, and the black wires to the "-". After that, the tapes are strengthened inside the tubes, the wires are connected to the power unit. It must be hidden on the reverse side of the structure. To the wall of the wall is fastened with screws, it is necessary to foresee at once how it will be from him to go the cable to the outlet. Such a lamp will be an unusual addition to any interior. Instead of a red or brown paint, you can use a silver one, the LED strip itself can have a different shade. Back to contents</a>
Decorative lamp in the room for a girl
In the room for the girl can make decorativecandlestick lamps in the form of soft buds of roses. They are easy to assemble with their own hands, even children can be attracted to the manufacture of lamps, which the process will seem very fascinating. To make unusual fixtures, it is necessary to prepare:  To create a lamp in the form of roses will be needed? plastic spoons, a lamp, an adhesive gun, tissue petals, glue.
- fabric petals for future roses (they can be cut from a fabric of different colors, it is best to give preference to white, pink, beige, two-color scraps);
- small plastic spoons;
- adhesive glue gun and stock of polymeric transparent glue;
- a small round lamp, it can be bought in any building or furniture store (such lamps are used to illuminate cabinets and shelves).
You need to start with the assembly of buds. Petals are cut from cloth or bought already ready in specialized shops for needlework. For one lamp it will take approximately 6-7 spoons, in which the handle is cut off. The petals are glued on both sides, the concave part must be facing outwards when glued. On one spoon can leave about 3-4 petals. 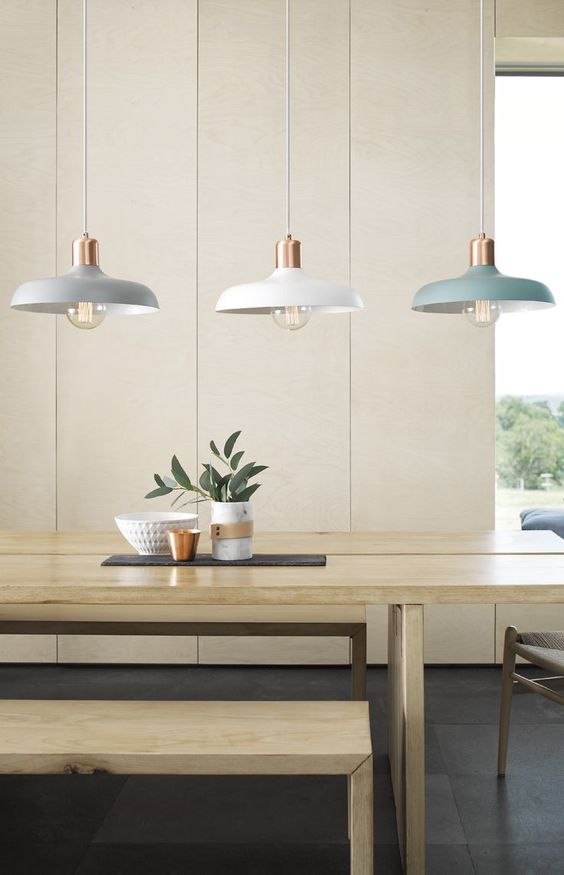 Lights in the form of roses perfectly fit in the roomfor girl. The glue is refueled in the gun, after which the spoons with the petals are glued to the finished luminaire in a circle, it is best to do this in two layers, so that the bud turns out to be stuffed. The outer row should have smaller petals, so the flower will look more attractive. The bulb should look in the middle of the flower, creating a soft but pleasant light. To turn on you can use batteries, but it's best to buy a luminaire that works by touch, its cost is low, but it's much more convenient to use. Arrange such spring buds-lamps can be on the bedside tables, window sills or shelves. In the evenings, even the coldest winter, such unusual lamps will create a warm, comfortable atmosphere, reminiscent of the coming spring and summer. Back to contents</a>
New Year fixtures and Christmas trees-chandeliers
New-year chandeliers can create an unusually bright, festive mood. They can even be a substitute for a real Christmas tree, if there is not enough room for it. For work it is necessary to prepare:  The process of creating a New Year's lamp.
Back to contents</a>
Original UFO lamp for nursery
For the children's room you can make an unusuala lamp with its own hands in the form of a flying saucer. To make a lamp that can be placed on a table or on a bedside table near the bed, it is necessary to prepare: 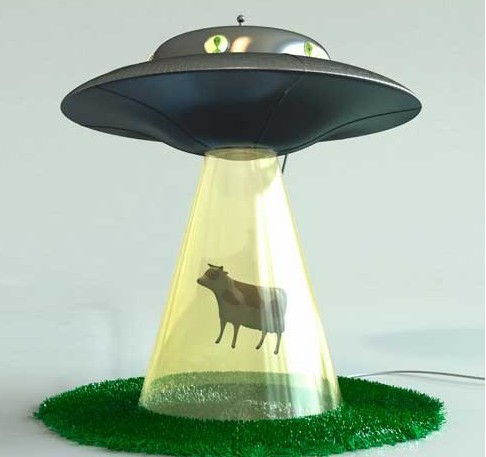 For the children's room, the original and unusual lighting solution will be a UFO lamp.
- 2 small plastic bowls (you can take any color, the diameter of the bowls should be equal);
- A sharp knife with replaceable blades;
- paint is silver in the can;
- transparent glass of glass;
- figurines of aliens, a small cow (such sets can be found in any store of children's goods, take the best small figures that are easy to place on the lamp);
- a napkin of green color;
- a small lamp that has a battery and motion sensor (you can buy in a building store, the cost of such lamps is small).
The lamp in the form of a flying saucer is assembled in this way:
It is not so difficult, if from the very beginning to be definedwith what appearance it will have. As a basis for such luminaires, you can take conventional cartridges into which any type of lamp or already finished fixtures are screwed. You can create original lampshades or ceiling lamps, which will be an excellent addition to the interior of the living room, bedroom or children's room.