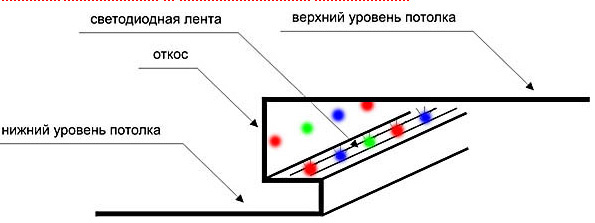
Today, a boring, monotonous ceiling withdefiantly standing in the middle of the chandelier can hardly be considered a successful design move. Today in the fashion much more effective solution - a false ceiling with hidden illumination. This way of lighting the room makes an unforgettable impression, and for its implementation, it is not necessary to spend, hiring professionals: it's not so difficult to make a similar ceiling with gypsum cardboard stitching with your own hands.  Illuminated ceiling scheme.By design, the illuminated ceiling is two-level. The second (lower) level is mounted along the perimeter of the room; its edge is often made in the form of a spline. There is an empty space between the first and second levels, this is where it will be installed. The lamps turn out to be hidden from the eyes of people in the room, and thanks to the reflection effect, it seems that soft light is pouring in an even stream directly from the ceiling. With this kind of lighting, the interior is perceived very differently than with a chandelier or lamps striking the eyes.
Choosing a fixture
 Illumination scheme for a two-level ceiling.Anyone who wants to build equipped with a hidden one first of all needs to decide what kind of lighting sources will be used. Until a certain time, such designs mainly used fluorescent lamps or, in other words, fluorescent lamps. Nowadays, they are being replaced by a more economical version of the lamp - the LED. Of course, one LED will not be able to provide the light of the required brightness, but a whole garland of these elements will successfully replace the usual incandescent lamp or fluorescent lamp. Important advantages of LEDs are durability and low power consumption (at the same luminosity, the element consumes half the energy than a conventional lamp), but this does not exhaust their advantage over traditional light sources. LEDs are incredibly easy to install. They do not need a socket like conventional lamps. These elements are produced in the form of tapes with an adhesive backing, which is enough to stick to any surface, be it a wall or ceiling, and connect to the power supply network. Such a backlight can be connected through a special control unit that can recognize user commands sent from the remote control. Back to the table of contents</a>
How to choose LED strip?
 Connecting a tape with LEDs.Currently produced LED strips are recruited from various types of diodes. LEDs of the SMD series can be considered optimal for the device. Among them there are both more powerful ones, for example, SMD-5050, and relatively weak ones, for example, SMD-3528. In addition, LED strips may differ in the number of diodes per 1 running meter of the product. The brightest and most powerful tapes contain 120 LEDs per 1 m in length, but they are rarely installed on hidden backlighting. More suitable are tapes with a density of LEDs of 30 or 60 elements per 1 running meter. The most affordable LED strips shine in one color. If you don't mind spending extra money for a truly eye-catching design, look for an RGB-grade tape. Such a product can change the color of the radiation either at the command of the user, or automatically in accordance with one of the preset programs. Unlike monochrome models, RGB tapes should be connected through a special controller, without which they will not work properly. For greater safety, you can opt for tapes in a waterproof design. They are equipped with silicone insulation, which will protect the device from a short circuit in the event of water ingress on conductive elements. Back to the table of contents</a>
Ceiling-mounted ceiling device
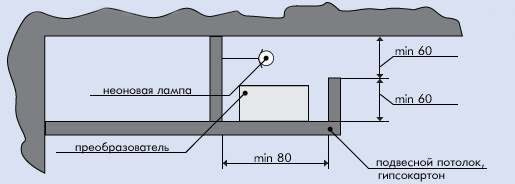 Scheme of installation of neon lights in a false ceiling from plasterboard. Installation of a ceiling from a gypsum cardboard with the latent illumination carry out in such sequence:
- a ceiling device of the first level;
- the device of a ceiling of the second level;
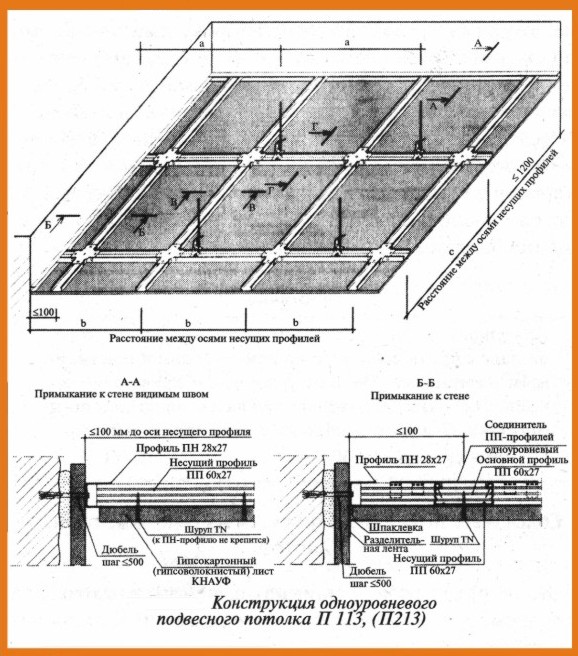 The scheme of the device of a single-tiered false ceiling.
If necessary along the edge of the ceiling of the second level, you can paste a strip of gypsum board in the form of a portico, which more reliably conceals the elements of the frame and LED strips. Back to contents</a>
Mounting of LED strips
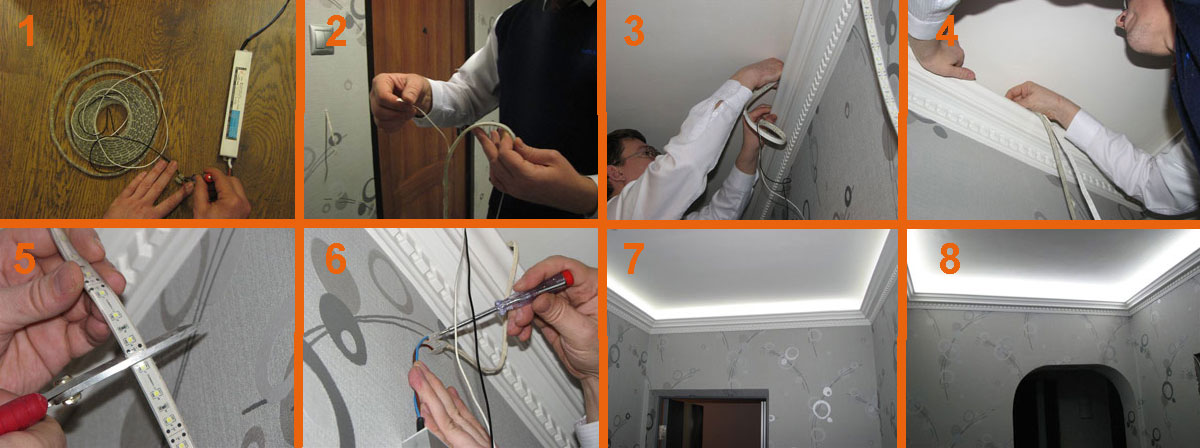
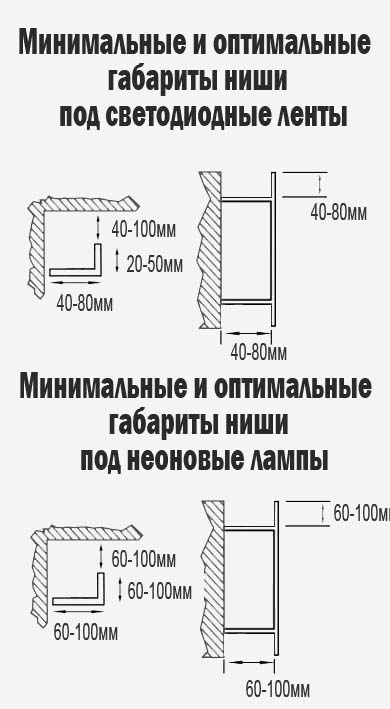 Minimum and optimal niche dimensions forLED strip and neon lights. Standard delivery of LED strips - lengths of 5 m in length, twisted into bobbins. To divide the tape into fragments can not be arbitrarily done, the cut can be done only in specially designated places. When the monochrome tapes are connected in series, their identical terminals should be soldered. In the same way, multi-color RGB-class tapes are connected, but it is important not to confuse the conclusions by connecting, for example, the "R" line on one tape to the "B" line on the other. The consecutive connection of more than three 5-meter tapes can lead to overloading of the conductive tracks, in this case the light emitters must be connected in parallel. To the power supply and the controller, the ceiling lighting from the gypsum board is connected in accordance with the polarity. Then the tape is turned on for verification, after which, if everything is in order, paste on the wrong side of the ceiling of the second level.


