About stretch ceilings for the first time learned from Europeancountries in the XX century. This technique allows you to implement any ideas of the design plan. They are practical and easy, under them it is easy to hide flaws in the ceiling, electrical wiring, ventilation system. Having installed two-level stretch ceilings with your own hands, you can save money significantly and be sure of the reliability of the structure.  Thanks to the simple installation of two-level tension ceilings, any design solution can be easily implemented.
Types of tension structures
Suspended ceiling can be made of fabricand PVC films. The second option is most often installed. It is the finest base of polyvinyl chloride. Such a surface can be either glossy or matte. At the same time, the subtlety of the base does not indicate its fragility. PVC coating is very durable. You can choose for yourself any shade. Such a film is not afraid of dampness, in case of flooding by residents from the upper floors, furniture and surrounding objects will remain in their original state. Fabric variants are made of a material, which is saturated with polyurethane components. Constructions of this type can be installed in rooms where there is no heating. But glossy base on such ceilings can not be, and the number of colors is limited.  The device is a two-level ceiling. Two-level suspended ceilings are allocated on the general background of such devices. They help to divide the room into zones without using additional partitions. The design of these ceilings allows you to mount in their base lamps and chandeliers. In the process of installation, there is almost no dust. But the installation work involves heating the room to maximum temperatures, so items that can deteriorate should be removed. Back to contents</a>
Tools and adaptations for work
To install tension ceilings it is quite possible independently, and installation proceeds without complications. In order for the work to be fruitful, it is necessary to prepare the necessary devices: 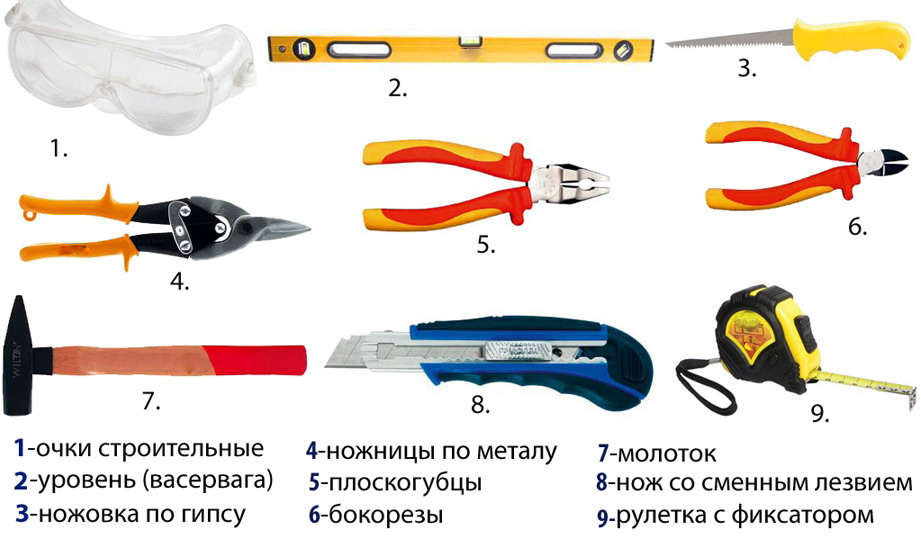 Tools for installing a two-level stretch ceiling.
- film;
- baguette;
- decorative sleeve;
- plywood for the construction of several levels of space;
- wood bar;
- fixers on a metal base, U-shaped for fixtures;
- thermo rings for installation of lighting devices for the point plan;
- glue;
- dowels, plastic screws.
And also a set of tools:
- level laser or water;
- heat gun;
- Drill with a set of drills for concrete bases;
- a hammer;
- Screwdriver;
- Hacksaw for metal and wooden surfaces;
- putty knife;
- a clip for suspending a film;
- painting thread coloring;
- roulette;
- pencil.
Thermal guns are available to organizations implementingmanufacture of such ceilings. It can be rented for a while. Before carrying out the basic work, you should empty the room of furniture or remove it in such a way that it does not interfere with the process. You should also calculate the amount of material correctly. It will help in this drawing up a two-level ceiling scheme. Do not forget about the electrical wiring. 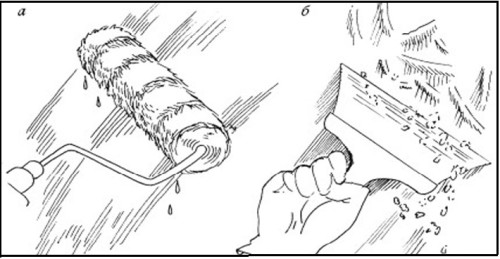 Methods of removing putty: a - with the help of paste; b - using a spatula. On the eve of the installation of a stretch ceiling it is important to check its foundation for the fact of integrity. The previous coating must be completely removed. It is necessary to pay special attention to the hollow sections, they need to be removed. The absence of any kind of defects allows you to apply the finishing filler. Significant damage to the ceiling coating, the presence of visible height differences obliges you to conduct a new plastering of the base. If such unevennesses reach 10 mm, it is necessary to treat the surface with putty. Once the plaster dries, you should prepare for the next stage of work. Back to contents</a>
Installation work
An essential circumstance is the protection of the electrical wiring by laying it in a special pipe made of polyethylene. To the base it is fixed with clamps. 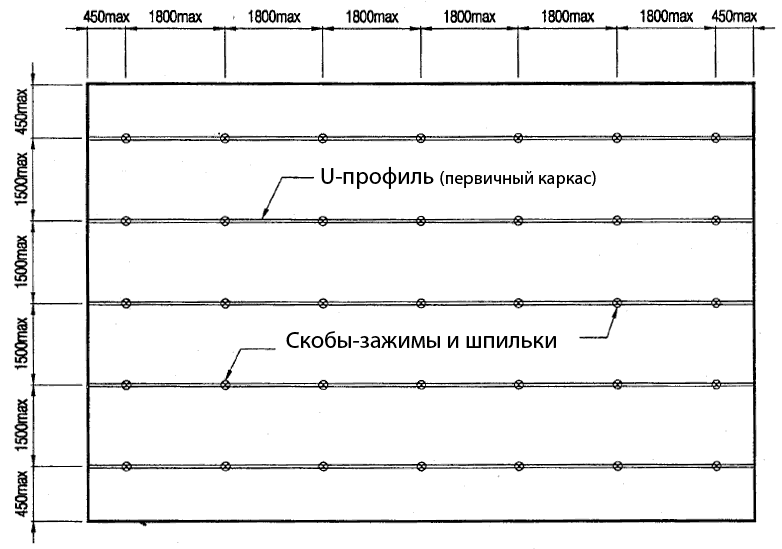 Layout scheme for a two-level ceiling.To get it right, you need to take the level of the water or laser variety. A mark is made for the ceiling of the first row: the permissible elevation indicator will be at least 3 cm from its source. Using a bright thread for upholstery, you should stretch the outline along the marks. A thread is taken, which is strongly stretched, focusing on these same marks, after which it is released from the hands. Traces in the form of a smooth strip are visible on the wall. The lower ceiling should be made at a level of 10-12 cm. Two-level stretch ceilings, which have a configuration of waves or rounded elements, are marked with a pencil at the base of the ceiling. These markings will help in the future to carry out installation work to collect the frame of the second layer. To secure the plywood frame, a timber bar is screwed to the ceiling base. They are cut into small pieces of 10 cm in length, then they are fixed to the ceiling zone with screws or dowels along the outline of the designation of volumetric elements. The permissible distance is 10-15 cm. A plywood rail 10-12 cm in size is screwed to them. A prerequisite will be its passage along the indicated line, while all convolutions must be preserved. To fix the baguette, on the first tier at a distance of 10-15 cm, holes are drilled with a drill or puncher into which the dowels will be screwed. For fixing to the wall, a screwdriver and fastening material are used, the baguette is fixed to the base. When installing this small part of the space, you should be aware that the connection points of adjacent profiles do not have to be located in the corner zone. At the time when they are connected, the distance between the holes is equal to 2-4 cm.
 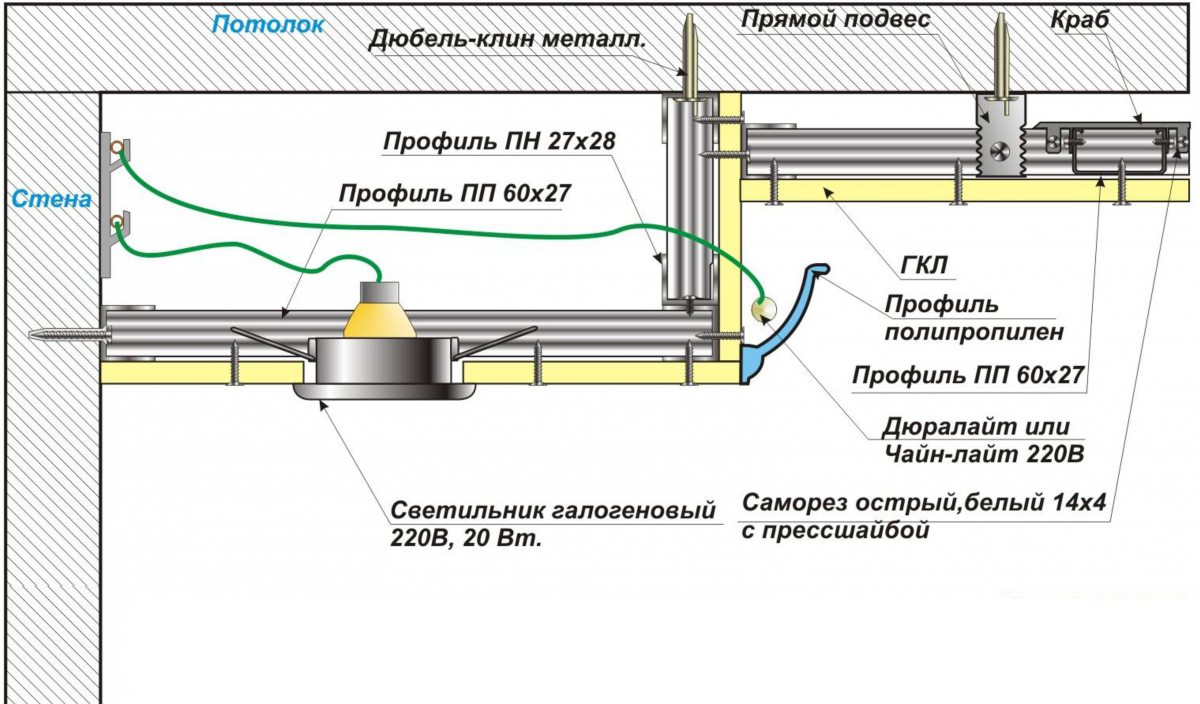 The scheme of a two-level suspended ceiling witha lamp. Baguettes of one and the other plane must be on a common horizontal. The bar on the basis of the second level should be lower from the ceiling by 10-15 cm. Once these components have been fixed in the right places, start installing point lighting devices. They are fixed at the plane of the ceiling with special metal profiles in the form of the letter "P". In order not to complicate the work of such a plan, it is necessary to take a drill, screws and dowels. Finished fixtures are connected to the wires in a special corrugated pipe. It is important to know that on such devices make lighting devices whose permissible power is equal to 50 W. Back to contents</a>
Practical recommendations
So, the film should be fastened, starting from the firstseries. It unwinds, clamped at the corner points around the baguette bar. Then a thermal gun is taken, which heats the space to +60 degrees. Under the influence of high temperature conditions, the film softens and easily stretches onto the finished frame. At the edge of the film is a harpoon. Using a spatula, it moves into the groove of the baguette bar. To begin with, the corner zones should be fixed, then the middle part should be installed. Once the basic installation work is completed, the heating will no longer be required. At the time of completion of the installation of the first row, the second level begins to be mounted. In the gaps, located in the space of the cloth and the wall, an elastic profile is fixed. It will help to mask the visible swings of the walls. A plastic plug is installed at the joints of the film of the tiers. The luminaires are put in place at the moment when the ceiling installation works are completed. As soon as the surface of the ceiling cools down, it stretches, then the cutouts for the lighting fixtures are cut out. To make this work correctly, you need to feel the touch points of each of them under the film, the thermo ring is gently smeared with glue. As soon as it dries, use a knife to make a small opening for the lamp and fix the lamps in the desired position. In this simple way, you can install two-level tension ceilings yourself. To mount a device of a more complex level, you can ask for help from specialists. In general, the process of decorating the ceiling space in this way seems to be quite a difficult task, requiring attention, accuracy, organization and coherence in the work of several people. However, joint actions conducted under a clear plan will help in quick and quality installation. </ ul>


