A special mood for the whole room can be given by lamps that are made by themselves. Such a product fully reflects the individuality of the owner.  Wall lights emit subdued light, creating a quiet and peaceful environment. Modern materials make it possible to use all their diversity in order to be able to (sconces).
Materials for fixtures
The source material from which it is possible can be: 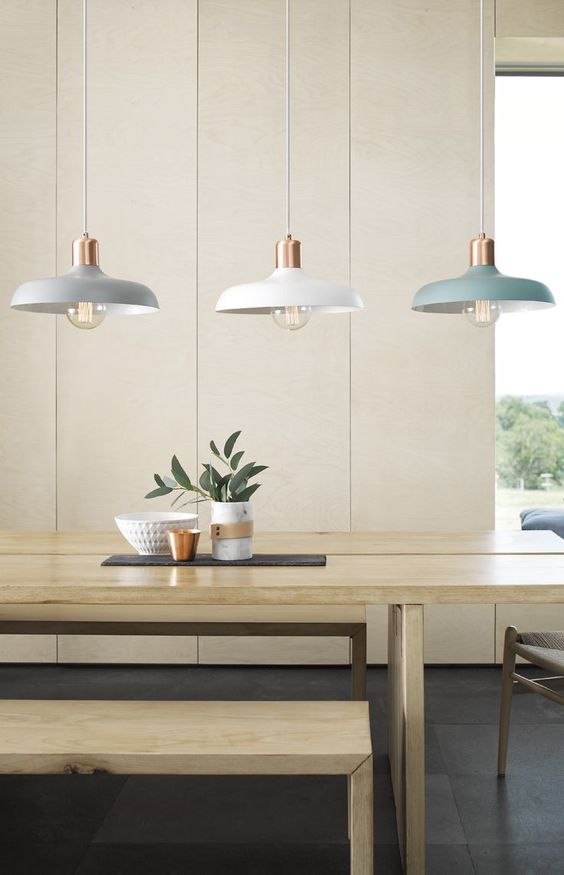 To make a wall lamp you can use different branches.
- Wooden twigs, brushwood, large branches of any size and unusual shape;
- paper of different density and texture (rice, cardboard);
- a wire that can be bent by hand, but it keeps the shape well for a long time;
- Natural material, for example, dried leaves or flowers;
- textiles of any quality and density;
- threads of different thickness and texture (thin and smooth or coarse and thick).
And this is only a small part of the source materials.for creativity. In order to do it, you just need to turn on your imagination, be patient, and then you can get a real masterpiece. In addition, if the interior changes, then the lamps with your own hands can be remade to suit the new motives of the room. It should be borne in mind that if flammable materials are used as a lampshade, for example, fabrics, paper, wood, then the light bulb that will be mounted inside must be energy-efficient. This will prevent the outside materials of the luminaire from overheating and the risk of fire in the room can be avoided. If it is envisaged to use only incandescent lamps, then it is necessary to consider the device of a lampshade made of materials that are resistant to heat and do not deform with prolonged exposure to temperature. 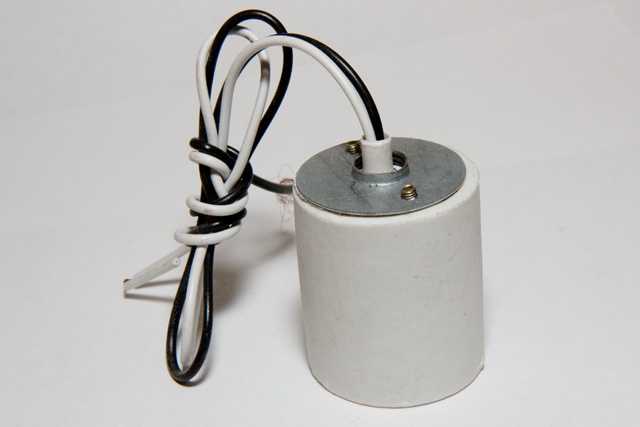 Use the old lamp as the basea lamp chandelier. The basis for the wall lamp can be cartridges from obsolete chandeliers, floor lamps or other lighting fixtures. The only requirement is the integrity of the socle. It depends on it how long the lamp itself will last. The color of the wall lamp can be changed using cans of paint or originally colored materials. Most modern materials are well suited for bonding. But most often, to get a reliable lamp, use a heated gun with glue. It can serve as an additional insulator when twisting the wires, and is also not afraid of the effects of temperature. It is able to glue together materials of various origins, for example, plastic and paper. But if the lamp itself is made only of paper, textiles, that is, from materials for which the use of such glue is not necessary, then PVA is used. It reliably holds the whole structure together. Back to contents</a>
Technology of manufacturing of devices
Wall light can serve as an alternativetop lighting, that is, the need to use the chandelier completely disappears, and it can be dismantled. This will change the configuration of the canvas or its finish. In order to make a wall lamp with your own hands, the following materials and tools are needed:  To create a luminaire you will need: an electric jigsaw, a drill with drills, a screwdriver, a tape measure, a grinding machine.
- electric jigsaw or saw with fine teeth;
- grinding machine or sandpaper with different granularity;
- drill and set of drills to it for wood;
- Screwdriver;
- tape measure and pencil;
- sheet MDF (not very dense) or OSB thickness of 19 mm;
- putty mixture on wood;
- paint or a colored can.
Lamps with their own hands of a similar designbegin with the fact that a rectangle is cut off from the OSB sheet, which will be the base for the luminaire. The geometric dimensions of the front part are preliminarily calculated based on the dimensions of the lamps and the room. For such a lamp most suitable for daylight lamps. They have a good light output with little consumption and heating. To the size of the lamp add 10-20 cm from the end and 5-10 cm with the length of its part. The thickness of the sidewalls is also added, which are made of the same sheet as the main part of the lighting device. Thus, the overall size of the luminaire is obtained. Now it needs to make a few rectangular slits. Their number and width are determined by the requirements of room lighting. If it is necessary that the room was light enough, then saw 2-3 wide slots, then 3 and 5 lamps will be used, respectively. If you do not need a strong light, you can do 1 cut and 2 lights. In this case, it is necessary to take into account the width of the lamps installed in the future. You can cut out the slots with a jigsaw. 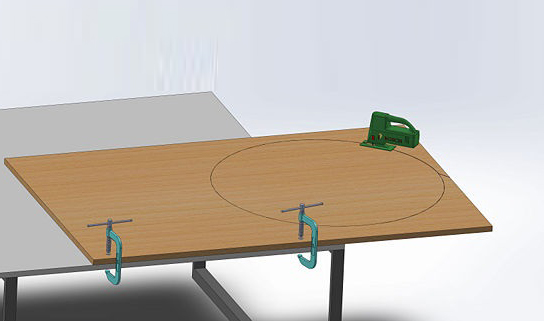 In order to make the base of the lamp,It is necessary to cut out a square or a circle from the MDF sheet. Preliminary make their marking with tape measure and pencil. Further in the corners drill holes, which will serve as a starting point for the cut. After the holes are made, they are ground by a machine or manually by sandpaper. To the rear, lamps are attached and the fixing points are indicated. Then drill holes into which the fasteners will be made. From the OSB sheet, cut out 4 sides for the perimeter of the base and the same for framing each of the slits. The dimensions of the large ones must be such that during installation on the main part of the fixture there are still 5-10 cm along the entire perimeter. But the lateral parts themselves are adjacent to each other without gaps. This will make the design airy. Thus it is necessary to provide from one of the lower sides the distance between the sidewalls of 2-3 cm, in order to extend the wires from the lamps through it. The dimensions of the sidewalls that surround the slits are determined by their dimensions. Before further use, they must be treated with sandpaper or a grinding machine. The sidewalls are applied to the back of the luminaire and fixed using self-tapping screws. In addition, the surface can be treated with glue. After that, the whole frame must be clamped with clamps and wait for the glue to dry completely. Back to contents</a>
Shutdown
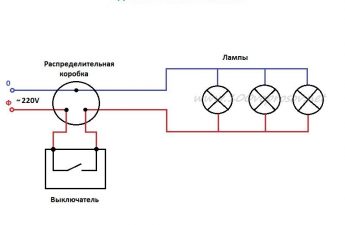
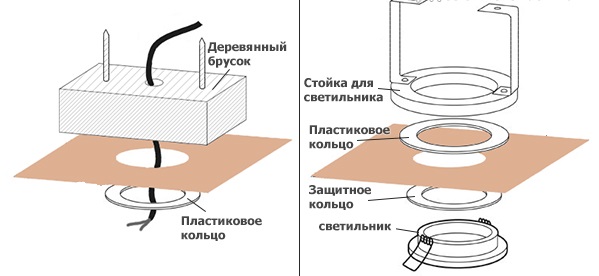 The scheme of installation of a lamp in a fixture. Once the glue has dried, you can proceed to fixing the lamps. They are fixed with screws into the prepared holes. In addition, we must ensure that the wires from them go out in one direction. When the lamps are strengthened, the wires are pulled through the prepared gap between the sidewalls. Then they are twisted and connected via a switch to the outlet. The luminaire is turned over with the front side and with the help of puttying, the hats of self-tapping screws are closed. This must be done throughout the frame. After its solidification, these places are treated with sandpaper. All surfaces are treated with a primer. It will cover with a protective layer, in addition, the paint consumption will decrease significantly. The interior of the lamp can be painted white. This will give additional illumination by reflecting light from the inner surface. After that, the outside of the lamp is painted. To do this, you can use any colored paint or aerosol can. If necessary, apply several layers. To give the surface of the luminaire a glossy shade, you can apply a layer of varnish on top of all layers of the paint after it has dried completely. Wall mounting is carried out on dowels and hooks, which are located on the rear surface of the side parts of the lighting fixture. Such lamps by their own hands can be installed in the corridor, in the kitchen or in the cottage. </ ul>