Bare walls in an apartment or house lookunpresentable, dull, uncomfortable. Modern interior design trends do not provide for the presence of empty walls in a living space. How to decorate a wall with your own hands? First, you need to come up with the main idea of the decor, its mood. It is very easy to become a designer for your home with minimal construction and repair skills and even with their complete absence, the main thing is to show creativity and patience.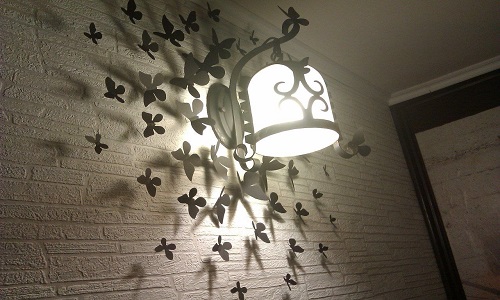 Butterflies should be contrasting with the main color of the walls.
About butterflies, hearts and plates
Decorating walls with butterflies, birds, flowershas been a design trend for several years now. According to experts, this technique is especially relevant in small spaces where a visual expansion of space is required. To make decorative elements that will be used to decorate, you will need: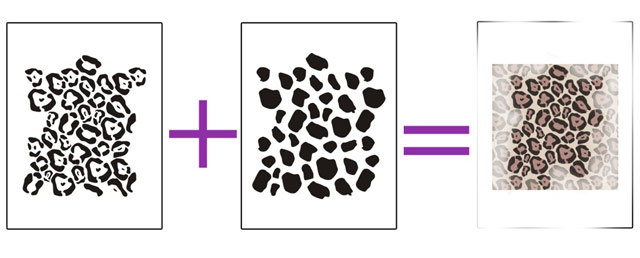 Scheme for using a multi-color stencil.
- cardboard or heavy paper;
- foil;
- colored polyethylene film;
- beads, rhinestones;
- scissors;
- A glue-pencil, a clerical glue or glue "Moment";
- simple pencil.
The outline of the butterfly is drawn with a pencil onto the cardboard.or thick paper. Cut out a stencil, then use it to make butterflies from foil and polyethylene film. Beads or rhinestones are used to decorate the decorative elements. Once the butterflies are ready, they are fixed to the wall with glue. A similar algorithm is used when making birds and flowers. As for the color scheme, there are no uniform canons here. Some designers advise that the butterflies be contrasting with the main color of the walls, others - black or white. Still others recommend that the wall and the elements attached to it be decorated in a single color scheme. If you need to decorate the wall above the bed, decorative scarlet hearts are an all-time classic; they can be made from the same materials using a similar technology. How to add volume to a decorative element if the heart is made of paper? First, make a cut with scissors, gently squeeze the paper a little in the central part, and then glue the halves of the decorative element together. A regular glue stick is quite suitable for this operation. If the operations are carried out using foil, craftsmen usually recommend "Moment".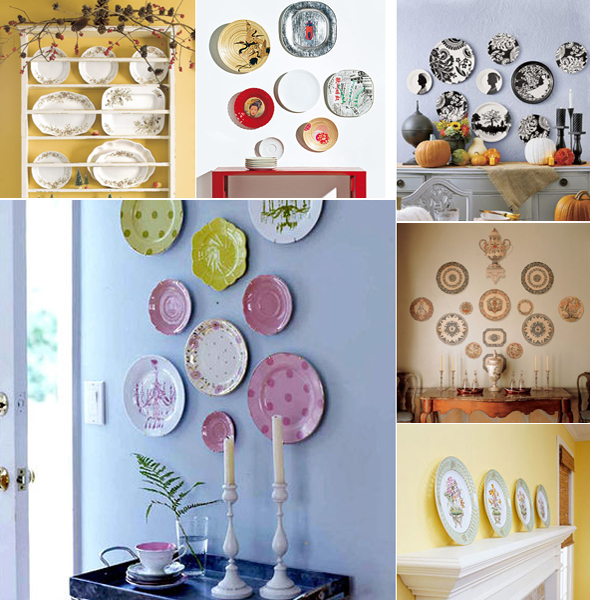 For wall decoration it is recommended to useporcelain, earthenware, plastic plates. How to decorate a wall with plates? Plastic, porcelain, earthenware decorative elements do not go out of fashion in interior design. There is nothing complicated in this operation. For it you will need:
- plates, which plan to decorate the wall;
- liquid Nails;
- simple pencil or chalk.
This technique of decorating walls is consideredclassic. However, before decorating the wall surface with plates, it is better to sketch out a plan of the approximate arrangement of things on paper. Then, using a simple pencil or chalk, mark the places on the wall where the plates will be attached, and then start gluing them. It is important to remember: decorating walls with plates will look good if the decorative items are on the same line. A large plate can become the center of the composition. There is another option: instead of it, place a photograph in a round frame. This will add originality to the classic design solution. Return to contents</a>
About disks and wires
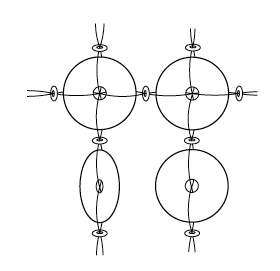 Scheme of weaving disks for wall decoration.Decorative items can perform not only an aesthetic role, but also become functional. Why do we decorate the surface of the walls? Is it only to give them an original look? Quite often, it is necessary to decorate the walls with your own hands in order to hide the imperfections of the surfaces and shift the design accents. For the simplest solution to the problem, you need:
- old CDs;
- postcards;
- liquid nails and glue "Moment";
- paints;
- brushes.
The technology of making decorative elements is veryis simple: before decorating the surface with them, the disks are painted or pasted over with old postcards on the front side. When placing them on the wall surface, the same rule is observed as for plates. Decorating walls with disks will look especially impressive in combination with wall lighting fixtures. But here a nuance must be taken into account: the lamp and disks, with the help of which the wall decoration is carried out with your own hands, must be stylistically combined with each other. One of the difficult issues of modern interior design is masking wires. If there are a lot of them and it is not possible to decorate the walls with clapboard with your own hands, then the wires themselves can be used as a decorative element. It is forbidden to violate fire safety rules, as well as the requirements for the operation of electrical appliances, but no instructions prohibit decorating wires as climbing plants. To make such a wall decoration, you will need:
- colored decorative adhesive tape;
- scissors;
- Ruler;
- chalk or simple pencil.
Using scissors, cut out the adhesive tapefigurines of birds, flowers, leaves - and the wall decoration is ready. Before attaching the wires, the surfaces are marked with a ruler, a simple pencil or chalk. As soon as one element is cut out, the wire is immediately attached to the wall with its help - and the problem is solved. The main thing - before decorating the walls with your own hands, do not forget to calculate the ratio of the length of the wires and the distance to the outlet, so that, carried away by design innovations, you do not leave household appliances without power supply. Return to the table of contents</a>
How to deal with corners?
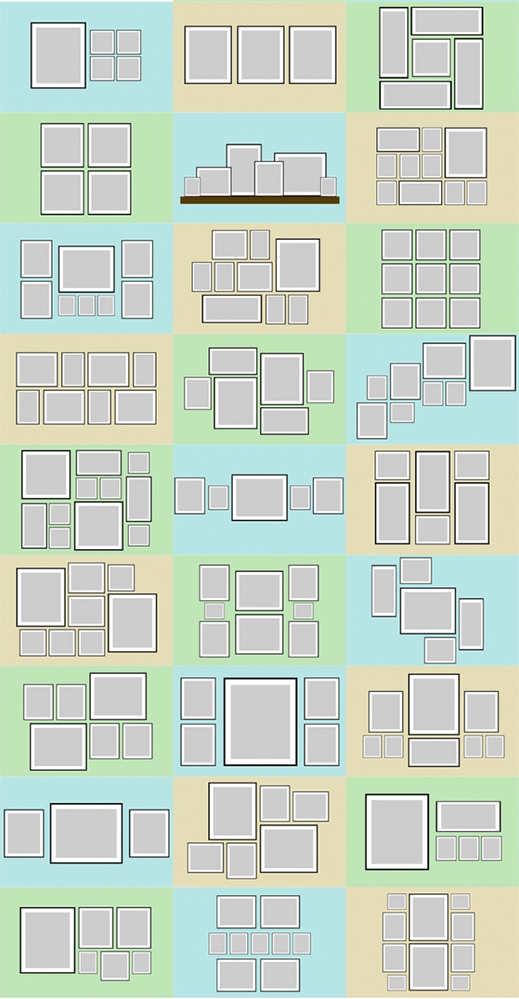 Options for the correct placement of panel elements.Many home and apartment owners who have ever decorated wall surfaces consider corners to be the most difficult area to decorate. Professional designers share this point of view and offer their own solutions. They will help you decorate the wall surface in an original way with your own hands:
- angular photographs;
- baguettes;
- tile;
- decorative rock;
- wooden shelves.
The listed decorative elements can be combinedwith each other or use separately. In order for even the most ordinary photographs to decorate the corner, you will need to place them in an unusual way on this section of the walls. It is better to choose frames that are the same in color and texture, but different in size. A stylish design solution is considered when frames with photographs placed next to each other form a pyramid or a rhombus. To attach frames to the surface of the walls with your own hands, use liquid nails, and for marking you will need a ruler, chalk or a simple pencil. Return to the table of contents</a>
About photos, mirrors and murals
Decorating your wall with your own hands usingphotos - a creative process, but here too there are several rules that will help to avoid common mistakes. Black and white and color photos rarely look harmonious together, so it makes sense to place them on different walls. If you decide to place them next to each other, you will need to painstakingly select frames. Modern interior design suggests choosing white frames for such cases, which are made of natural wood or materials imitating its surface, glass. Mirrors - a necessary piece of furniture. In the room, you can decorate the walls with your own hands and with the help of mirrors. A very important point here is also the selection of frames. You can also place embroidered pictures next to the mirrors. If there are multi-colored remnants of wallpaper and a little glue left after the renovation, you can use them to make a composition for the walls with your own hands. In the central part of it, place a mirror attached to the wall with liquid nails. And one more important nuance: having decided to decorate the walls with your own hands using mirrors, you need to correctly calculate the required number of mirror surfaces. It should be clarified right away: such a design solution is absolutely not suitable for a child's room, and for a bedroom, living room, hallway, it is necessary to provide one large mirror in it. The most fashionable element of decor is considered to be wall painting, a suitable pattern can be selected for any interior style, it will not be difficult to replace the image at any time. It is easy to do the painting if you buy special stencils. In addition to them, to complete the work you will need:
- putty;
- plaster;
- primer;
- acrylic paints;
- varnish;
- putty knife;
- roller;
- brushes;
- spray;
- simple pencil.
First of all, the walls are put in order.The old plaster is removed from them. The surfaces are puttied, primed and plastered again. Then, using a simple pencil, markings are made on the dried surface and then the image is applied with acrylic paints. In order for the painting to last as long as possible, after drying, the wall is varnished using soft brushes or a sprayer.</ ul>
