Modern building materials allow those who do not haveextensive experience in finishing works to help people independently create high-quality interiors in their homes. The so-called self-leveling floor has made life much easier for amateur craftsmen, using which many apartment owners have solved the problem of an absolutely flat horizontal surface in their rooms. Filling the floor with new self-leveling materials is much less labor-intensive than its traditional installation, which is why more and more developers are giving preference to it. Scheme of self-leveling floor installation.
Advantages of bulk floor
The choice of self-leveling floor for finishing is justified by a number of its advantages over other materials. Self-leveling floor:
- Long-lived;
- is durable;
- resistant to extreme temperature changes;
- moisture resistant;
- has excellent characteristics for resistance to chemical attack;
- fireproof;
- is environmentally friendly.
Due to the combination of the listed properties,This type of flooring looks brand new for many years. It does not require careful maintenance. It does not develop mold. In addition, the self-leveling version can be used as a finishing coat for underfloor heating, which makes it the main competitor to tiled flooring, which requires much more experience to work with. Return to contents</a>
Types of self-leveling floors
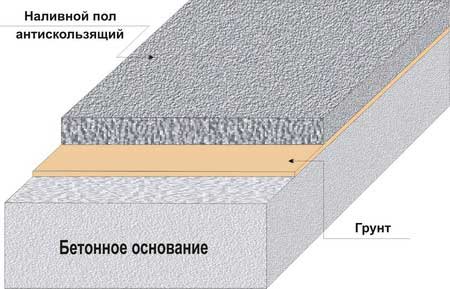 Liquid anti-slip floor diagram.There are 2 types of such material - polymer and mineral. The first are divided into epoxy and epoxy urethane. Both are made of epoxy resins, but epoxy urethane coatings are used to finish surfaces exposed to high mechanical loads, and epoxy ones are used in rooms with high humidity. The second type of self-leveling floors are mineral. The main components of this material are mineral fillers, modifiers and cement. High-quality mineral-based mixtures provide high plasticity of the building material during its pouring, rapid hardening of the layer and a long service life. Mineral mixtures have self-leveling properties and spread well over the treated surface. However, these characteristics do not relieve the builder from the obligation to evenly distribute the prepared composition over the base. Mineral materials are often used to level the surface before finishing it with other coatings. Self-leveling floors on a mineral base are most often used when installing floors in a home with your own hands.
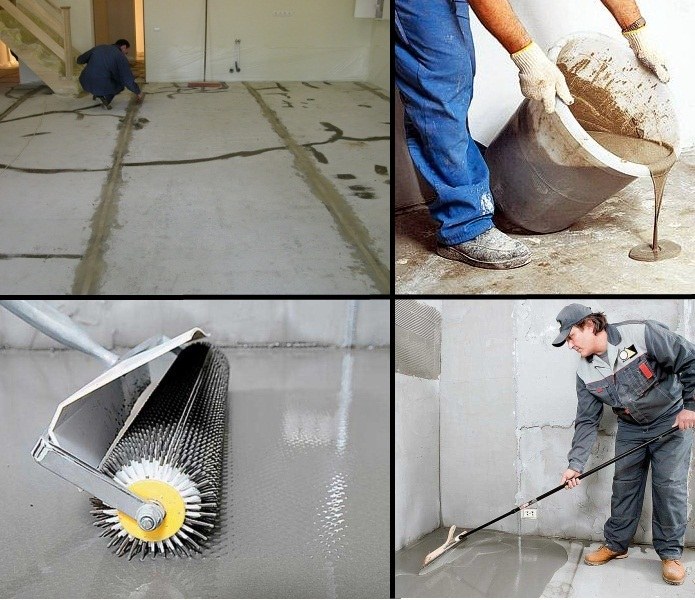 Stages of floor pouring.They are used for pouring foundations with various surface conditions. In order to work with the poured coating more efficiently, mineral mixtures were divided into 3 groups.
Taking into account the condition of the base in the living space and the conditions of further use of the floor, you can choose the most suitable material in the store to meet the requirements. Return to contents</a>
Preparatory work
Perhaps the most important stage in any work ispreparatory. The final result depends on how well it is done. To prepare the floor for pouring the floor, it is necessary: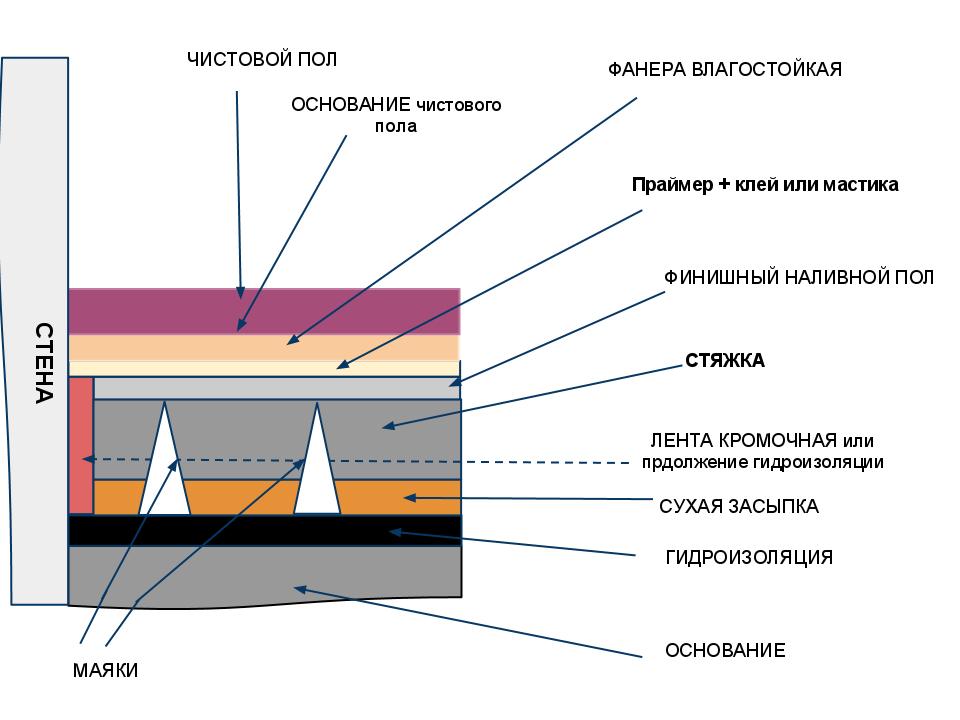 Installation of floor screed.
- to release him from the old screed;
- collect all garbage, remnants of solution and dust;
- to save him from any kind of oily stains;
- do a wet cleaning of the substrate;
- to fill cracks with a solution;
- align them with cavities.
There is a high probability that you will have to make a new one.screed, because the smoother the base, the easier it is to finish it later. It is better if a polyethylene film is laid underneath. To lay a new screed, you need to install beacon profiles. This is done like this:
After the plaster has hardened, the solution is poured in andis aligned along the beacons with a rule, the length of which should be 10-20 cm longer than the gap between the profiles. Now you will have to wait for the solution to set in order to continue the process of pouring the self-leveling floor. It is worth noting right away that the screed will be completely ready for further work in 4 weeks. During this time, it must be repeatedly moistened with water and ensure uniform hardening under the polyethylene film. Return to the table of contents</a>
Filling of filling floor
After the base has completely dried, you canproceed to the process of pouring the finishing coating. But before this, the screed must be treated with a primer, which will seal the microcracks and create a layer with high adhesion characteristics on the surface. A damper tape is laid along the walls and at doorways. After the pouring work is completed, it can be removed, because the resulting gap will compensate for thermal expansion. Looking ahead, it should be added that the space freed up after laying should be sealed with an elastic sealant.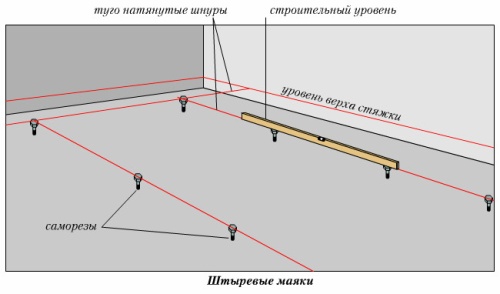 Installation of pin beacons.It is necessary to ensure the optimum temperature for pouring floors (15-25°C) in the room and the absence of drafts that will prevent the mixture from hardening evenly. Now you can start preparing it. The quality of the floor is affected by the correct dilution. The mixture should not be too liquid. This may cause the coating to crack. An insufficiently diluted solution will not spread properly. The mixture should not be prepared earlier than ½ hour before leveling it on the base. During this time, it is advisable to pour and level the floor in the entire room. If you do not have time to do this, ensure that the following mixes match the 1st in density. The layer should be ½ cm thick. If there is a need to make a thicker coating, this can be achieved by pouring several layers. Work begins from the wall of the room farthest from the entrance. The solution is leveled with a spatula or squeegee. The final removal of bubbles from the coating is done with a needle roller. It also additionally levels the surface. After 2-3 hours the coating will dry, but it will harden completely only after 3 days. It is already possible to pour the thinnest finishing layer on it, which after drying is covered with varnish.</ ul>


